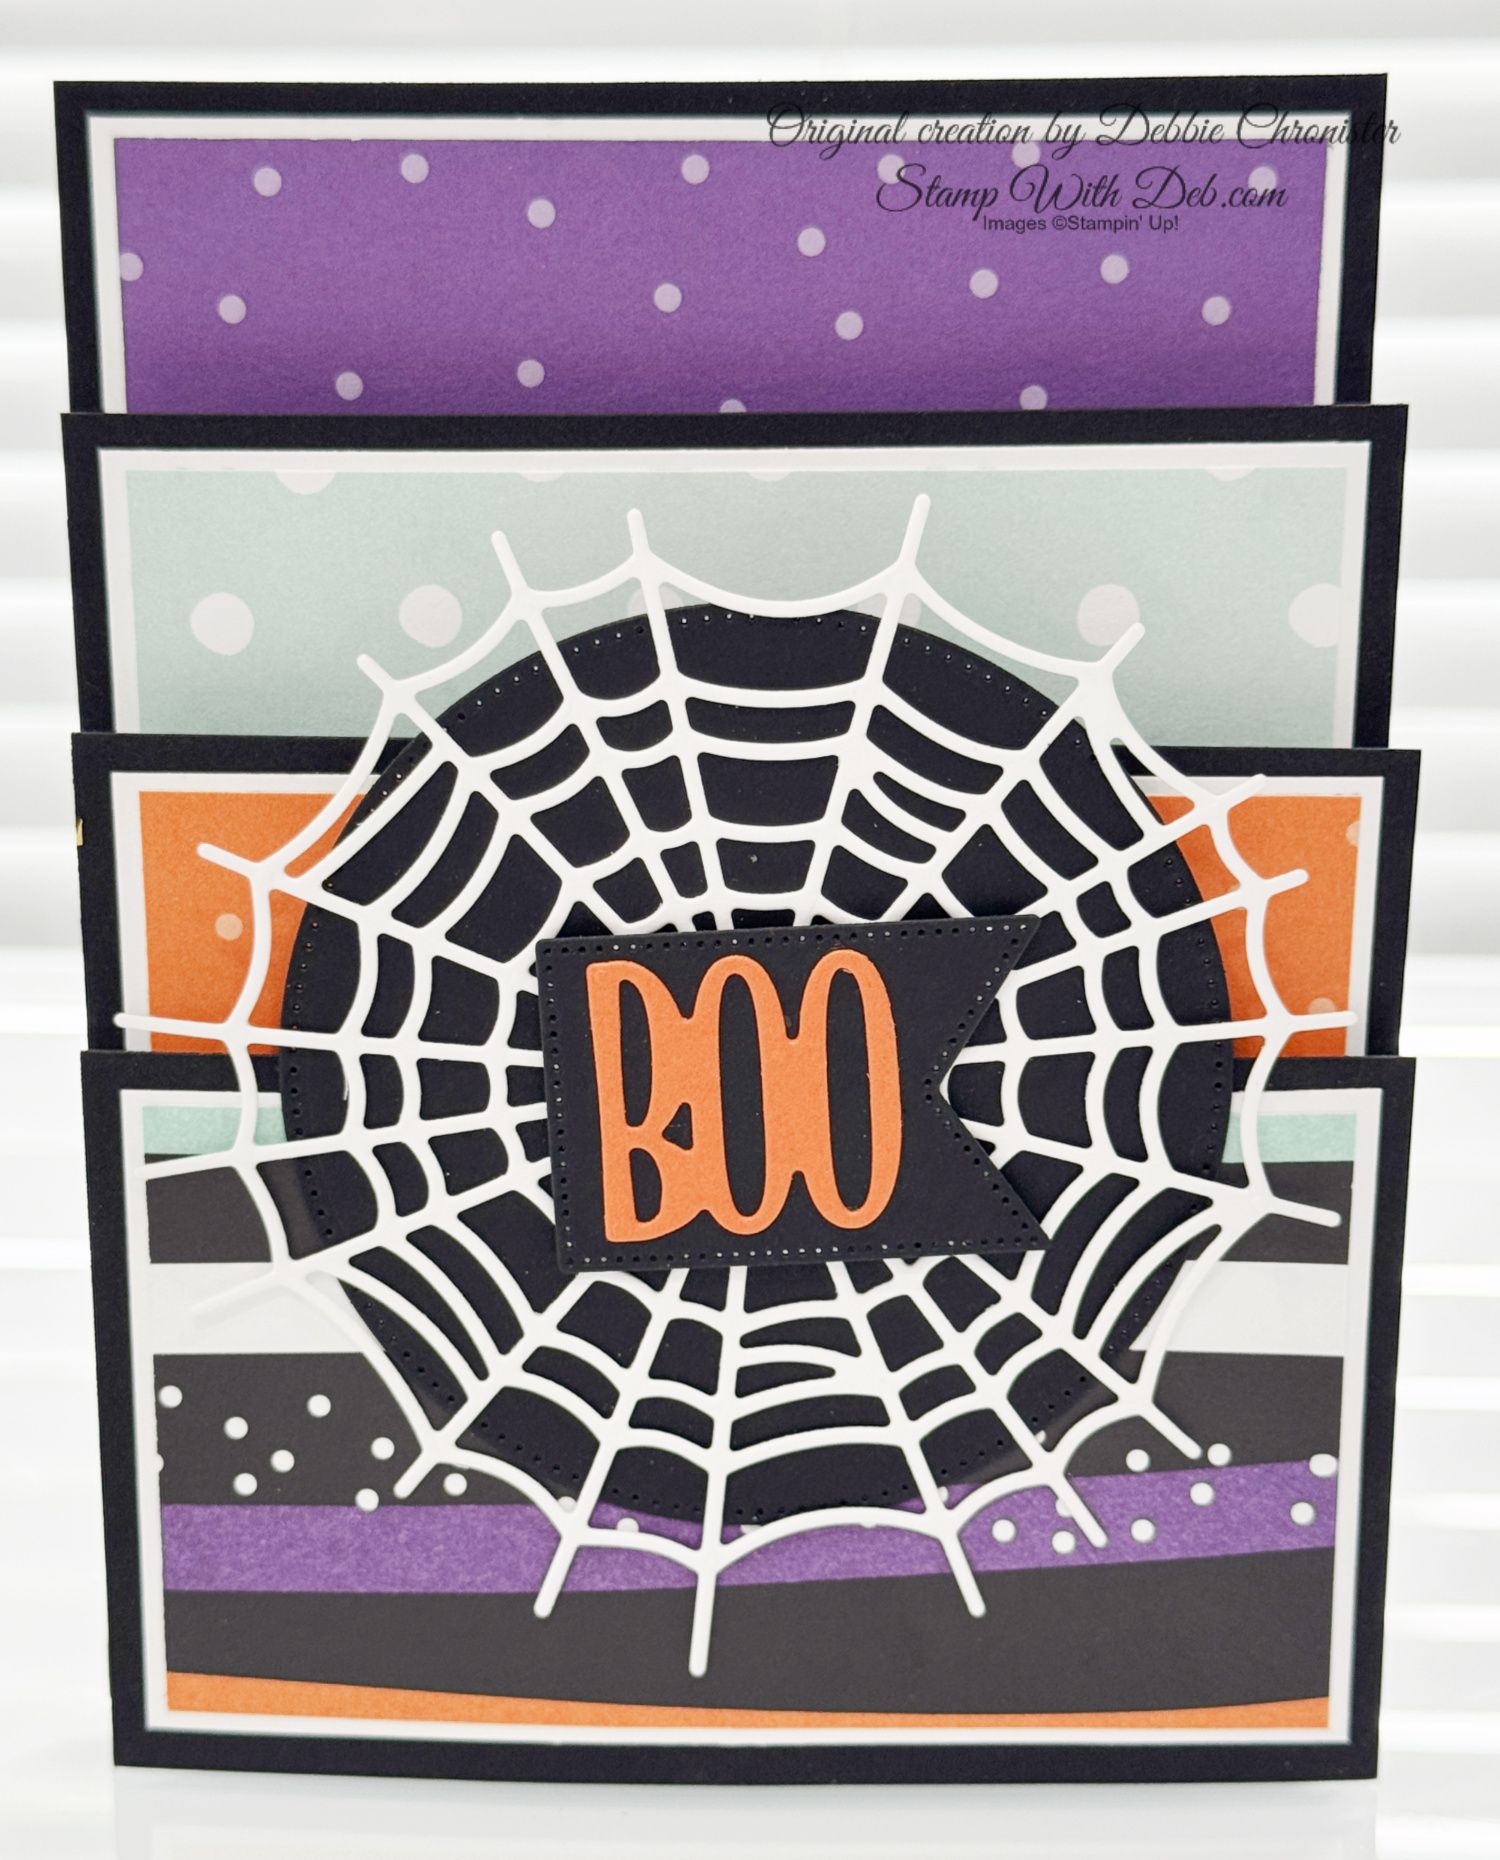
BUTTERFLY BRILLIANCE POP UP

February 16, 2021

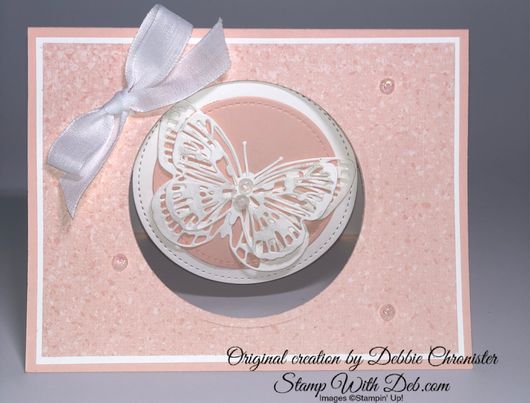
This is a brand NEW set that Stampin' Up! will introduce in March to all our customers. It has some amazing dies that cut out both the images and a layer to accent the images. In this blog post I will introduce you to a different stamp set and a unique card layout. I hope you enjoy the post.


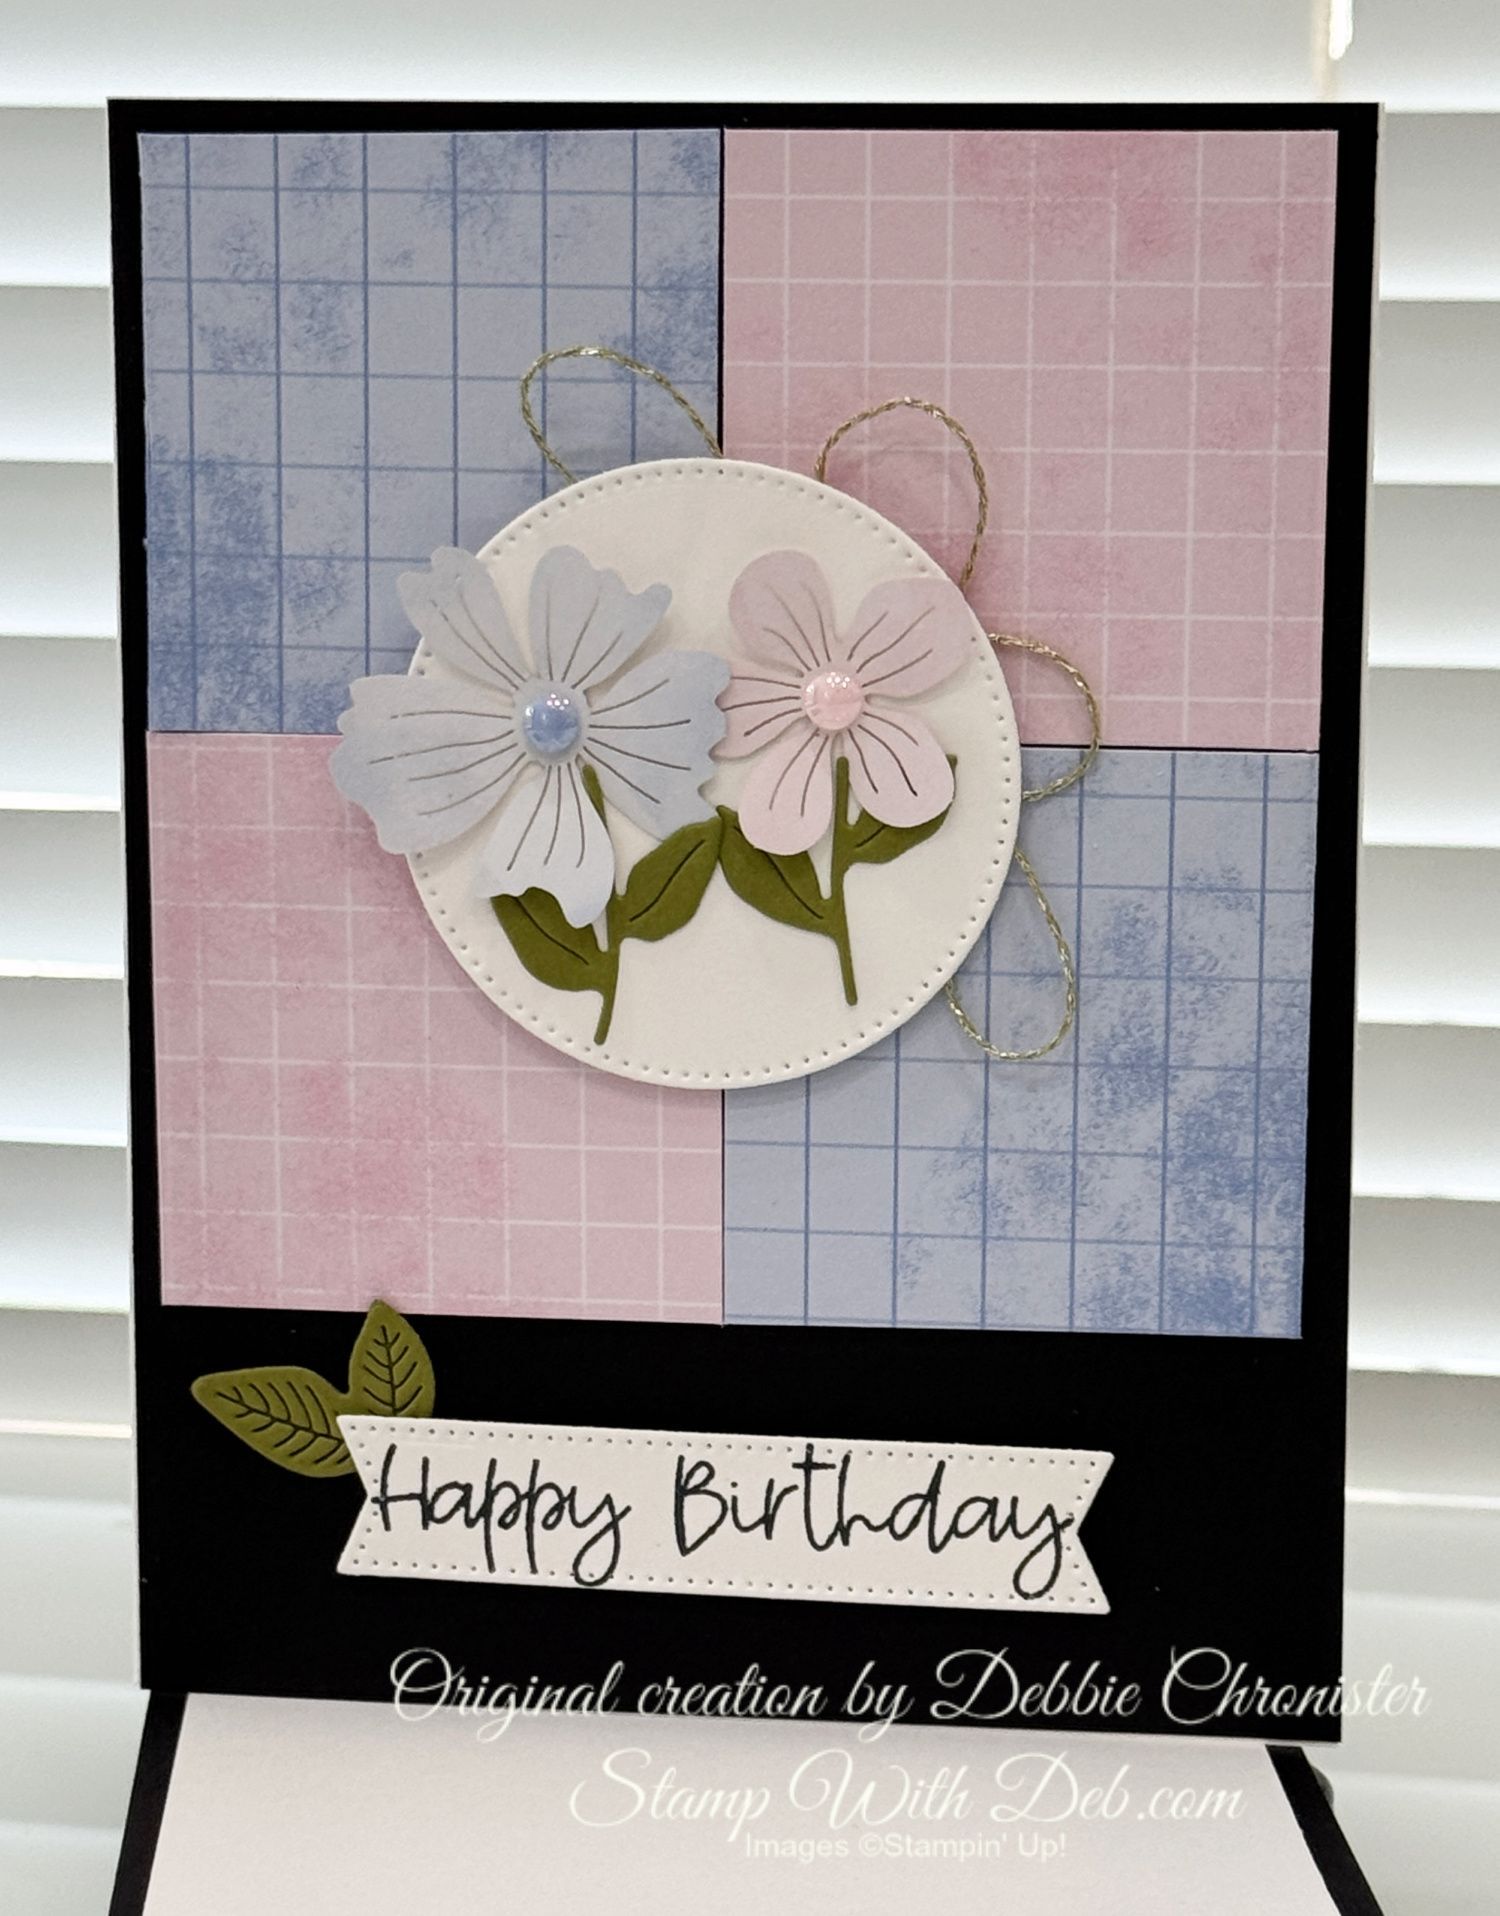
Cut 5 1/2 x 8 1/2 Gray Granite, score @ 4 1/4

Cut 5 1/4 x 4  Basic White, cut the largest circle you can in the center of this. You want the circle to be at least 3 1/2", attach to Gray Granite

Cut 5 1/8 x 3 7/8 Designer Series Paper, adhere to Basic White, placing adhesive on outer edges only

Cut 3 1/8" x 5 1/4" Designer Series Paper, attach to inside top portion of the card base, placing adhesive only on the two upper corners

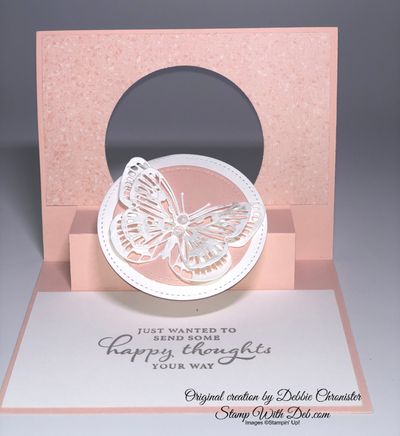
Cut the circle in the front using the largest circle in the Stitched Shapes Dies, remove the patterned paper from both sides of the circle, cut with the next smaller circle in the Stitched Shapes Dies

Cut Basic White Circle using the largest circle from Stitched Shapes Dies

Cut a 4" x 5" Gray Granite, on 5" side, score at 2", 3", and 4", on 4 inch side, at 1/2" cut to the 1" (1st score line), move to 3 1/2" cut to the first score line, cut along the score line between the two cut lines, keep this piece, score @ 1 1/2

Accordion fold the 4" x 5" scored piece along the score lines, and then adhere the 3/4" x 2 1/2" piece to the center of the top one inch fold


Adhere the 2 inch base of the folded piece of cardstock to the bottom, inside base of the card, placing the first fold line 1 inch from the center fold of the card base

Fold the accordion piece of cardstock so that it is flat on the inside base of the card. Place adhesive onto the top of the 1/2" x 1" edge flaps, pull up the DSP and close the card on top of these flaps

Glue down the DSP on the inside to cover the mechanism

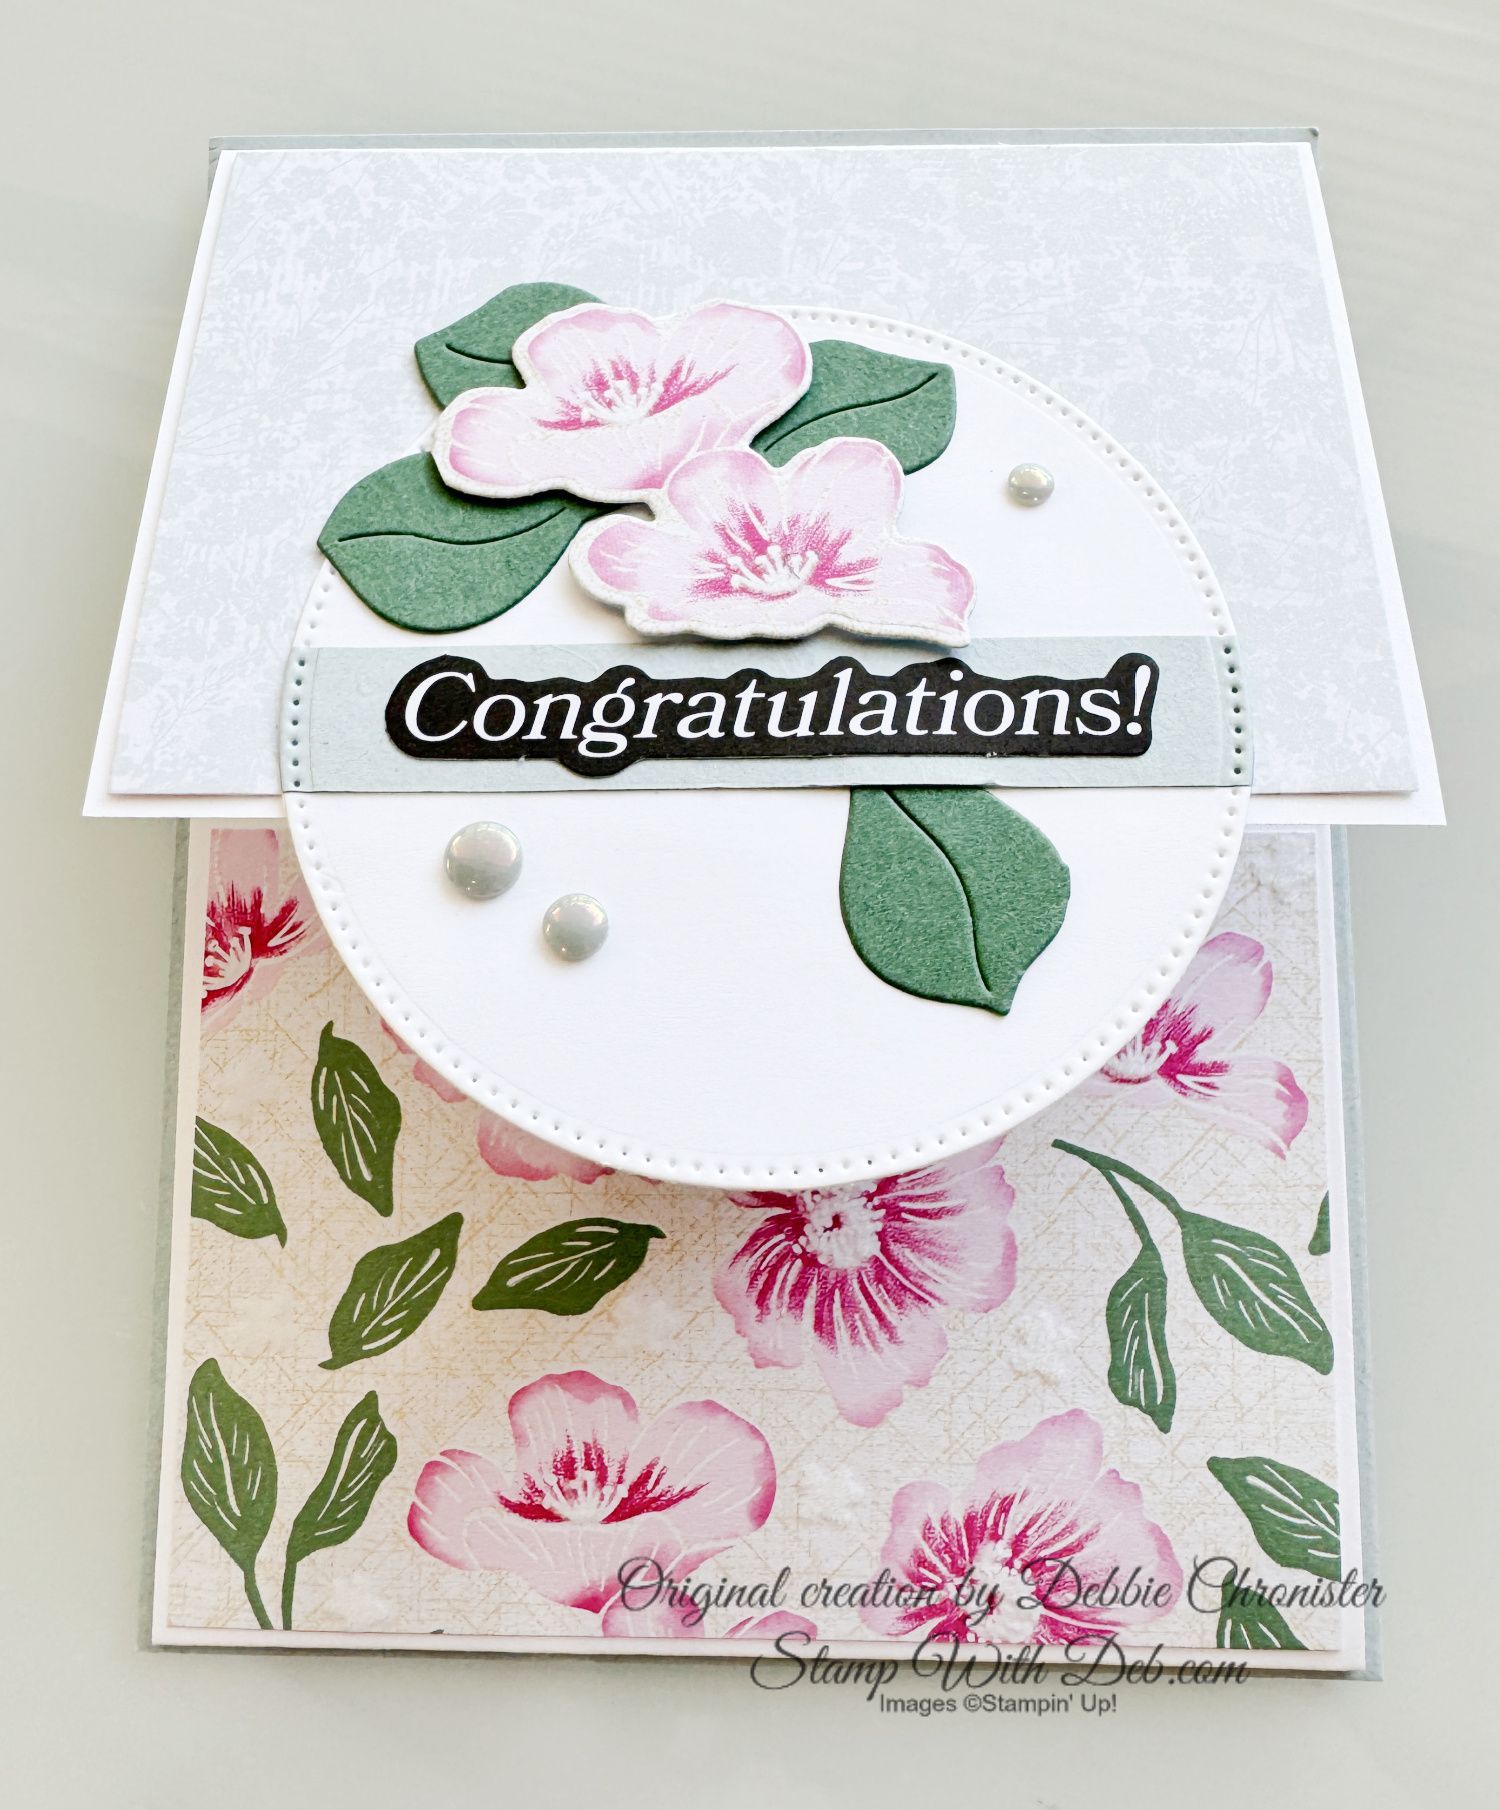
With the card in the closed position, fold the center tab along the score line, and place adhesive onto the top of the tab

Adhere the Basic White circle onto the tab, lining it up with the hole on the front of the card

Cut out the butterflies from Butterfly Brilliance Bundle

Cut 3 x 5 1/4 Basic White and attach to the bottom inside of the card to cover the mechanism, stamp greeting


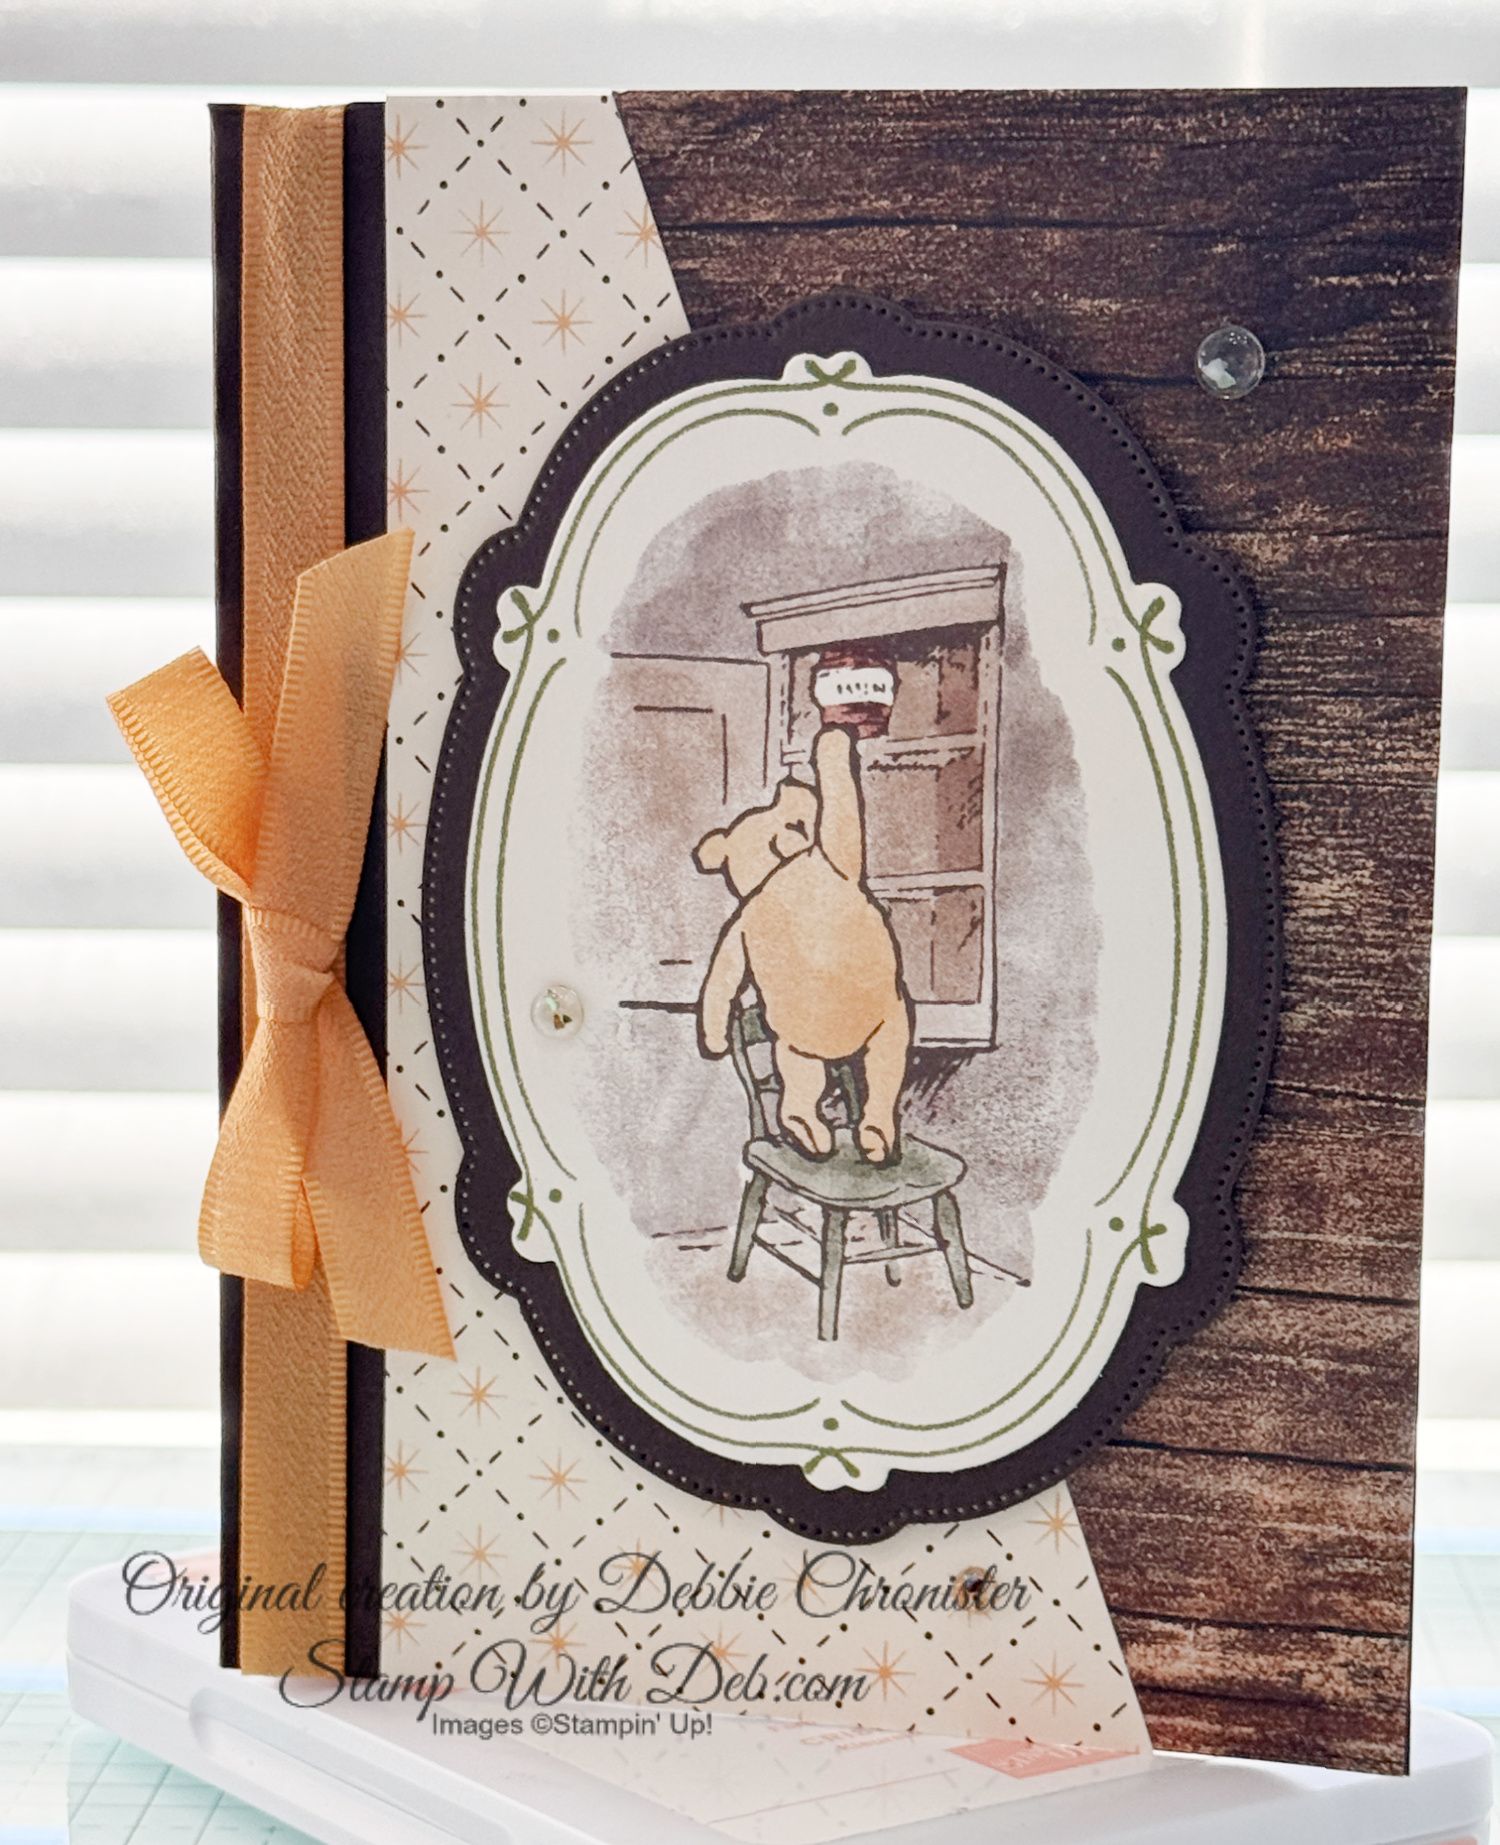
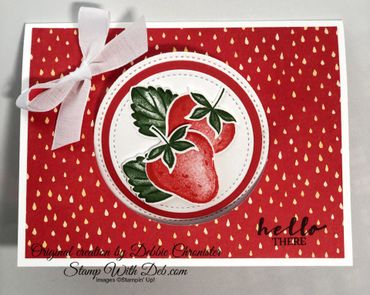
Here is another sample, made with the Sweet Strawberry Bundle


Still confused? Watch the video below


To purchase the Starter Kit and join my team

Check out the NEW 2020-21 ANNUAL CATALOG

January - June 2021 Mini is fabulous!

Sale-A-Bration is HERE! Don’t miss the deals!
Subscribe to my
My YouTube paper crafting video channel
Follow me on
Pinterest

Follow me on Facebook
Shop my
Online Store with February's Host Code UAZTRNAM

Are you about to hit that $99 mark on your order (before shipping and tax)? If so, why not consider joining my team? As a member, you’ll enjoy $125 worth of products of your choice for only $99! Plus, you’ll snag a fantastic 20% discount on all your future purchases and a variety of exclusive perks from me and Stampin' Up! Dive into this exciting journey of paper crafting with us! For more information, check out my Join My Team page


We now have 3 catalogs each year, January - April, May - August, September - December.  We no longer have an annual catalog.  You will find all of the products in the catalogs online as well as Last Chance and Online Exclusive Products. If you want to check out the May - August Catalog click on that catalog below. If you want a paper copy, please contact me to get yours!

Check out:

Online Exclusives
May - August Catalog Contact me to get yours!

Subscribe to my My YouTube paper crafting video channel
Follow me on 
Pinterest

Follow me on Facebook every week for Stampin' Tell Tuesday
Shop my 
Online Store


916-420-0562

Email Me

By Debbie Chronister June 3, 2026
This adorable Double Z Fold card features the charming Safari Smiles Bundle and is full of fun details and dimension. To create the ground scene, I incorporated the tree image from the Twisted In Time Bundle, adding the perfect touch of whimsy to the design. The soft cloudy sky was created using a homemade cloud template made from a retired Cloud Punch and lightly blended with Cloud Cover ink using a Blending Brush. The sweet elephants were colored with the Light Smokey Slate Stampin' Blend, giving them a soft and realistic appearance. Cloud Cover cardstock was the perfect choice for the card base, tying all the elements together beautifully. Be sure to download the FREE Project Sheet below for complete measurements, supplies, and step-by-step instructions to create this fun fold card yourself!
By Debbie Chronister May 31, 2026
It's time to start the 2027 Calendar! The first six months are ready! This is the first of a two part class, just to ease the stress of doing multiple calendars. This fee covers both classes. The second session will be October 1. If you live locally you can attend one of the classes I offer. One is in Lincoln, CA the other at my Studio in Citrus Heights. Please clear your calendar so you will have enough time to complete the pages. If you will be here during lunch please plan accordingly and bring a light lunch. If you do not live locally, you can purchase a kit to create the calendar. Please add shipping to your registration and if the amount is different, I will invoice to cover the difference.
By Debbie Chronister May 27, 2026
I created this fun and interactive Z Double fold card using the beautiful Balloon Festoon Bundle paired with soft Pool Party cardstock and the lovely Beautiful Ordinary Life Designer Series Paper for a fresh and cheerful look. The Z fold design adds movement and dimension, making the card extra special when displayed. I loved combining the festive balloon images with the soft patterns from the designer paper to create a playful celebration theme with lots of layered detail. The Pool Party color palette gave the project a light, airy feel while allowing the balloons, patterned paper, and embellishments to really stand out. This card was such a fun way to showcase both the unique fold and the versatility of the bundle and designer series paper together. The entire PDF Instructions for 18 alternate cards using the Pretty Party kit is available for purchase in my store along with other Tutorials & Kits.
By Debbie Chronister May 27, 2026
I had so much fun creating this cheerful card using the newly released Stampin' Up! Pretty Party Kit from May along with the beautiful Balloon Festoon Bundle . The soft colors and playful patterns from the kit paired perfectly with the festive balloon images and dies, making this card feel bright and full of celebration. I layered the elements to add dimension and finished it off with a few special embellishments for extra sparkle and texture. This combination made it easy to create a fun, happy card that would be perfect for birthdays, celebrations, or simply sending a little joy to someone special.  This kit is beautiful as it is but if you like a challenge and to do different things with the kits, you can purchase the tutorial for all 18 alternate cards on in my store.
By Debbie Chronister May 13, 2026
This elegant pop up Z fold card combines the timeless beauty of Basic White with soft layers of Crisp Cantaloupe for a fresh and inviting design. Many of our favorite card layouts begin with some form of a Z fold, and this fun interactive style is always a showstopper. I used the beautiful Fragrant Layers Bundle from Stampin' Up! along with the gorgeous Bloom Boutique Designer Series Paper to create soft floral layers and elegant detail throughout the card. The flowers were accented with the sparkling 2026–2028 In Color Dots for the centers, while the adorable 2026–2028 In Color Butterflies add the perfect finishing touch. A delicate bow tied with Crisp Cantaloupe Bordered Ribbon completes this charming project with just the right amount of texture and sweetness.
By Debbie Chronister May 6, 2026
I created this card using one of the more challenging patterns from the Valley In Bloom Designer Series Paper, and I love how it pushed me to think a little more creatively with my design. The detailed background really makes a statement, so I paired it with a simple, elegant greeting from the Scalloped Blooms stamp set to keep the focus balanced. To add a bit of texture and shine, I included Dew Drops embellishments, which catch the light beautifully. The finishing touch is a Mossy Meadow and gold bow, bringing in a rich, coordinated look that ties everything together perfectly while adding just the right amount of sophistication.
Show More