DECORATED WITH HAPPINESS FUN FOLD CARD
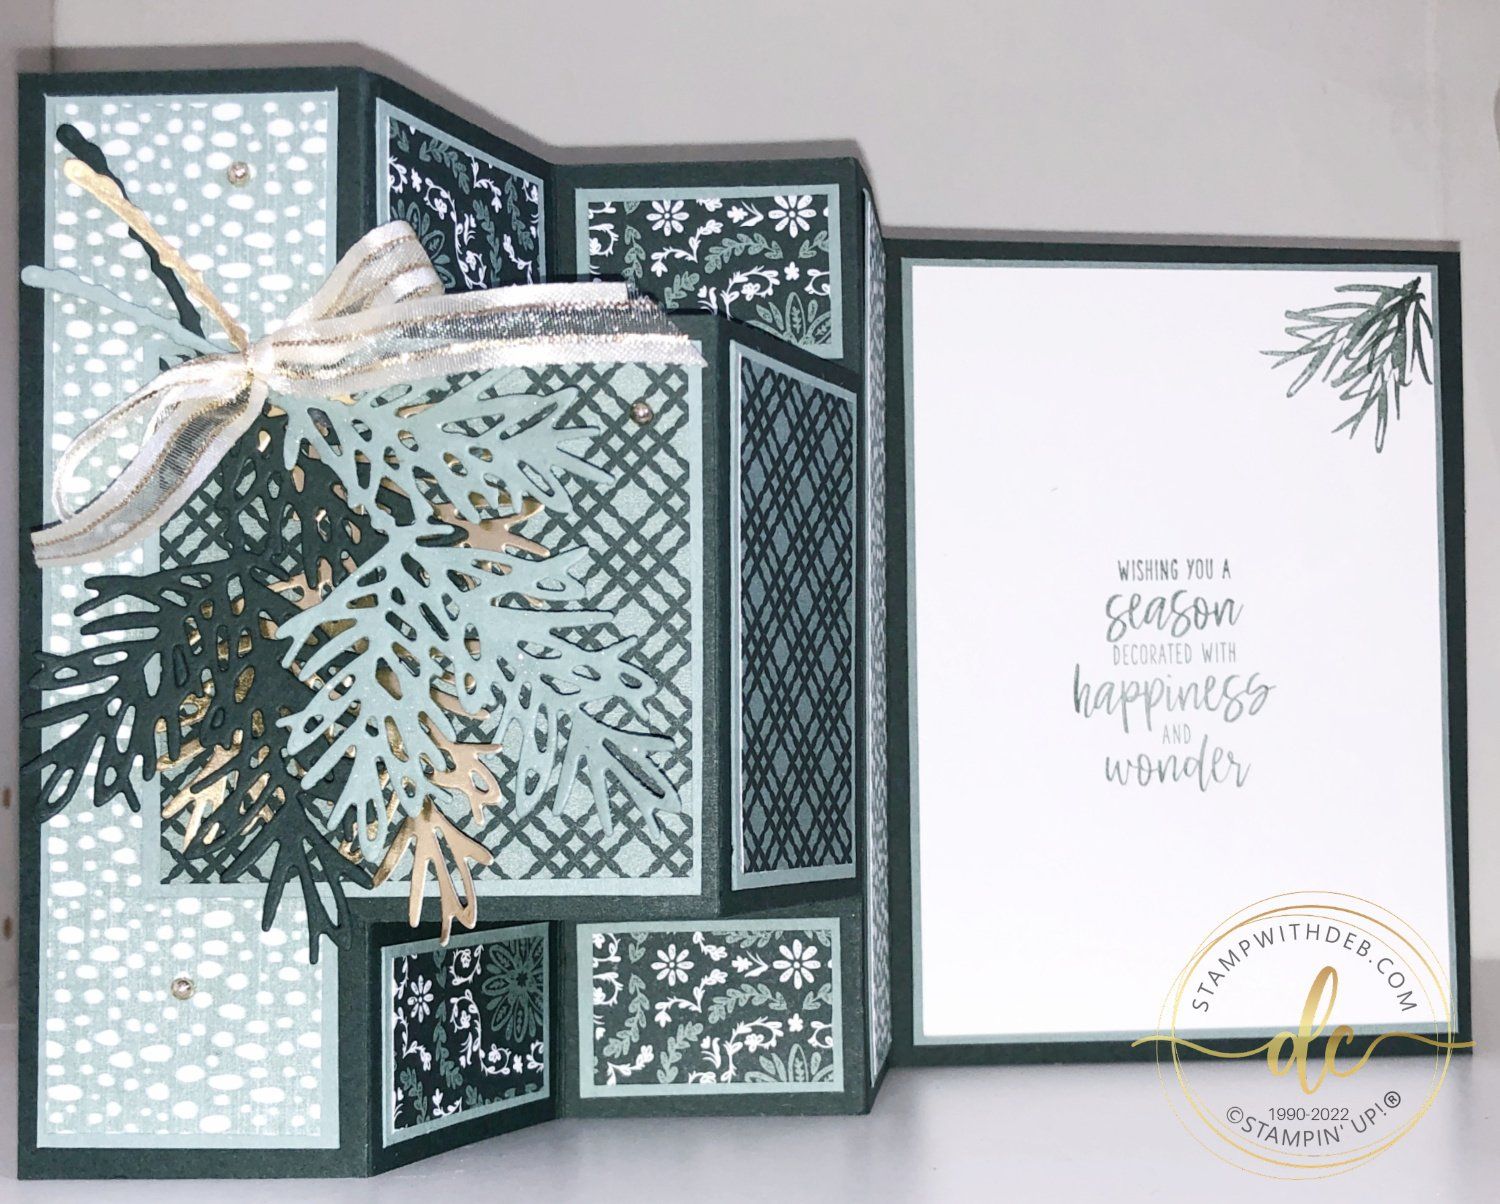
I love the style of the card and for how amazing it looks, it is relatively easy. Just a few strategically placed cuts and you have an easy fun fold card. I will apologize for the video as it has sound issues once again. I haven't been able to solve those.
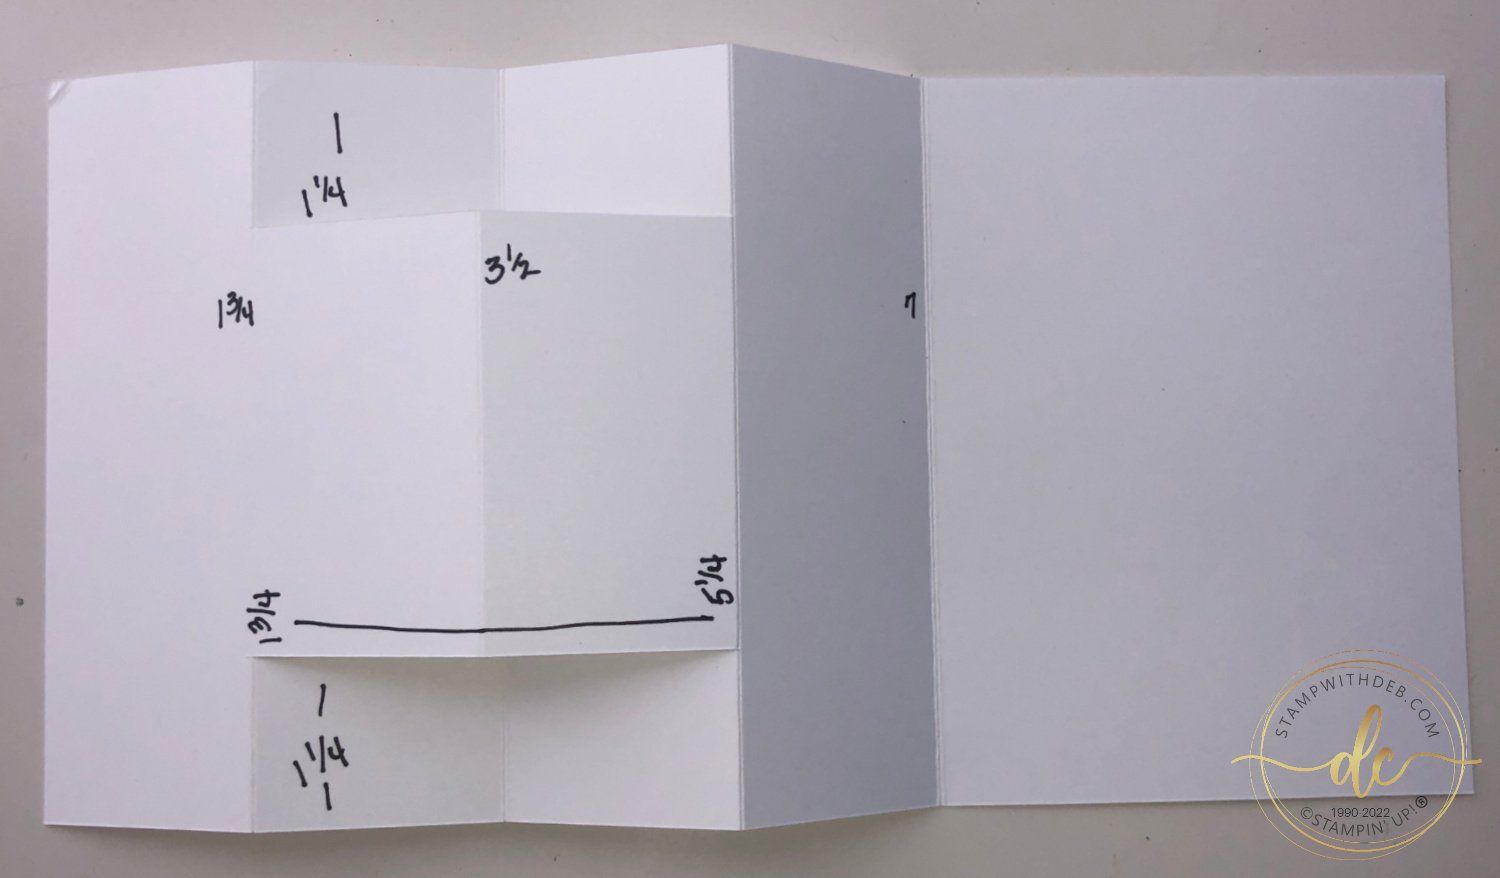
Measurements:
CARD BASE:
Cut 5 1/2 x 11 Evening Evergreen, with 5 1/2" side at the top of the paper trimmer, line up the edge of your paper with the 1 1/4" mark, cut from 1 3/4 to 5 1/4, turn the paper over, yes over, line up the other edge with the 1 1/4" mark and cut from 1 3/4 to 5 1/4, that is your strategic cut, the rest is scoring and decoration! With the 11" side at the top score at 1 3/4 ONLY THE TOP AND BOTTOM SECTIONS! If you do the center it's not the end of the world. We will be putting a piece of card stock over it and that will reinforce it, move to the 3 1/2" line and score all the way down, move to the 5 1/4" line, score all the way down, move to 7" line and score all the way down. All done with the card base!
INSIDE: These directions go from right to left
Right Panel:
Cut 5 1/4 x 3 3/4 Soft Succulent, adhere to inside of card
Cut 5 1/8 x 3 5/8 Basic White, stamp leaf and greeting, adhere to Soft Succulent
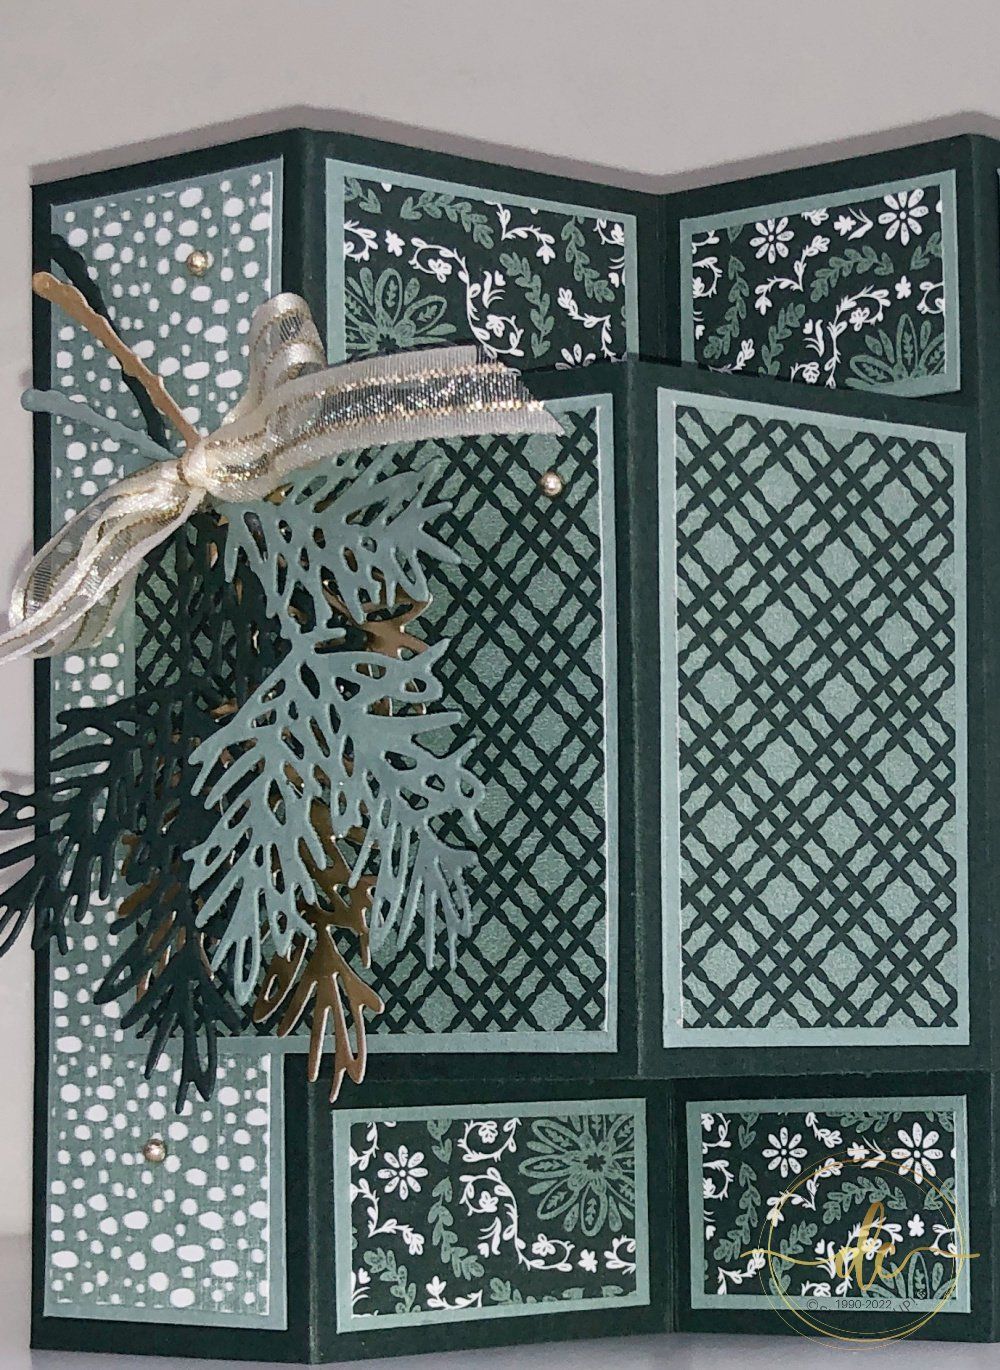
Panels #2 & 5
Cut 5 1/4 x 1 1/2 Soft Succulent, adhere to panel
Cut 5 1/8 x 1 3/8 Lovely Linen Designer Series Paper, adhere to Soft Succulent
Panel #3 & 4: Top & Bottom
Cut (4) 1 1/2 x 1 Soft Succulent, adhere to top & bottom of panels 3 & 4
Cut (4) 1 3/8 x 7/8 Lovely Linen Designer Series Paper, adhere to Soft Succulent
Panel #3 Middle
Cut 1 1/2 x 2 3/4 Soft Succulent, adhere to middle section of panel #3
Cut 1 3/8 x 2 5/8 Lovely Linen DSP, adhere to Soft Succulent
Panel #4 Middle
Cut 2 3/4 x 2 3/4 Soft Succulent, adhere to middle section of panel #4, it will overlap panel #5 so be sure you have done that one first.
Cut 2 5/8 x 2 5/8 Lovely Linen DSP, adhere to Soft Succulent
FRONT:
Cut 3 branches using the Decorated Pine Dies, one in Evening Evergreen, one Gold, one Soft Succulent, attach to the front panel
Tie a bow with Gold & Vanilla Satin Edge Ribbon, attach with glue dot
Add the Gold Bling from Festive Backed Red & Green Pearls
Are you about to hit that $99 mark on your order (before shipping and tax)? If so, why not consider joining my team? As a member, you’ll enjoy $125 worth of products of your choice for only $99! Plus, you’ll snag a fantastic 20% discount on all your future purchases and a variety of exclusive perks from me and Stampin' Up! Dive into this exciting journey of paper crafting with us! For more information, check out my Join My Team page
We now have 3 catalogs each year, January - April, May - August, September - December. We no longer have an annual catalog. You will find all of the products in the catalogs online as well as Last Chance and Online Exclusive Products. If you want to check out the May - August Catalog click on that catalog below. If you want a paper copy, please contact me to get yours!
Check out:
Online Exclusives
May - August Catalog - Contact me to get yours!
Subscribe to my My YouTube paper crafting video channel
Follow me on Pinterest
Follow me on Facebook every week for Stampin' Tell Tuesday
Shop my Online Store