Never Ending Card - Season of Green & Gold
Club Members this is the post for the Never Ending Card
Please watch the video to create the card base. This card is made using Very Vanilla, Old Olive Gold & Greenery Suite from Stampin' Up!
Click the link below to receive the Free Project Sheet
Card Base - 6 x 6 Very Vanilla (2), scored at 1 1/2 & 4 1/2 on each, cut across the score line at 3" on each panel
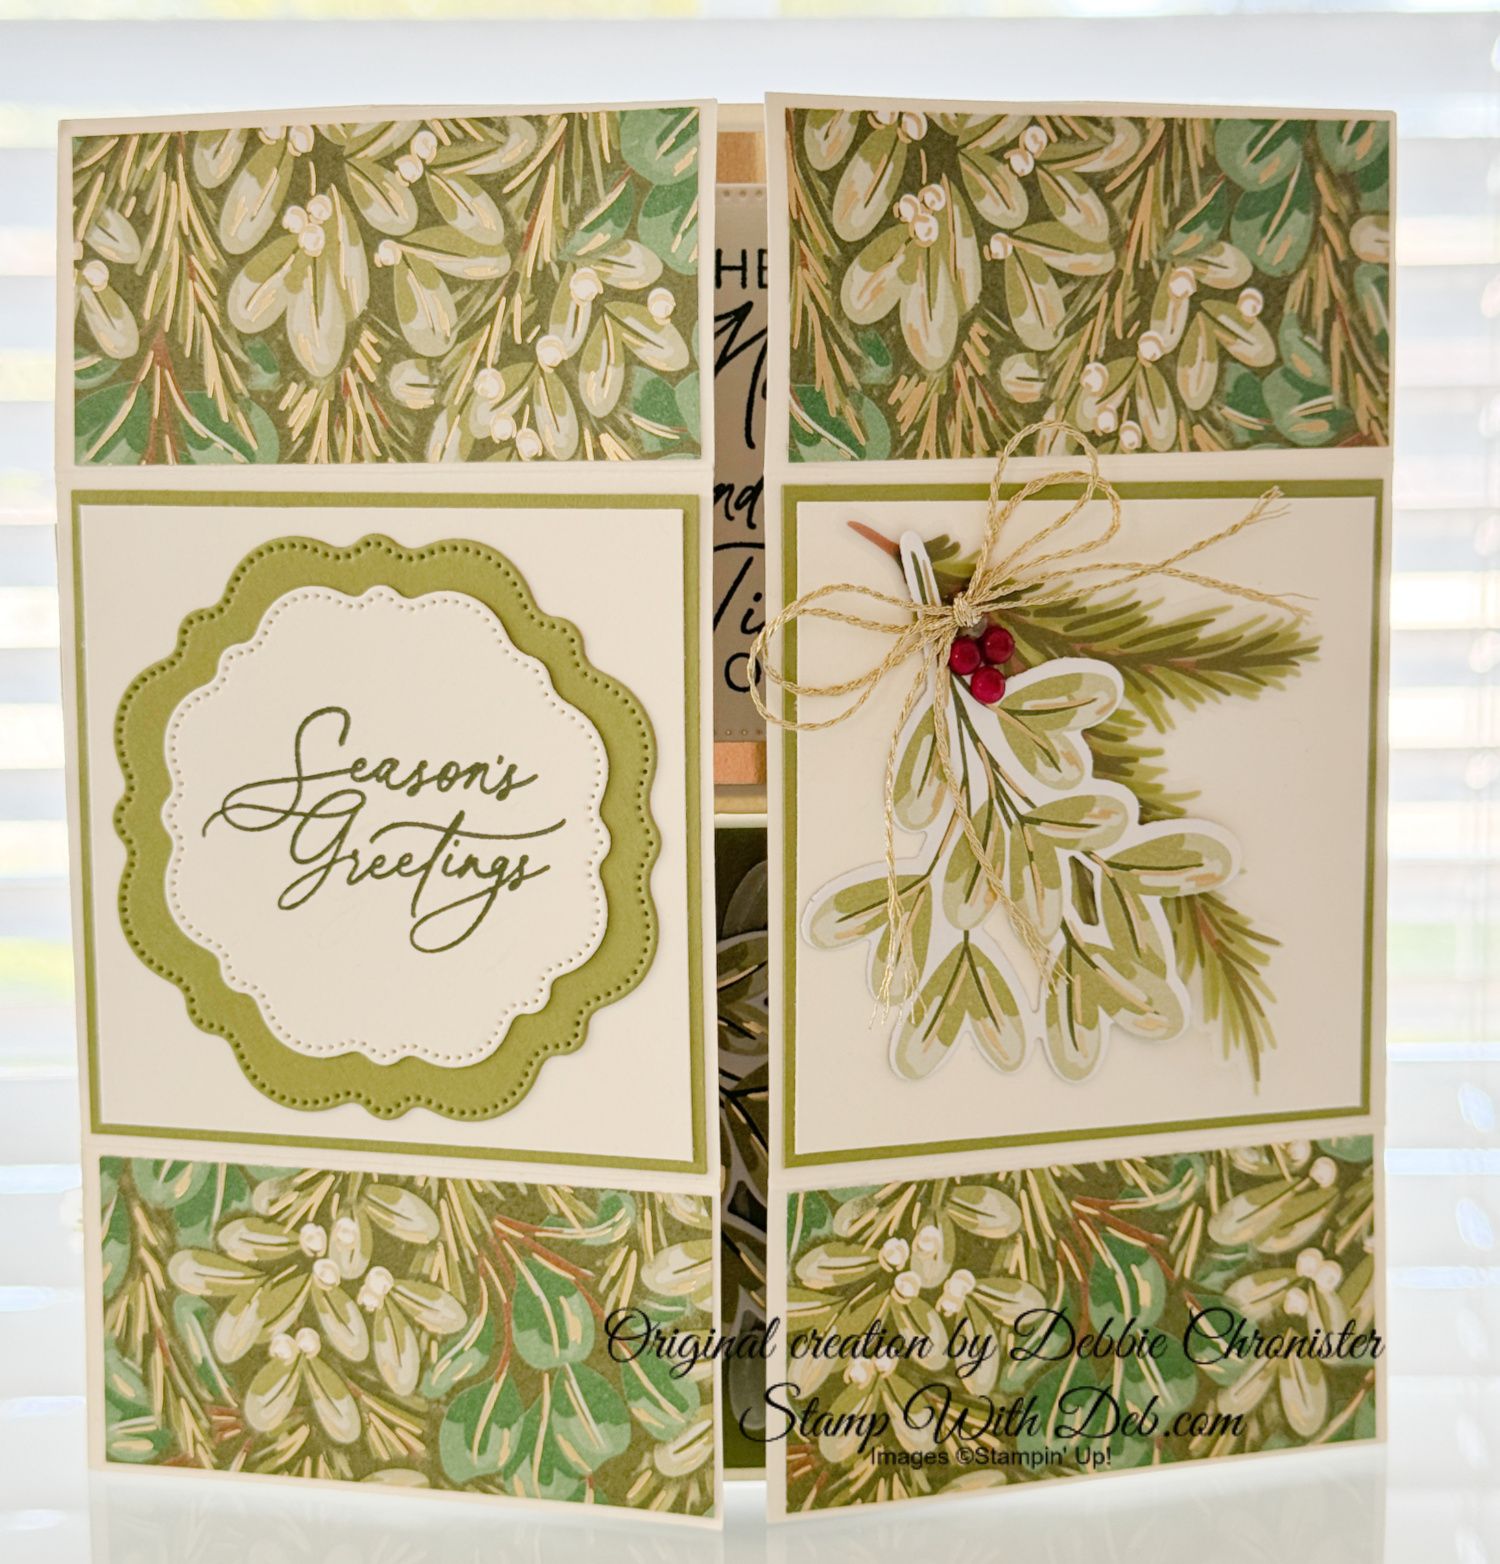
Panel #1 - Adhere the two Old Olive pieces to the center Section, adhere the Very Vanilla Panels to the Old Olive, Die cut the images from the Green & Gold Designer Series Paper and the Graceful Greenery Vellum. Cut the shapes using Thoughtful Expressions Dies. Stamp the greeting in Mossy Meadow. Adhere the top and bottom DSP to the panels. Finish off with gold cord and the Berries Bling
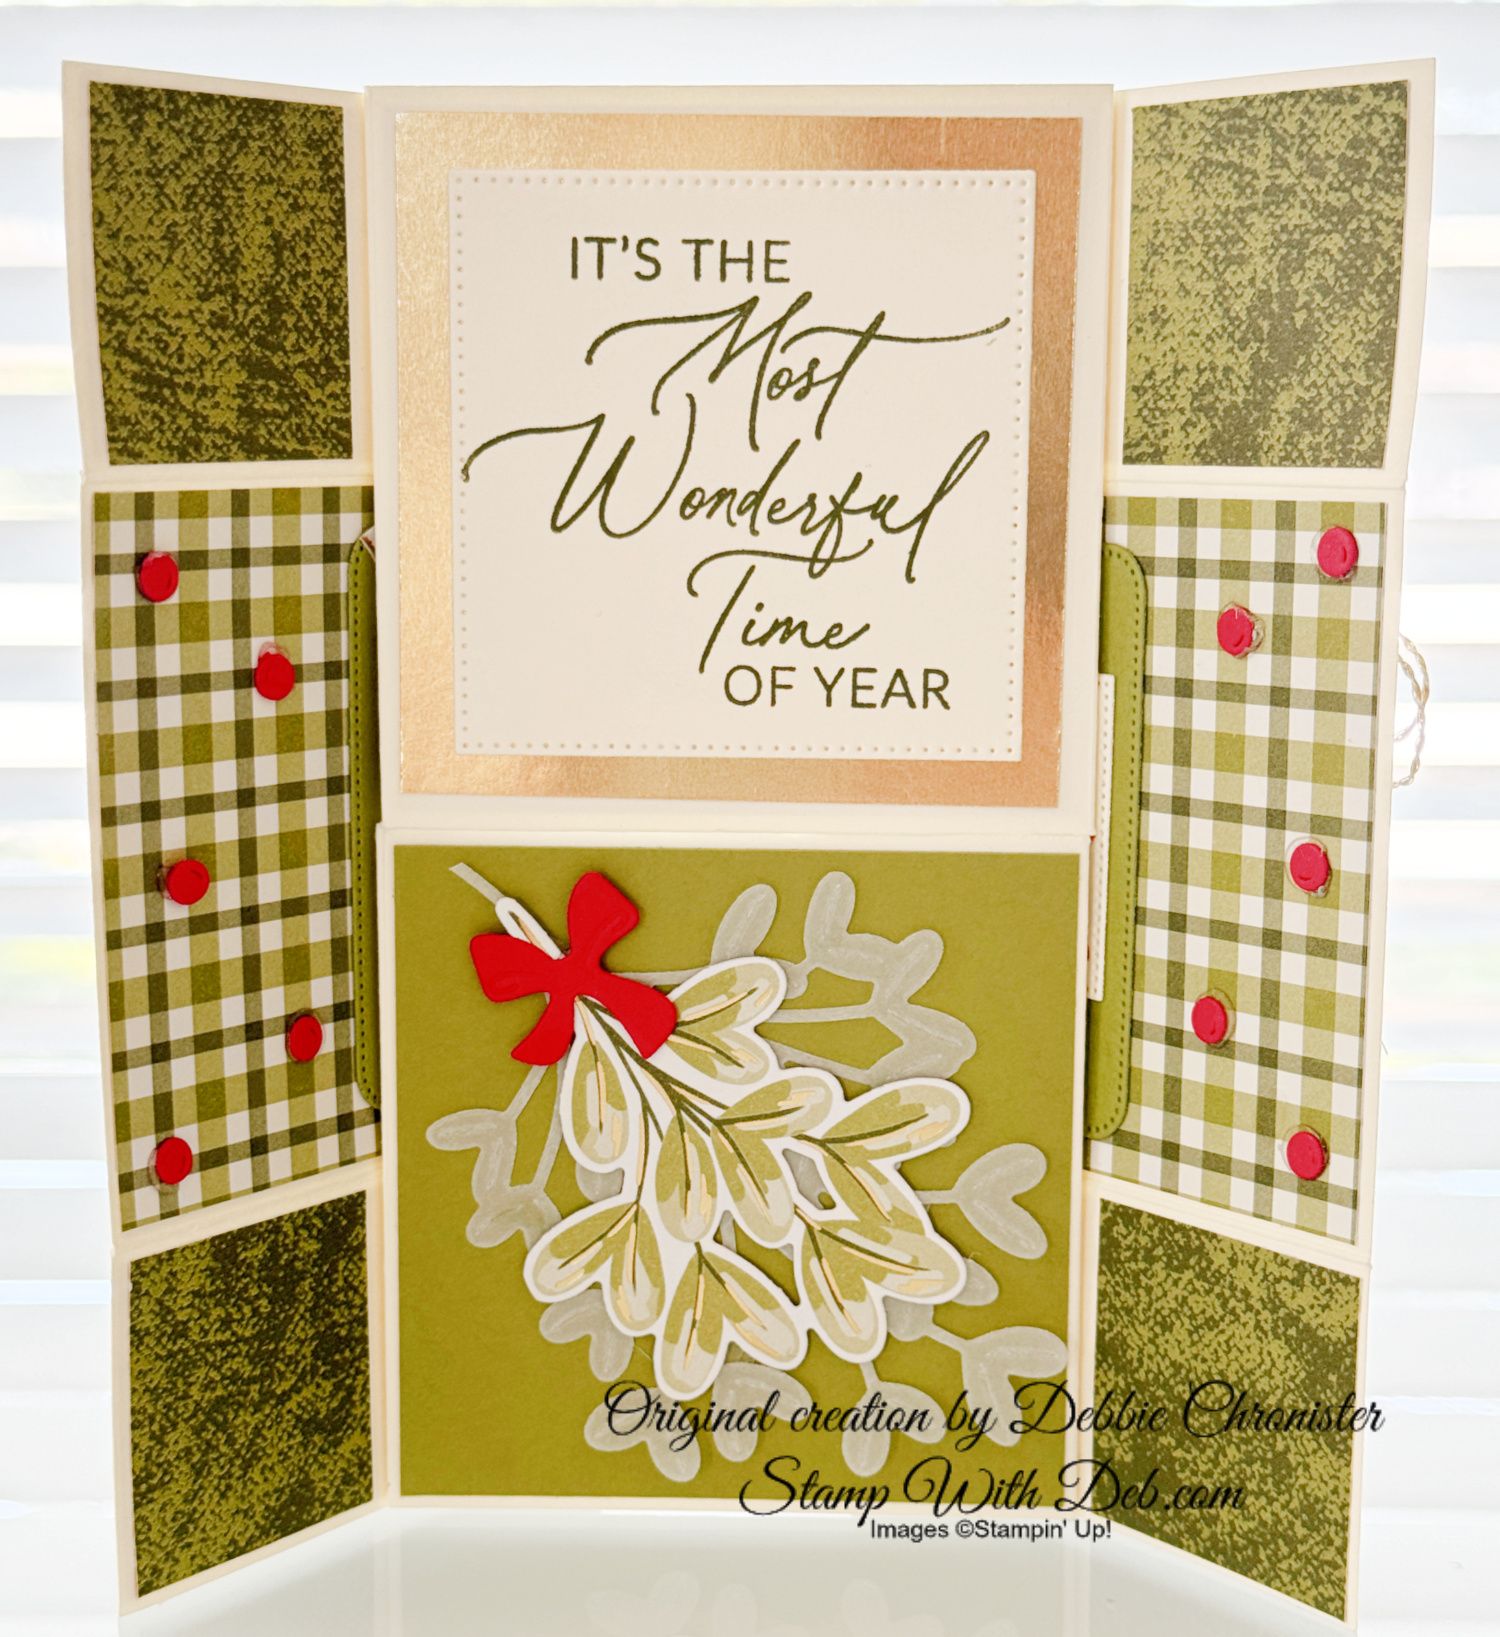
Panel #2. Each panel opens in the middle to reveal the next section. On this one the top panel has a square cut in Gold Foil, then using the Stylish Shapes Dies layered the next one down in Very Vanilla. Stamp the greeting from Greetings of the Season Bundle. Die cut the stem in the White Vellum from the Graceful Greenery Vellum. Die cut one of the images from the Season of Green & Gold Designer Series Paper. In Real Red, cut the bow from Wanted To Say Dies. The bells that show through are actually on the next panel
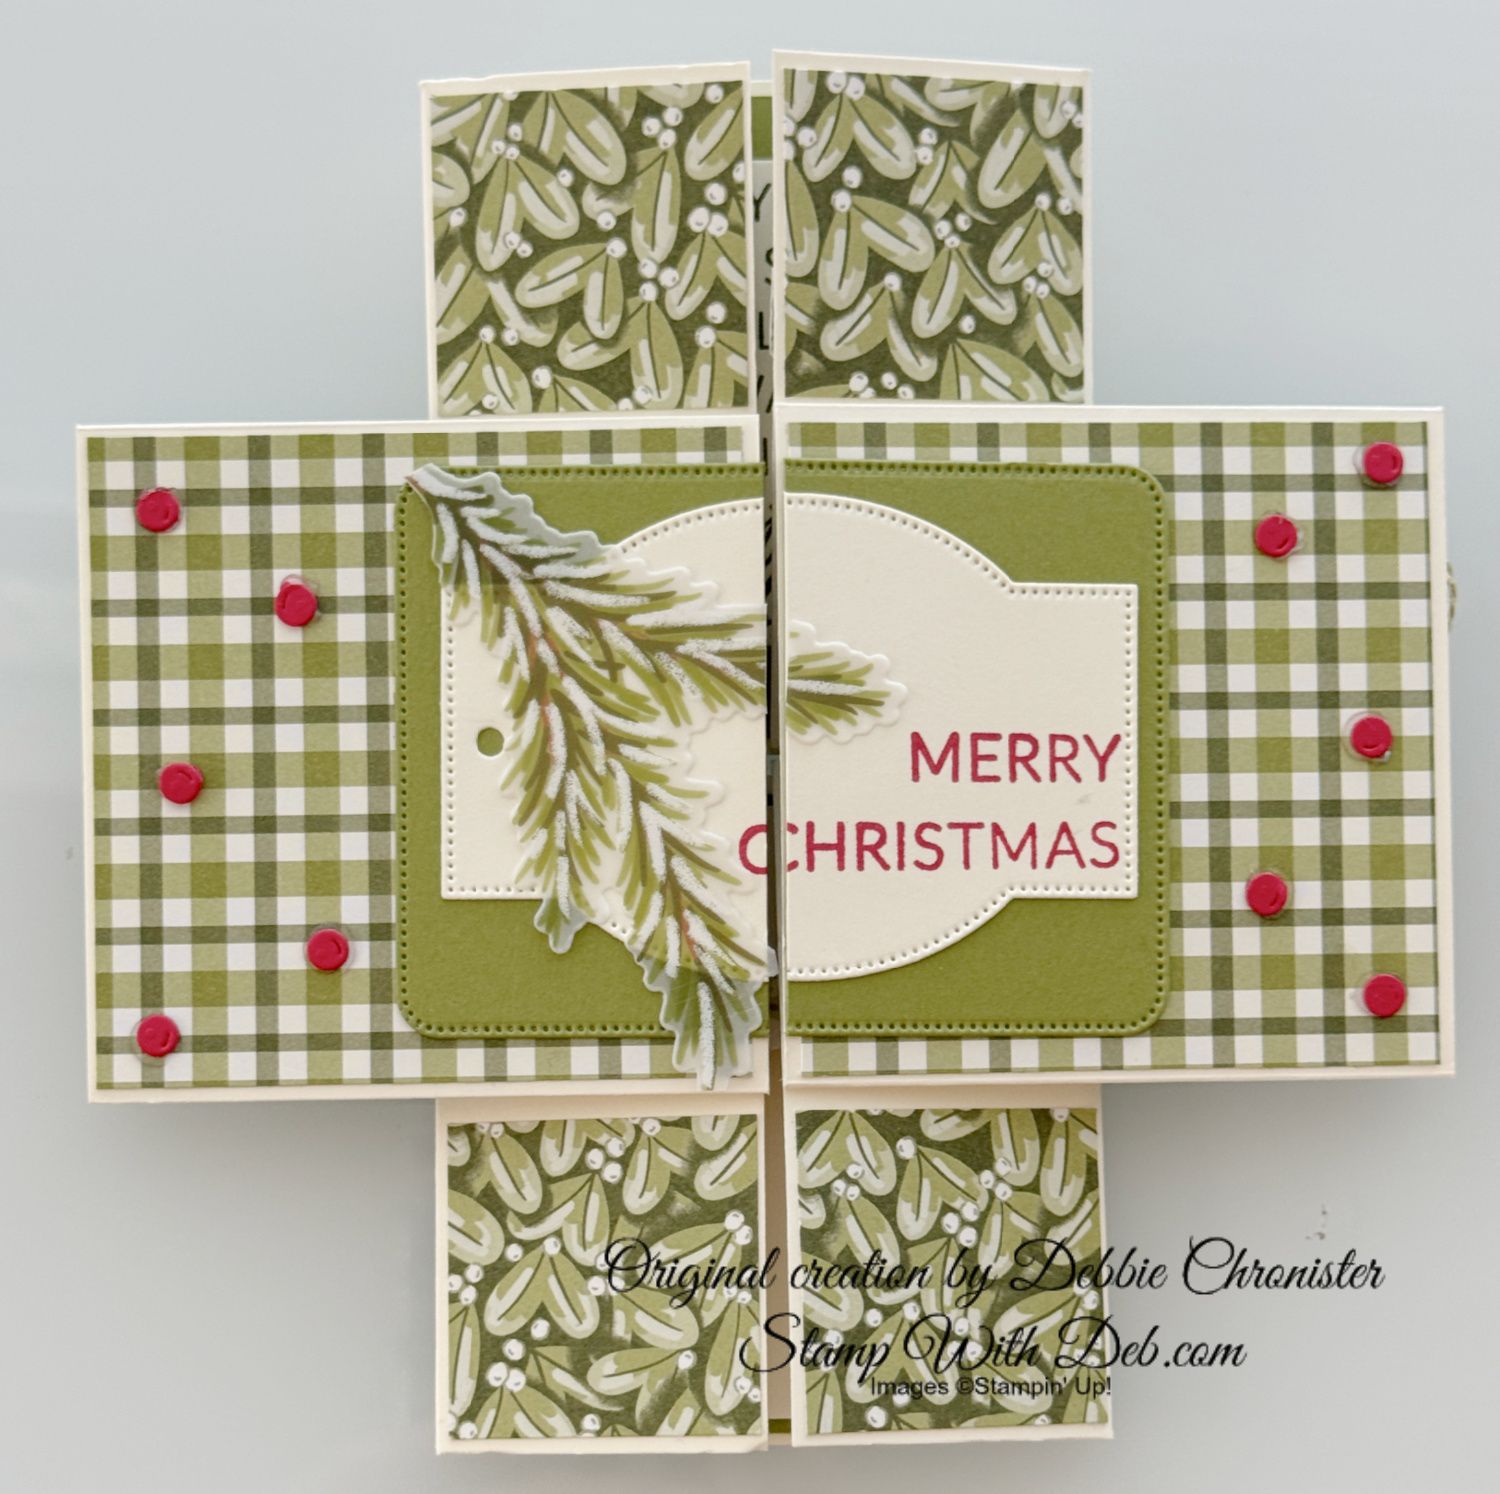
Panel #3 - Adhere two plaid DSP panels to the center, adhere the branch DS to the top and bottom sections. Cut the bells (dots) using the dies in the Golden Greenery Dies in Real Red. Scatter on the two far panels. Cut the large tag in Old Olive from Greetings of the Season, then turn it around and cut again using the die, cutting off the tag portion. Cut the Very Vanilla tag and adhere to the Old Olive tag, stamp the greeting in Real Red. Die cut the branch from the Vellum, add it to the tag, trim anything hanging over. Cut the tag in half and adhere it to the card so they are at the very edge of the Very Vanilla in the center.
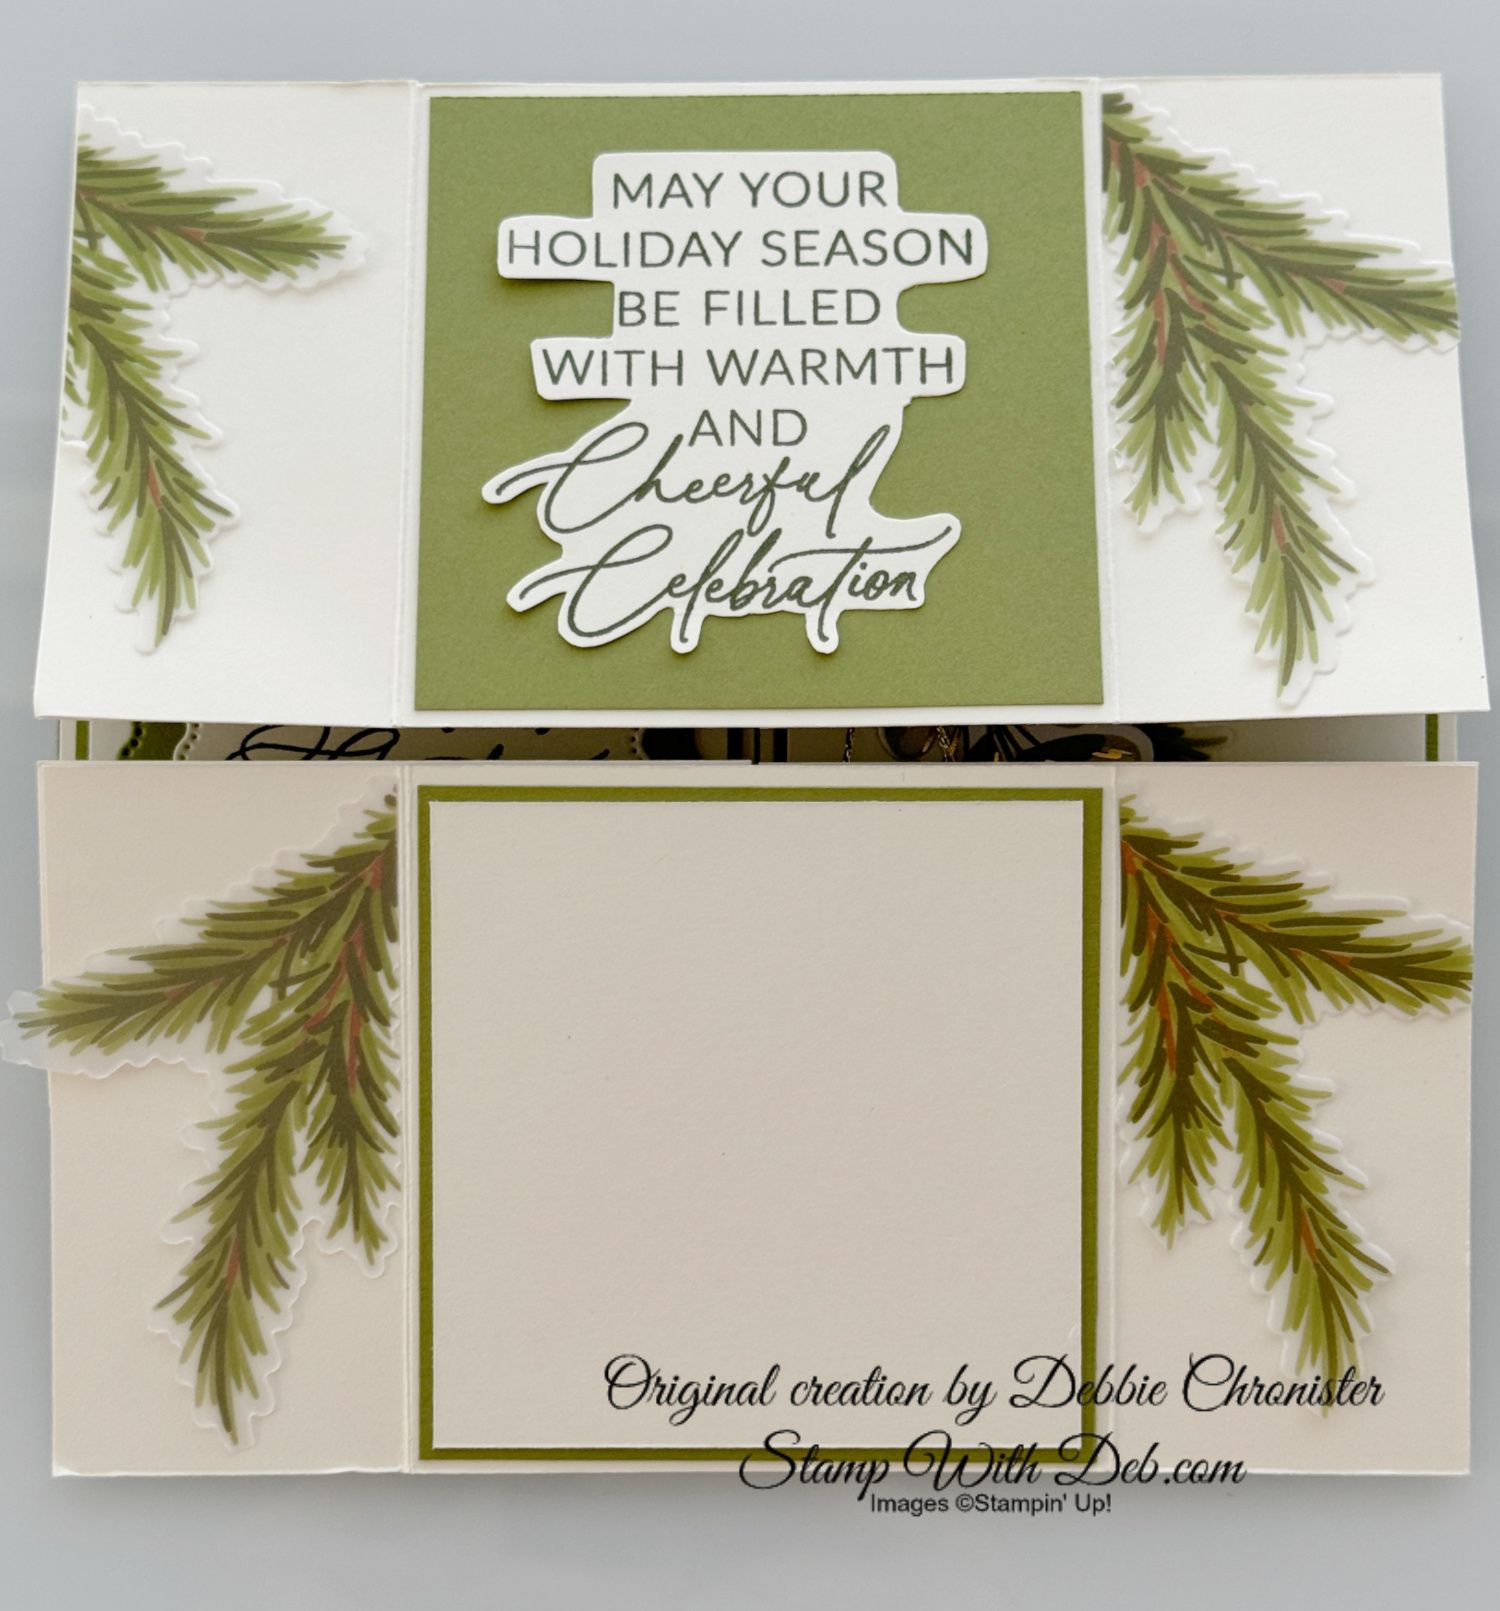
Panel #4 - This is the final panel. Be sure to work through the card to be sure you are putting this panel in in the right direction. Stamp the greeting on Very Vanilla, fussy cut around the greeting . Adhere the Old Olive to the top portion, adhere the greeting there. Adhere the other Old Olive to the bottom center of the card, adhere the Very Vanilla to the Old Olive.Die cut the branches. I used the pieces around the edges of the vellum that are missing sections, adhere them to the card

Are you about to hit that $99 mark on your order (before shipping and tax)? If so, why not consider joining my team? As a member, you’ll enjoy $125 worth of products of your choice for only $99! Plus, you’ll snag a fantastic 20% discount on all your future purchases and a variety of exclusive perks from me and Stampin' Up! Dive into this exciting journey of paper crafting with us! For more information, check out my Join My Team page
We now have 3 catalogs each year, January - April, May - August, September - December. We no longer have an annual catalog. You will find all of the products in the catalogs online as well as Last Chance and Online Exclusive Products. If you want to check out the May - August Catalog click on that catalog below. If you want a paper copy, please contact me to get yours!
Check out:
Online Exclusives
May - August Catalog - Contact me to get yours!
Subscribe to my My YouTube paper crafting video channel
Follow me on Pinterest
Follow me on Facebook every week for Stampin' Tell Tuesday
Shop my Online Store