REVERSE MASKING
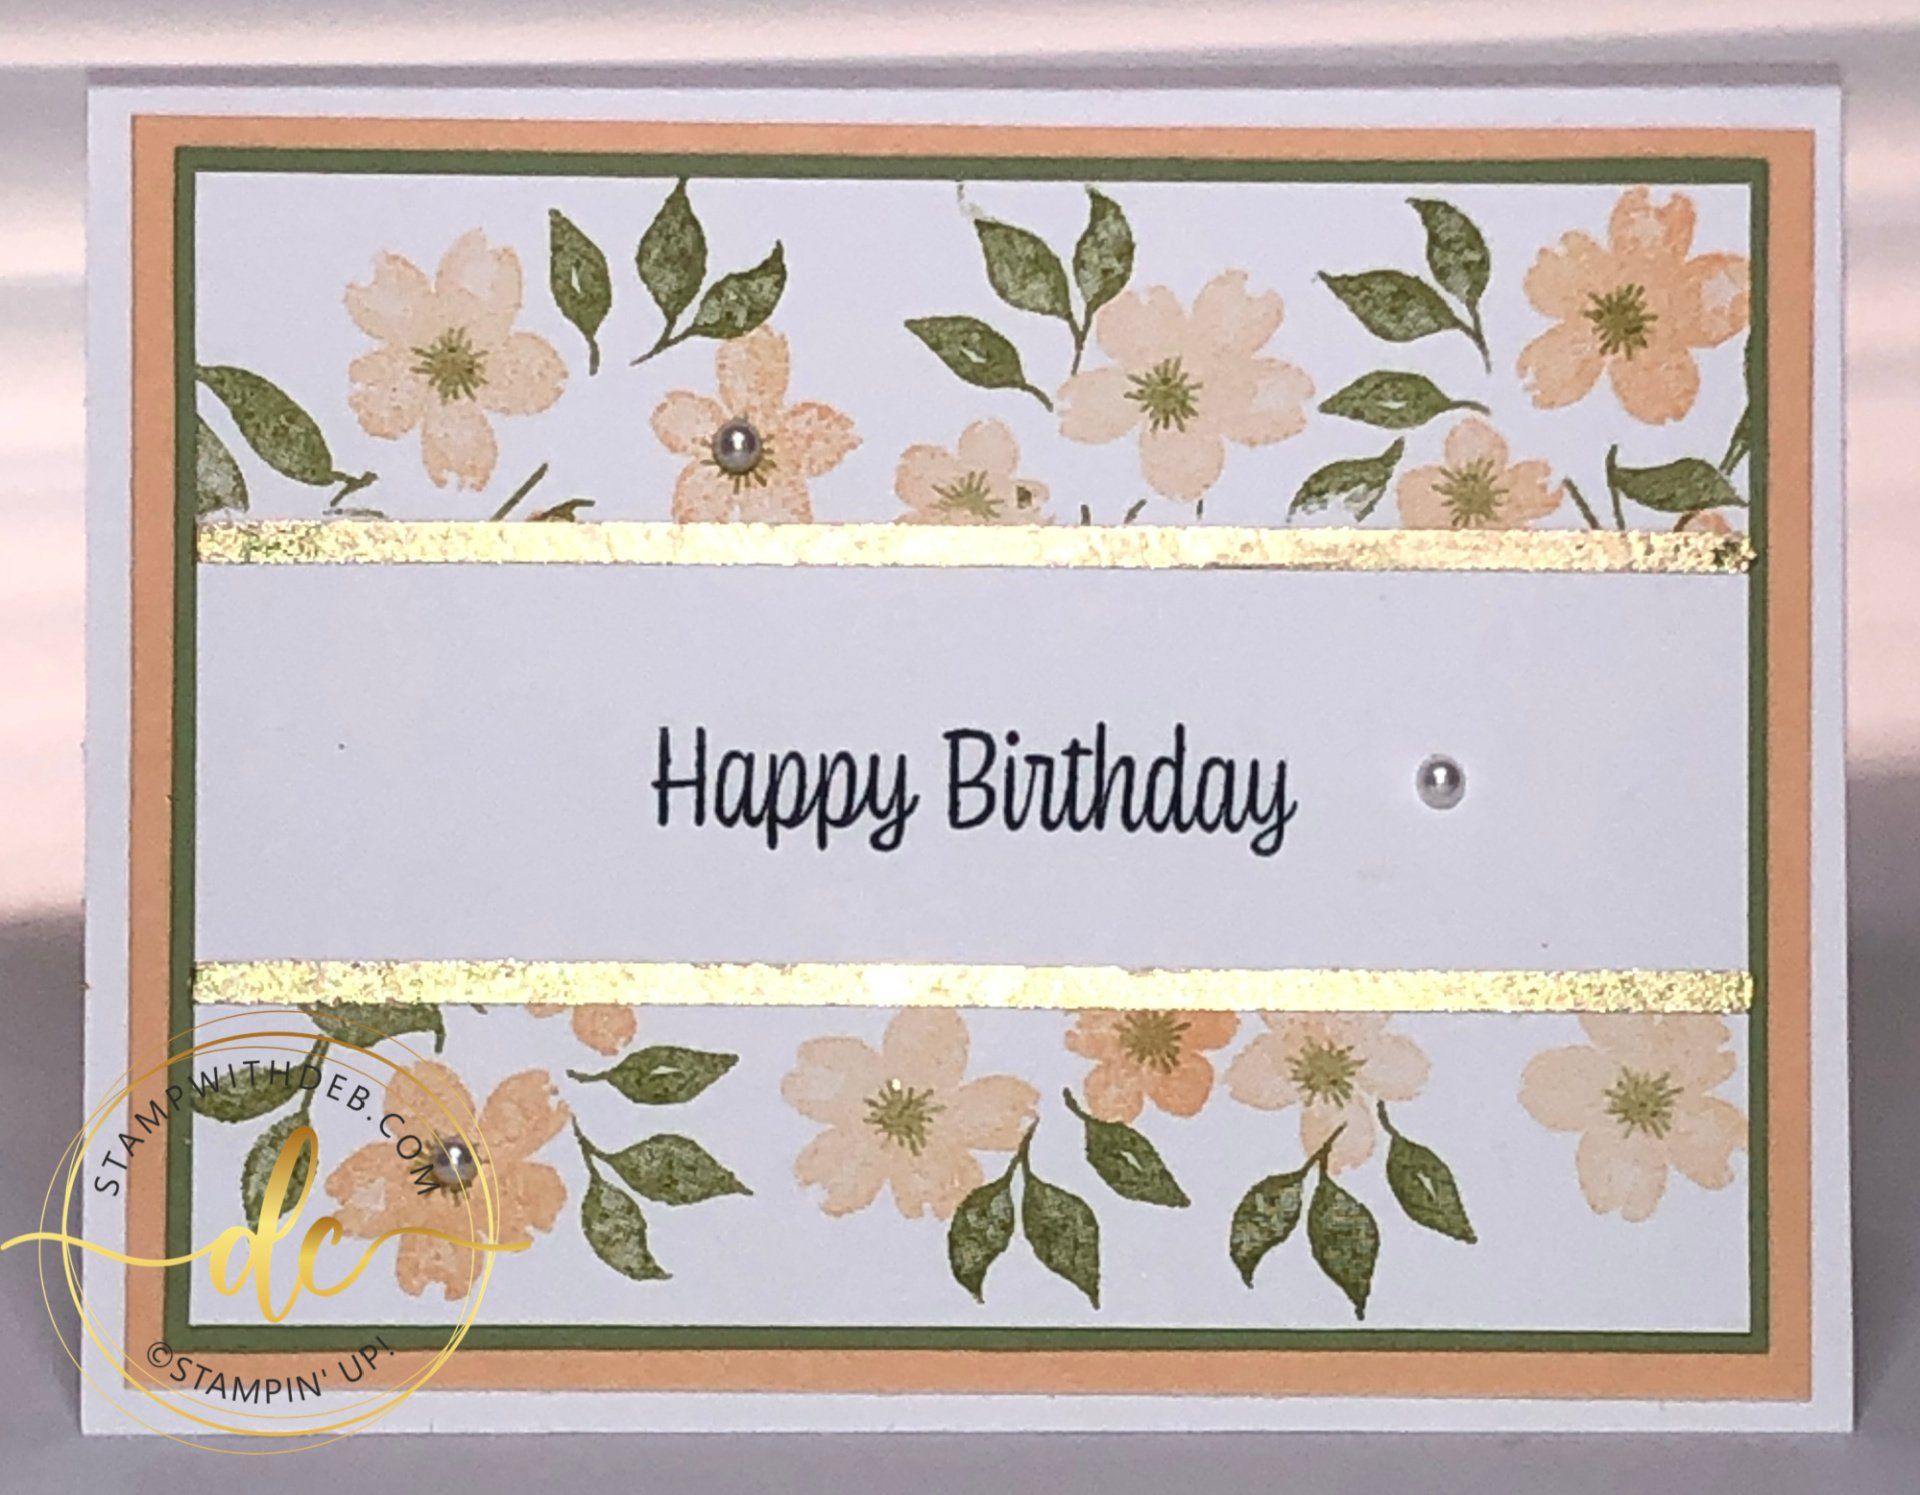
This is the final product I ended up with, however, in this case as happens many times when I have an idea I go the long way around to my final project and it looks like what I started with.
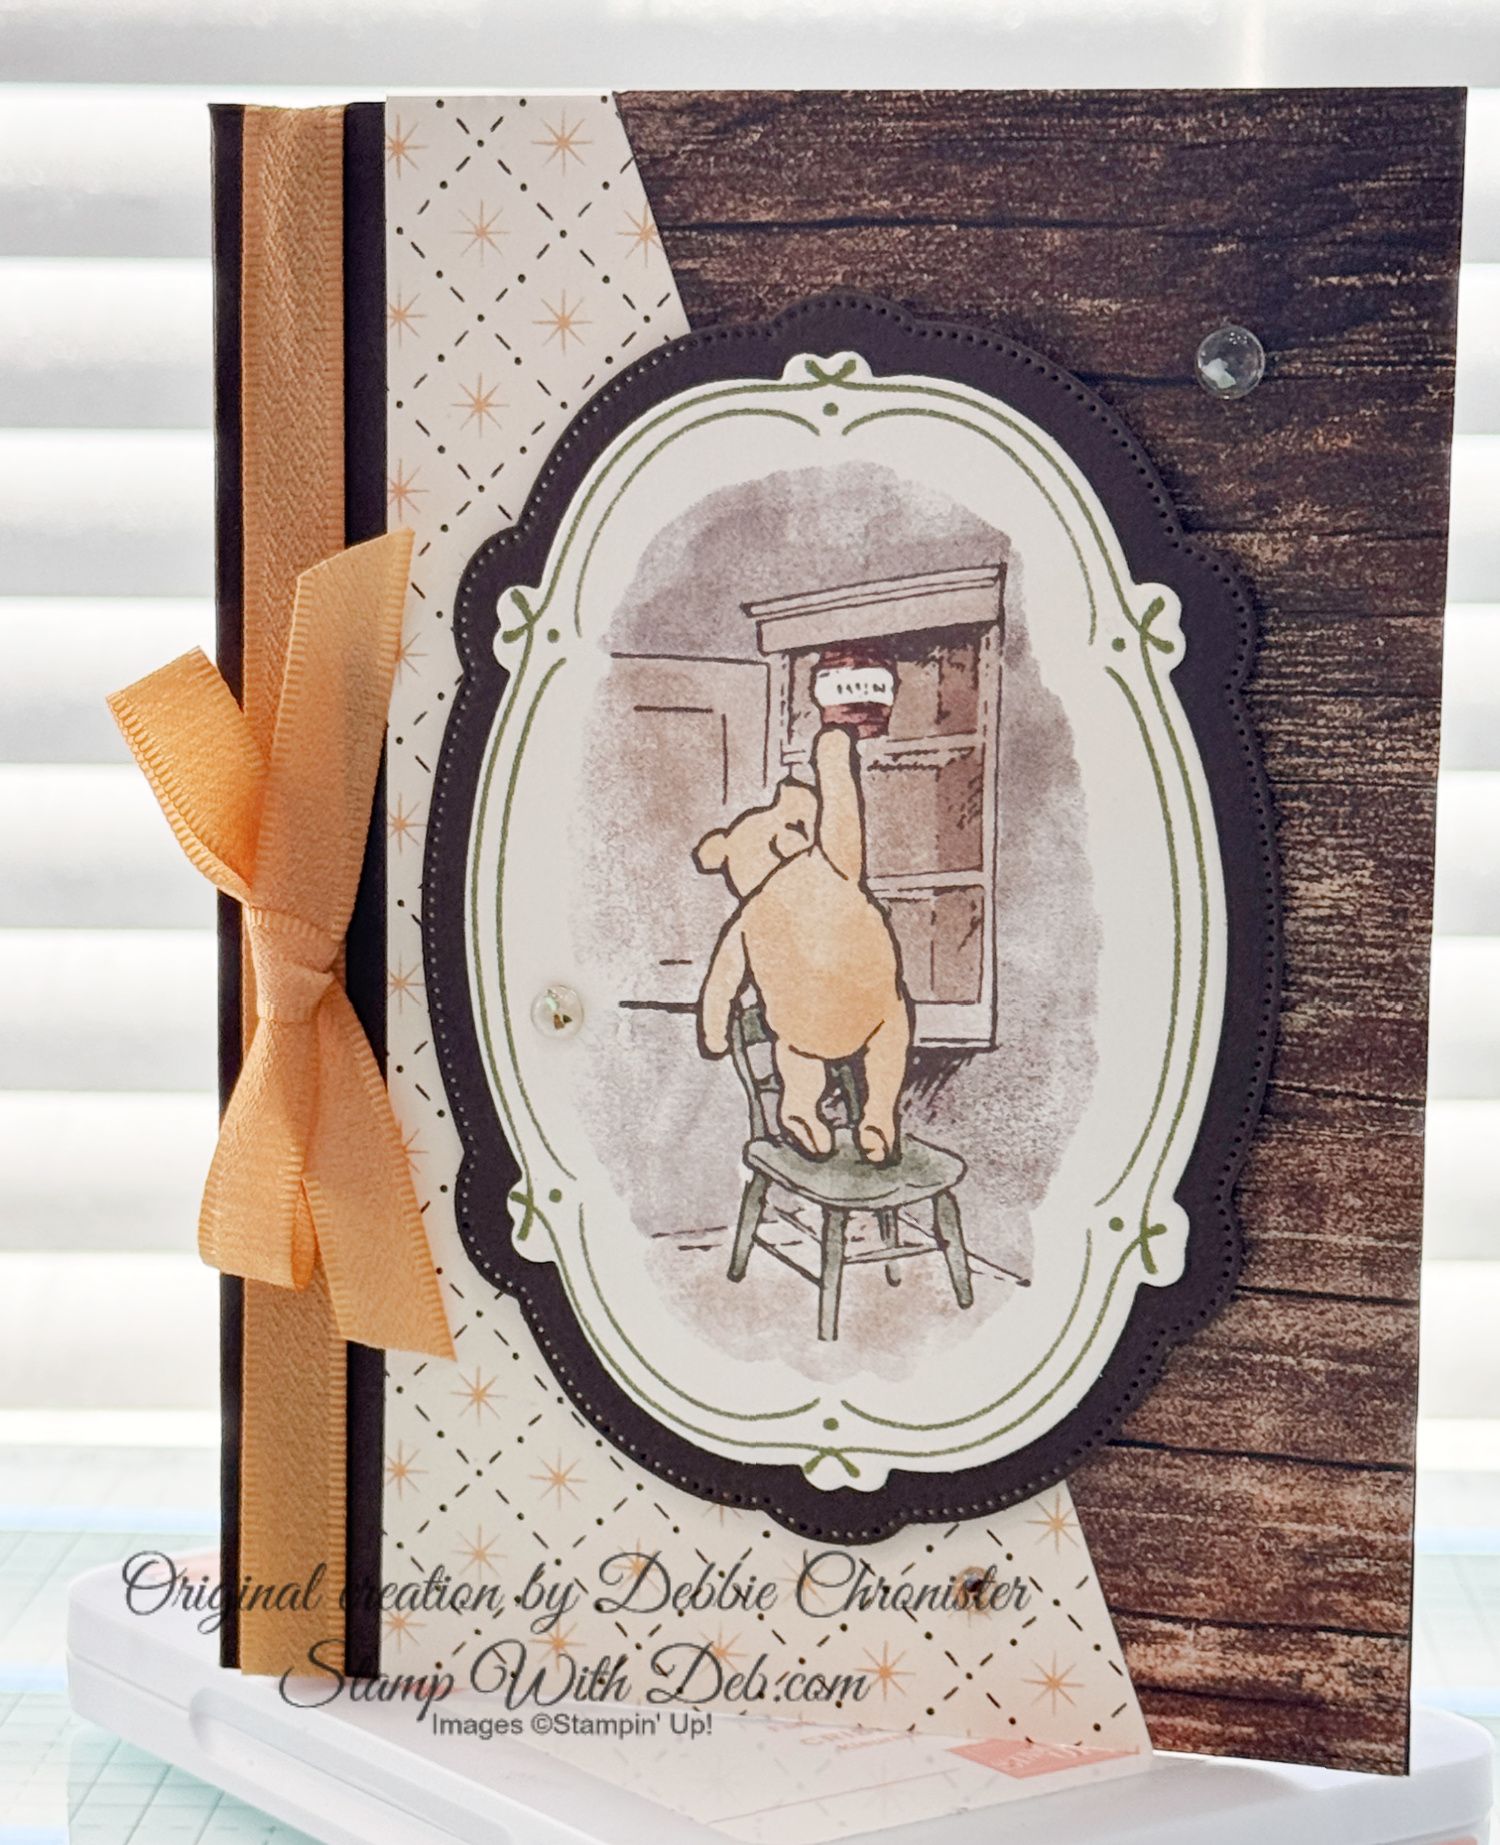
I wanted to show you Reverse Masking Technique, which is similar to masking. When we mask we stamp an image and then cover that image (mask) in order to stamp other things around it and not cover over the original image. Reverse masking means we cover the area where we don't want to stamp, sort of the same but the area has no image on it so we are covering a blank area. In this case I covered the center area so I would not stamp the leaves and flowers then I went back and stamped the greeting in the center. I also used the gold leafing on this card. I will show you an easy and sort of clean way to use it.
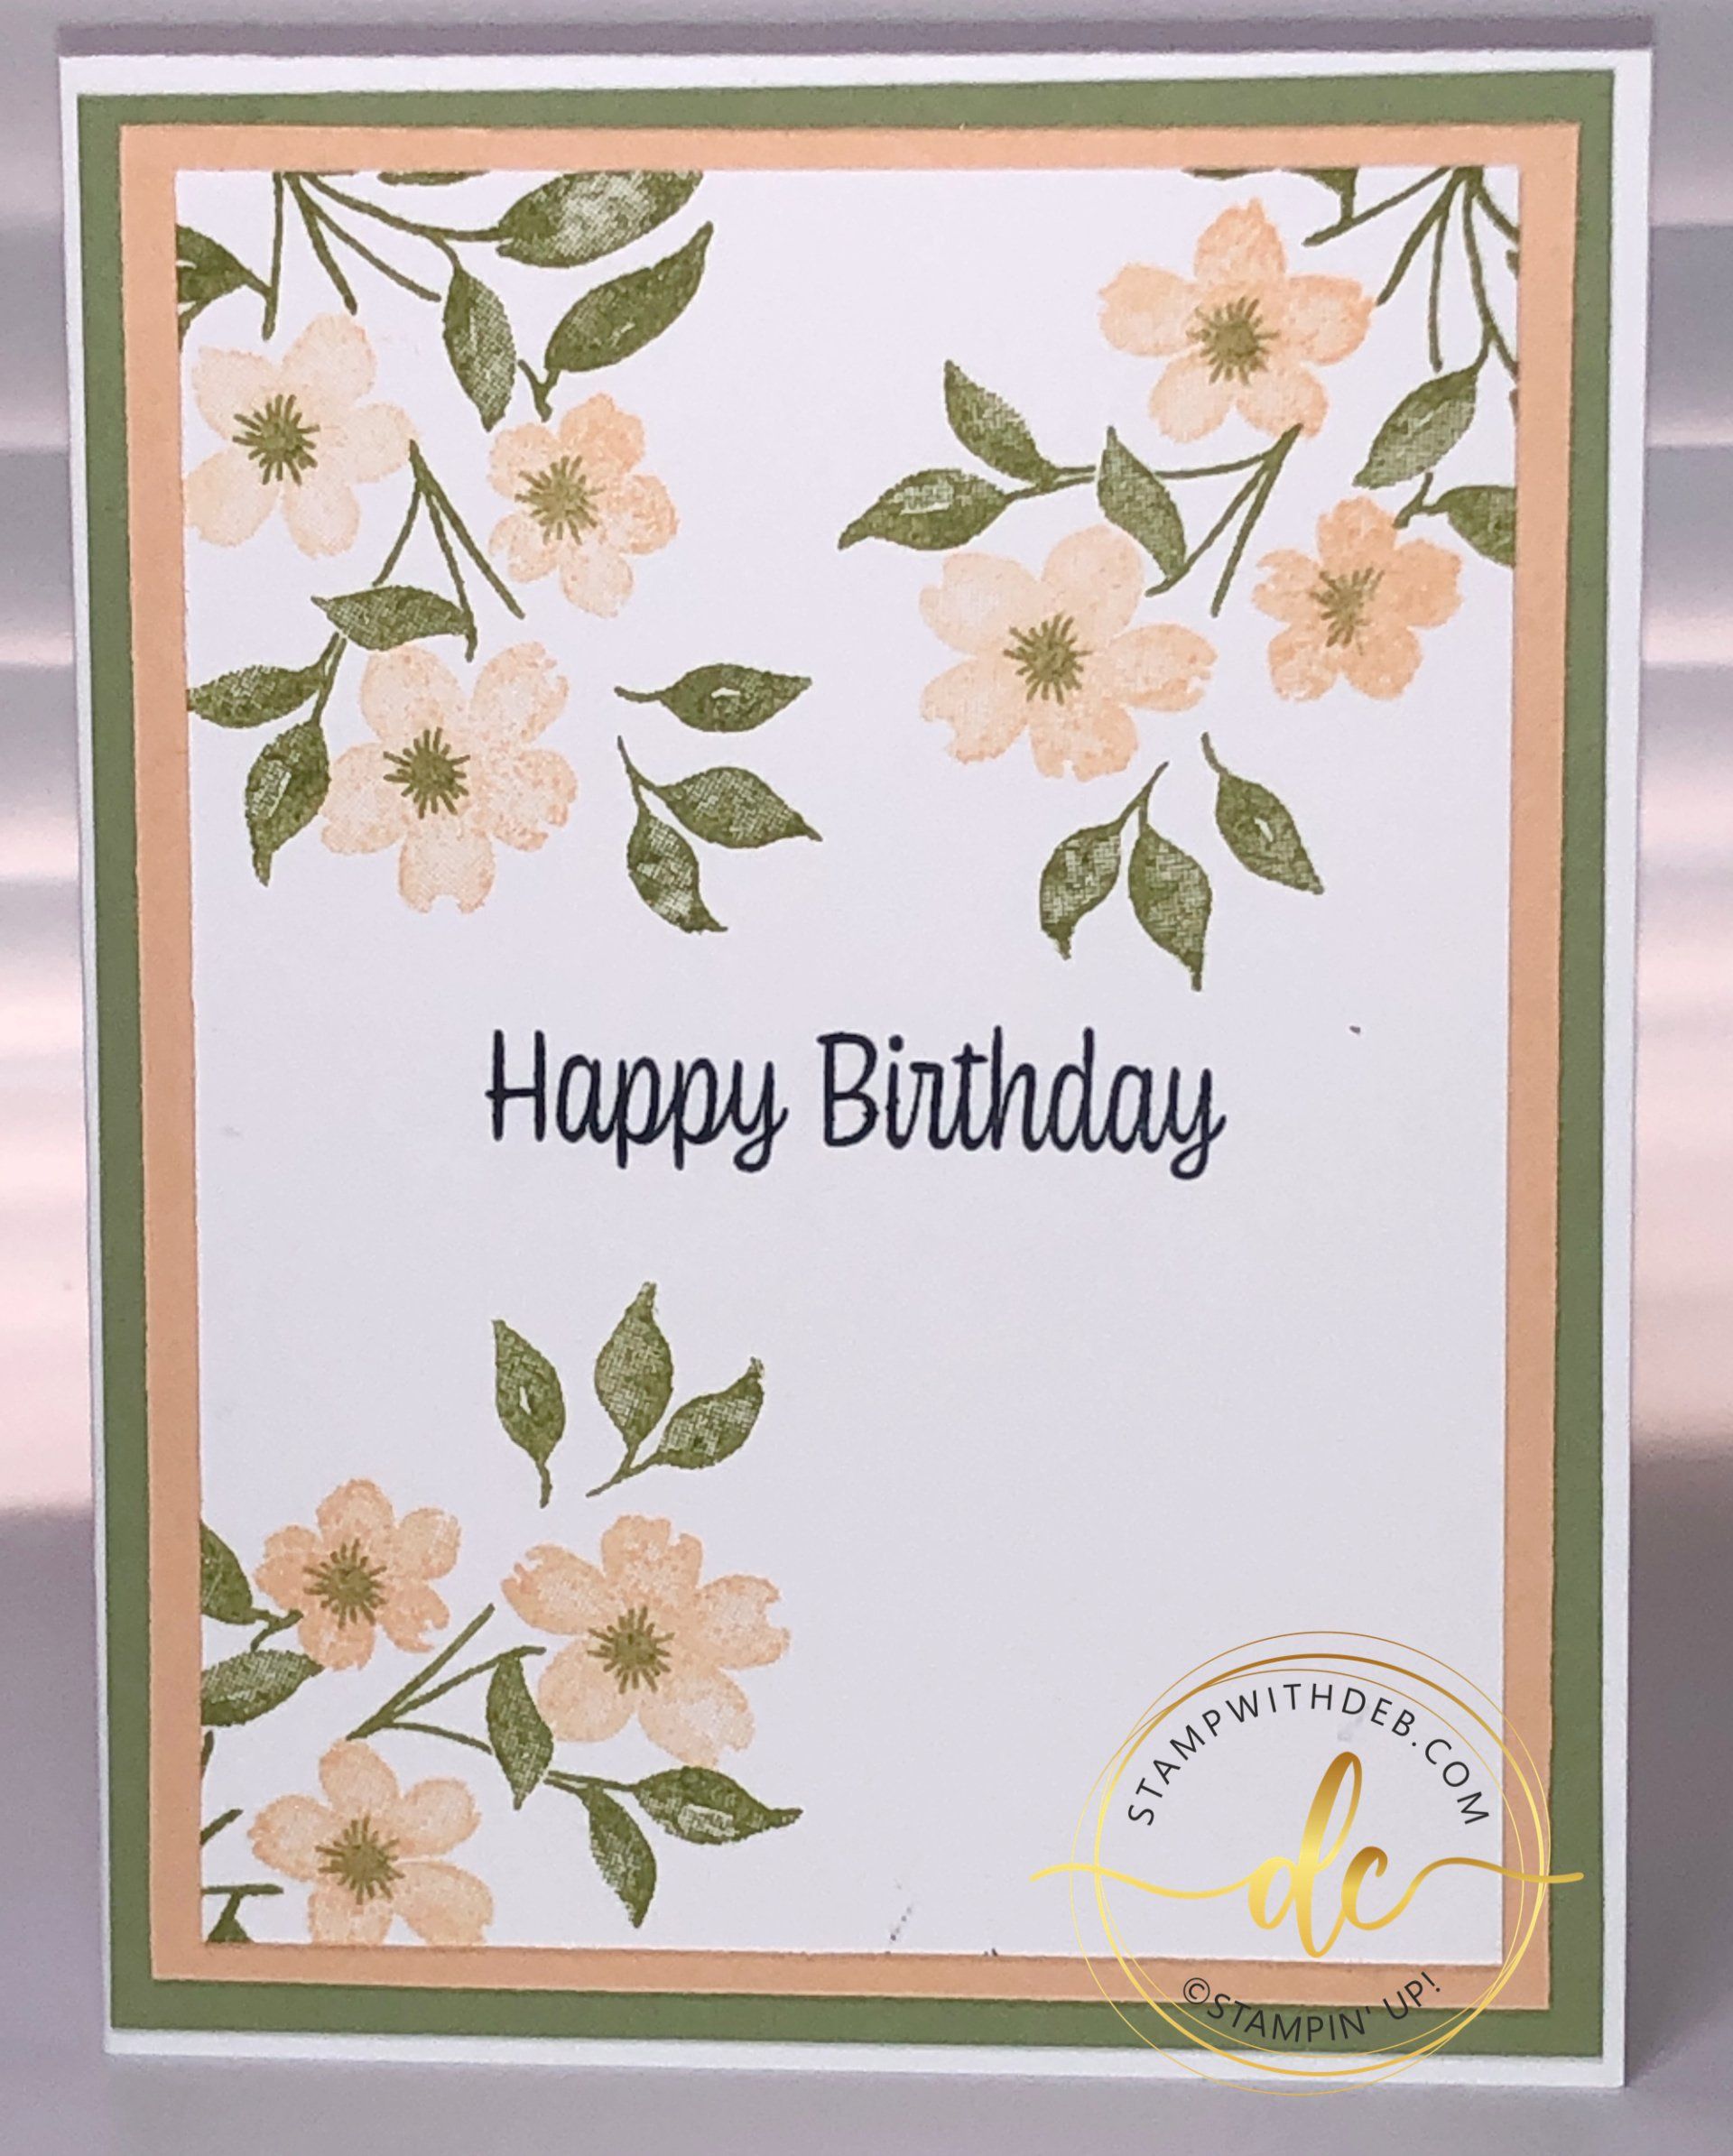
I started with just stamping this beautiful set to get a feel for it. Sweet As a Peach can be found on page 60 of the 2021-22 Annual Stampin' Up! Catalog. The Suite includes the bundle (stamp & dies), You're A Peach Designer Series Paper and the Mini Jam Jars (another days project). I love the greetings in this set and the images will be amazing to work with. This is the card I started with, notice NO masking at all.
Then I started with the Reverse Masking Technique. I cut a piece of computer paper to 5 x 3 3/4 and a piece of Basic White the same size. Using the largest circle die (which is no longer current) I cut an offset circle. That would be my mask.
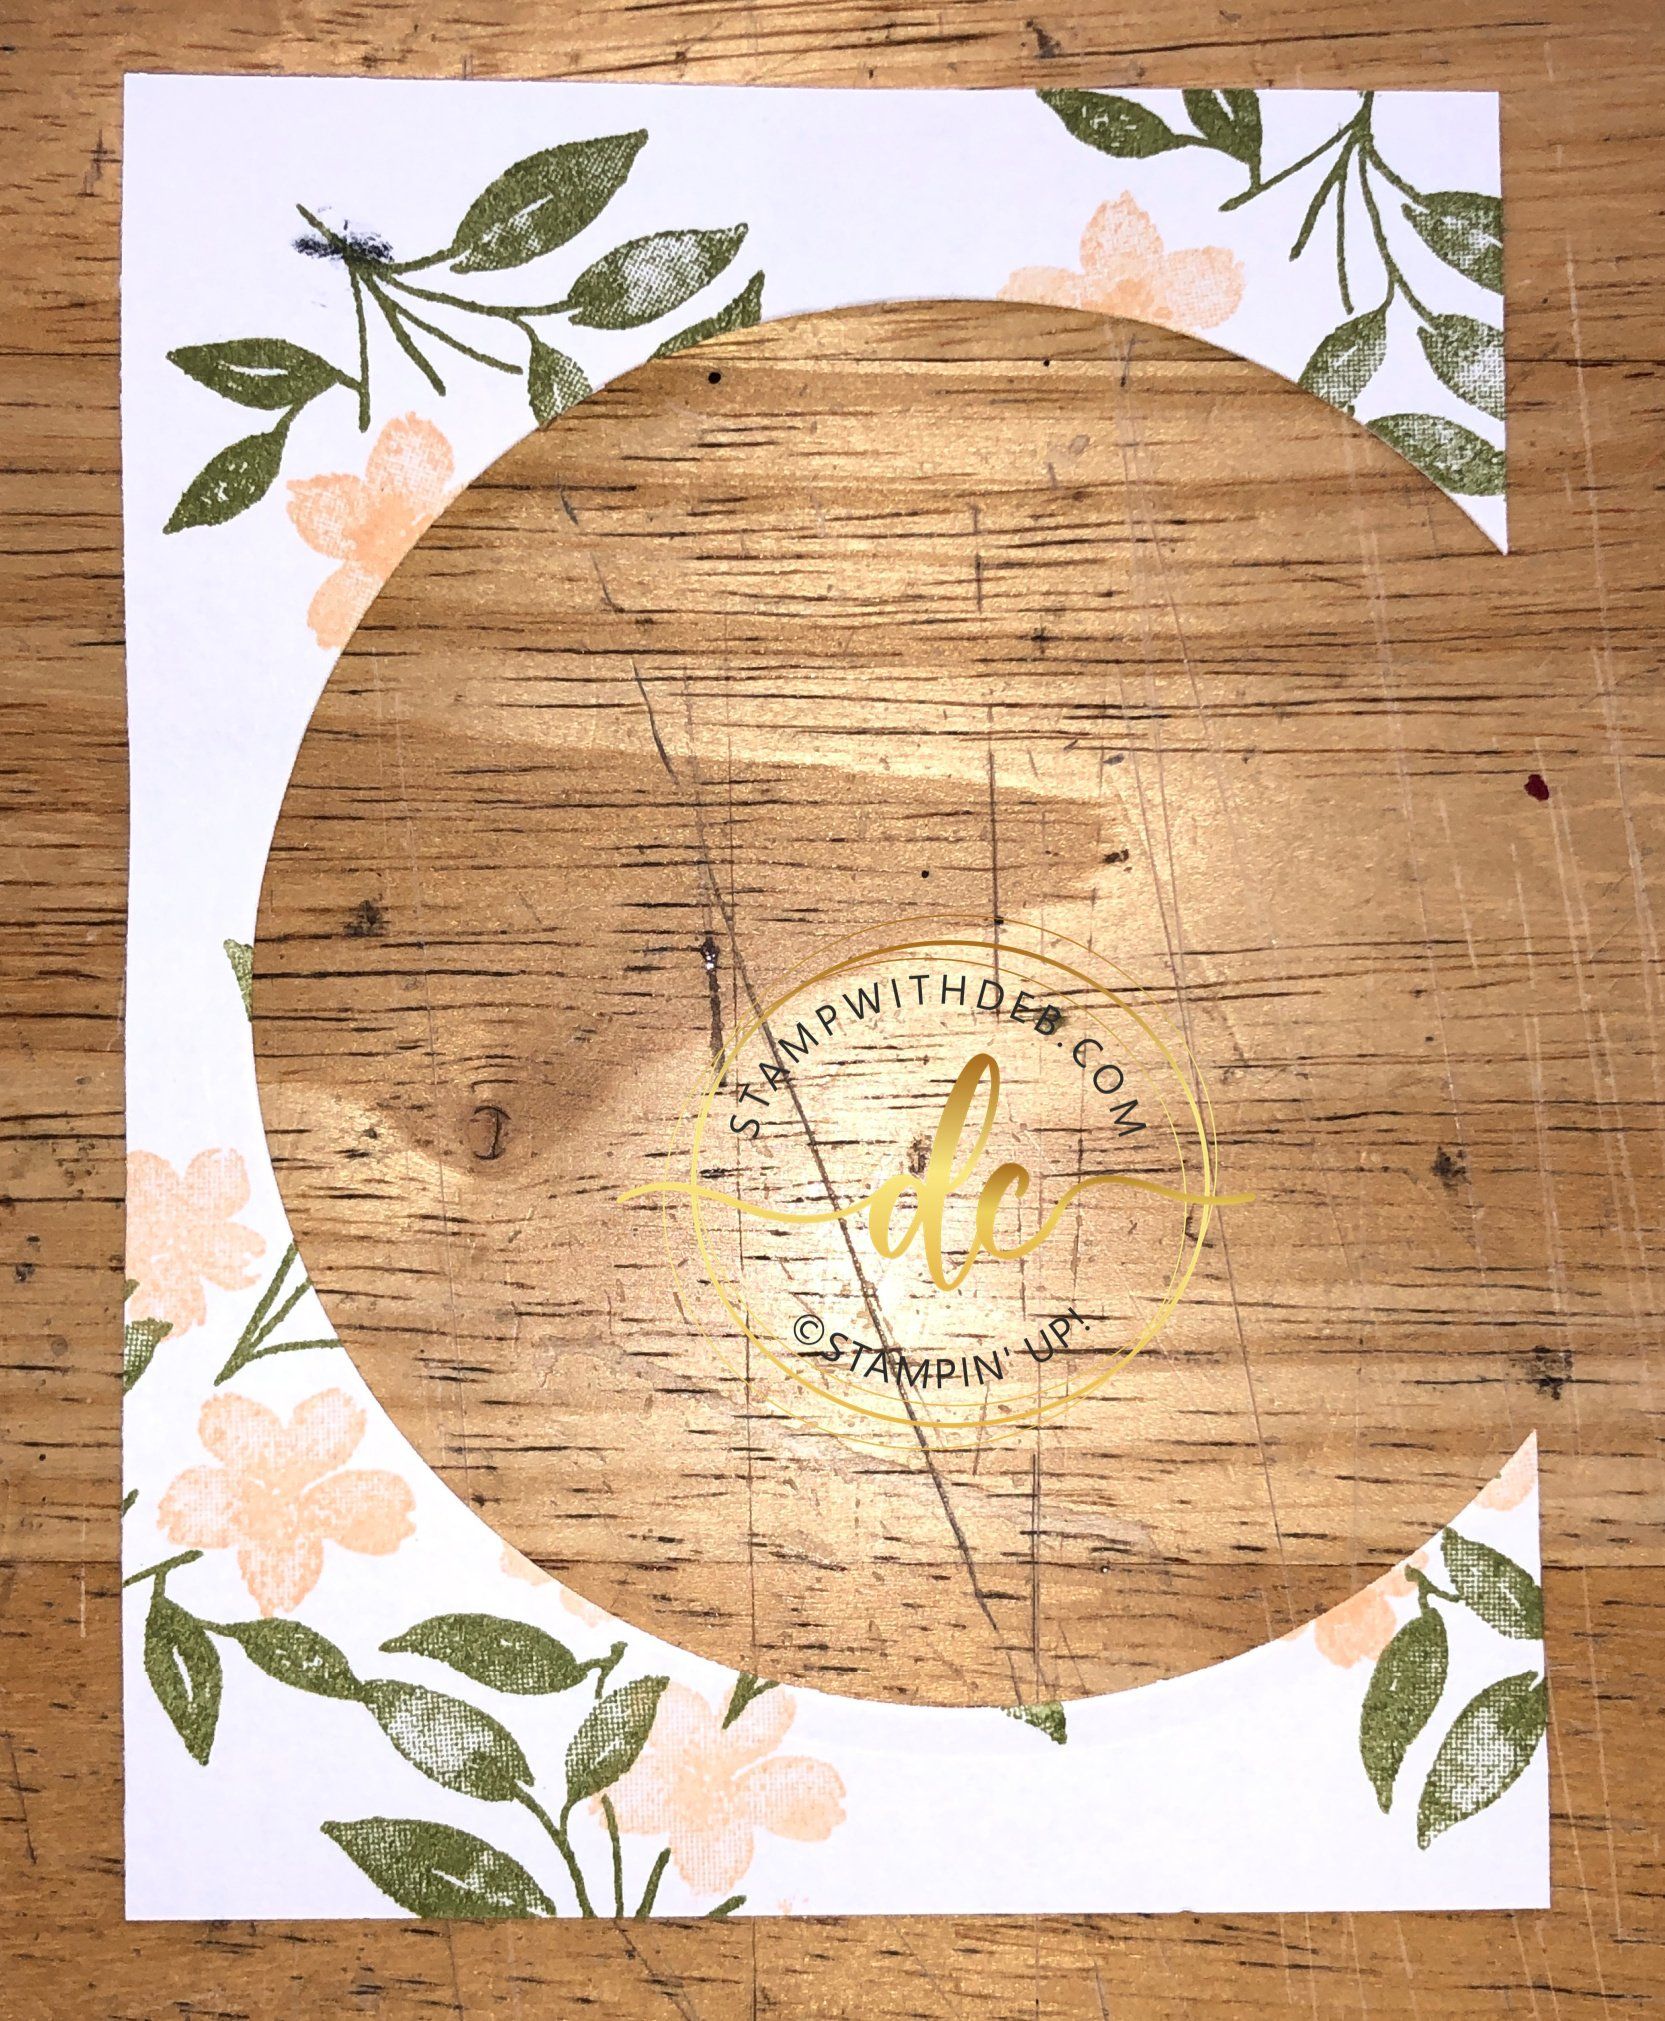
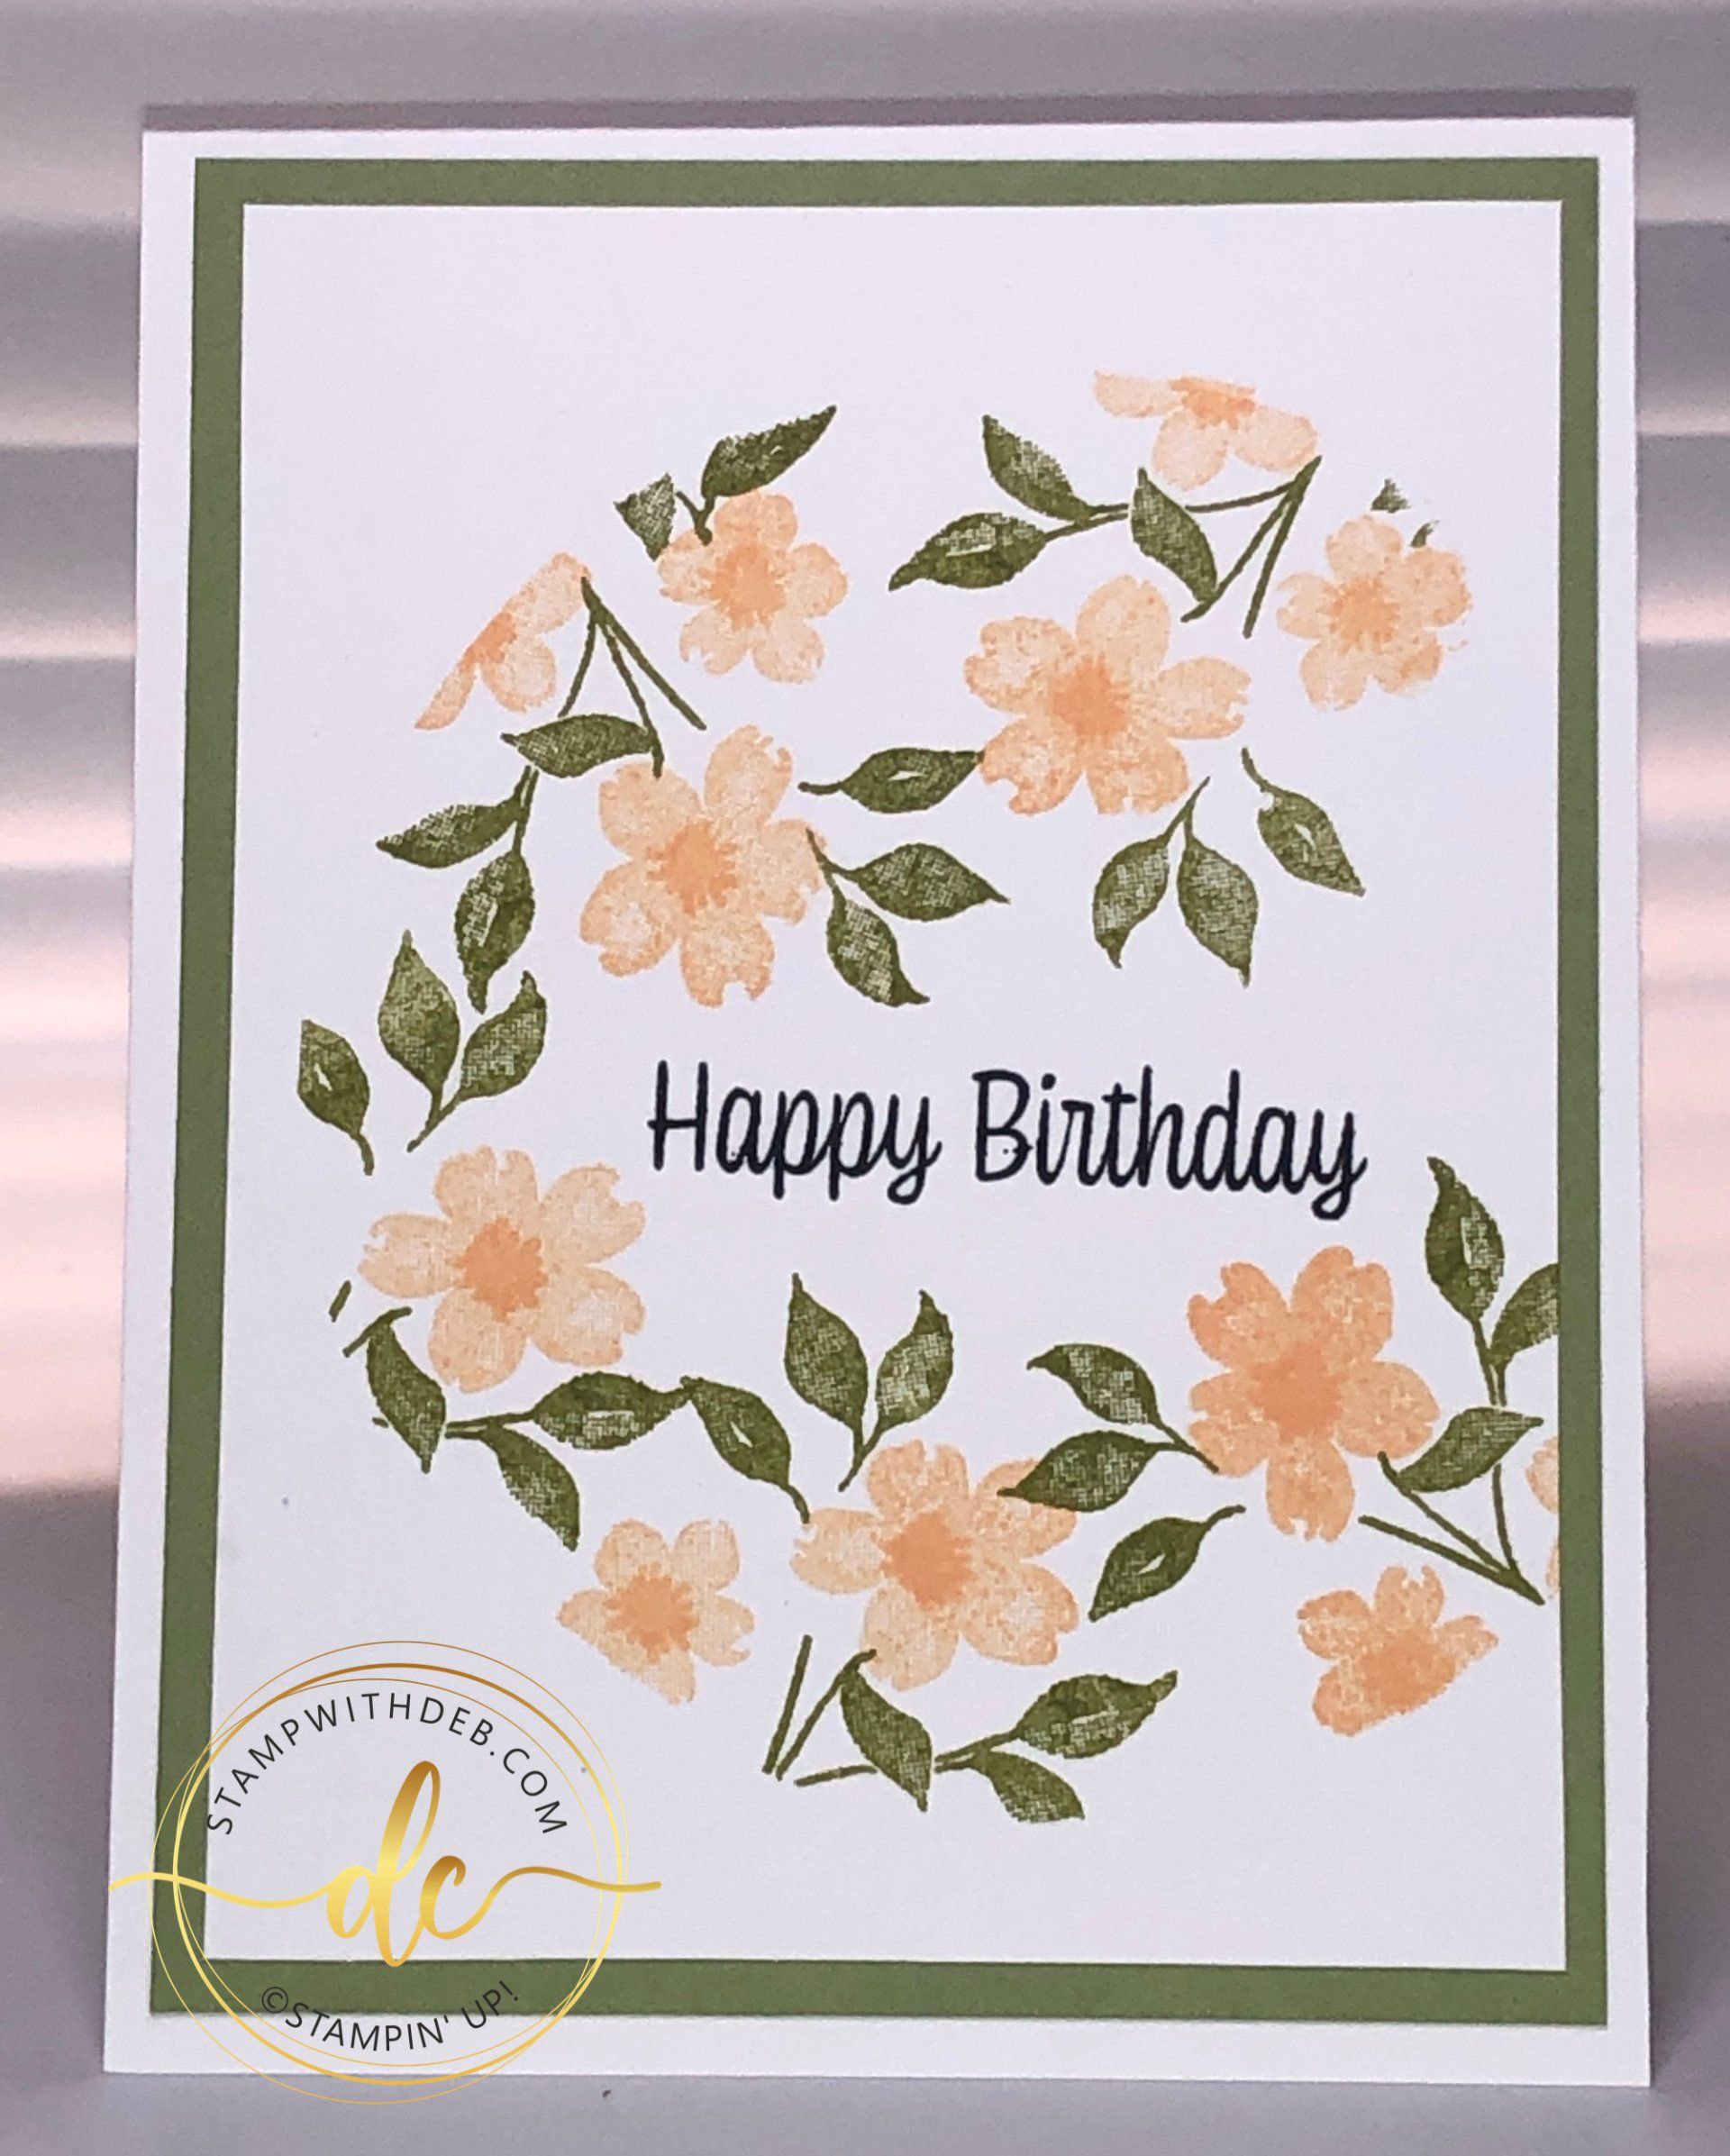
I gently adhered this to the Basic White card stock by putting a few little dots of Tombow Multipurpose Glue (green glue) smearing it and letting it dry until it becomes tacky. Then I began stamping around the circle allowing the image to go into the center area. Just be sure to use enough pressure so you will get crisp edges when you remove the computer paper. I stamped the greeting in the center. Here are the results.
Here is the final card
Measurements
Cut 5 1/2 x 8 1/2 Extra Thick Basic White, score at 4 1/4
Cut 4 x 5 1/4 Pale Papaya, adhere to card front
Cut 5 x 3 3/4 Pear Pizzaz
Cut 4 7/8 x 3 5/8 Basic White
Cut 1 1/4 x 8 Computer paper strip, place over center area attach outside of the card
Cut 2 x 8 1/2 Computer Paper strip, place over top of the previous computer paper, this is to keep you from overstamping with this particular stamp, stamp the leaves in Pear Pizzaz, the flowers in Pale Papaya, the flower centers in Pear Pizzaz and the greeting in Tuxedo Black Momento
Remove the computer paper strips
Put 1/8" Tear 'N Tape along the two edges of the stamping and put Gold Leafing on top of the Tear 'N Tape.
Add a few Basic Pearls or Rhinestones to finish off the card.
Are you about to hit that $99 mark on your order (before shipping and tax)? If so, why not consider joining my team? As a member, you’ll enjoy $125 worth of products of your choice for only $99! Plus, you’ll snag a fantastic 20% discount on all your future purchases and a variety of exclusive perks from me and Stampin' Up! Dive into this exciting journey of paper crafting with us! For more information, check out my Join My Team page
We now have 3 catalogs each year, January - April, May - August, September - December. We no longer have an annual catalog. You will find all of the products in the catalogs online as well as Last Chance and Online Exclusive Products. If you want to check out the May - August Catalog click on that catalog below. If you want a paper copy, please contact me to get yours!
Check out:
Online Exclusives
May - August Catalog - Contact me to get yours!
Subscribe to my My YouTube paper crafting video channel
Follow me on Pinterest
Follow me on Facebook every week for Stampin' Tell Tuesday
Shop my Online Store