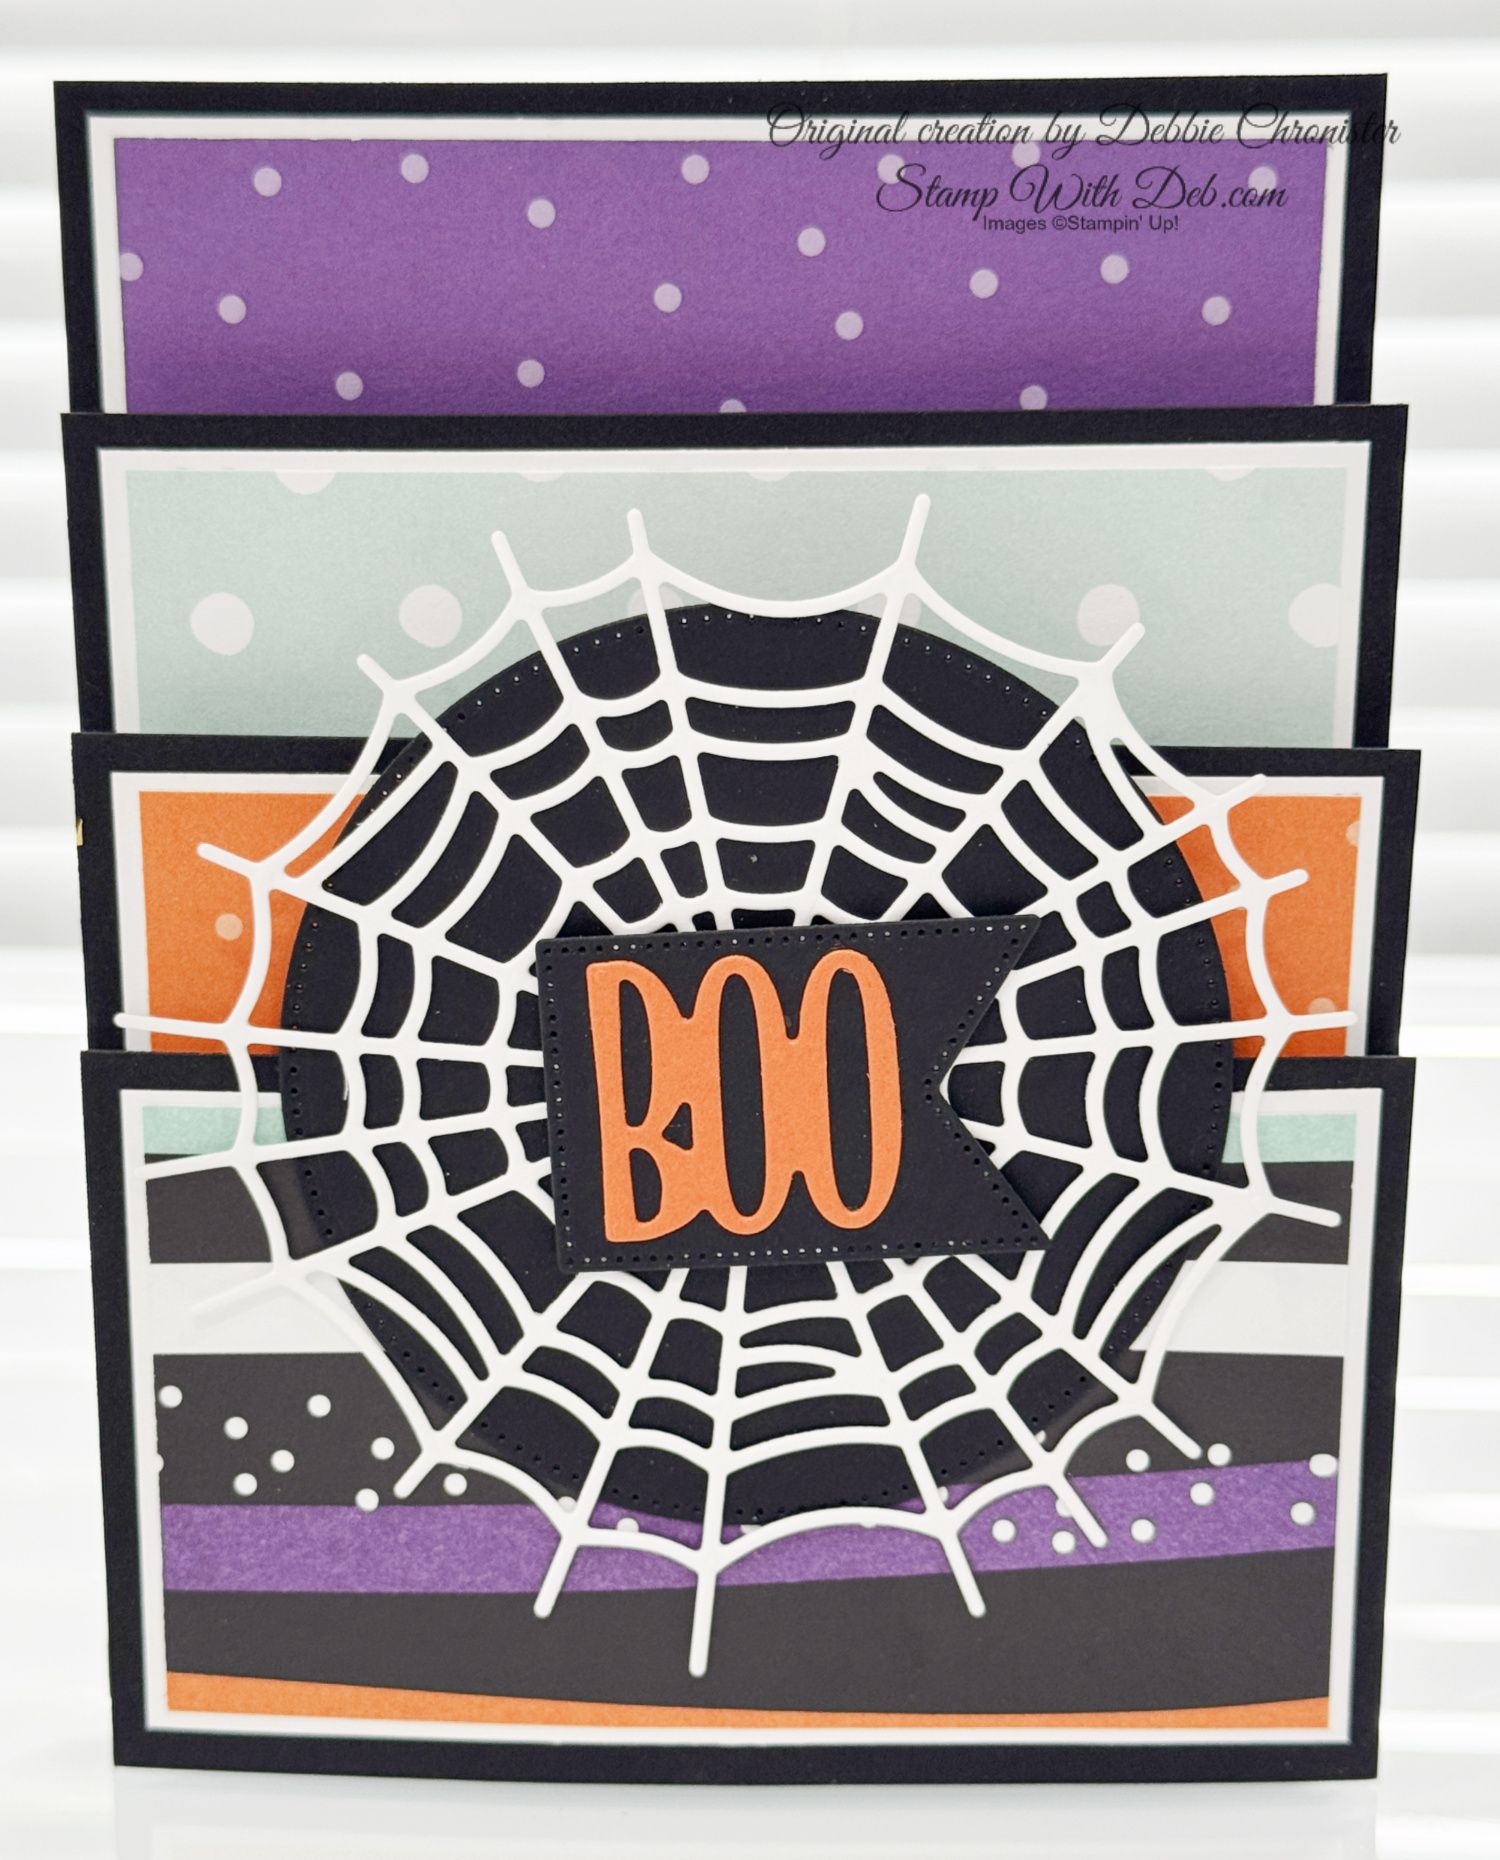

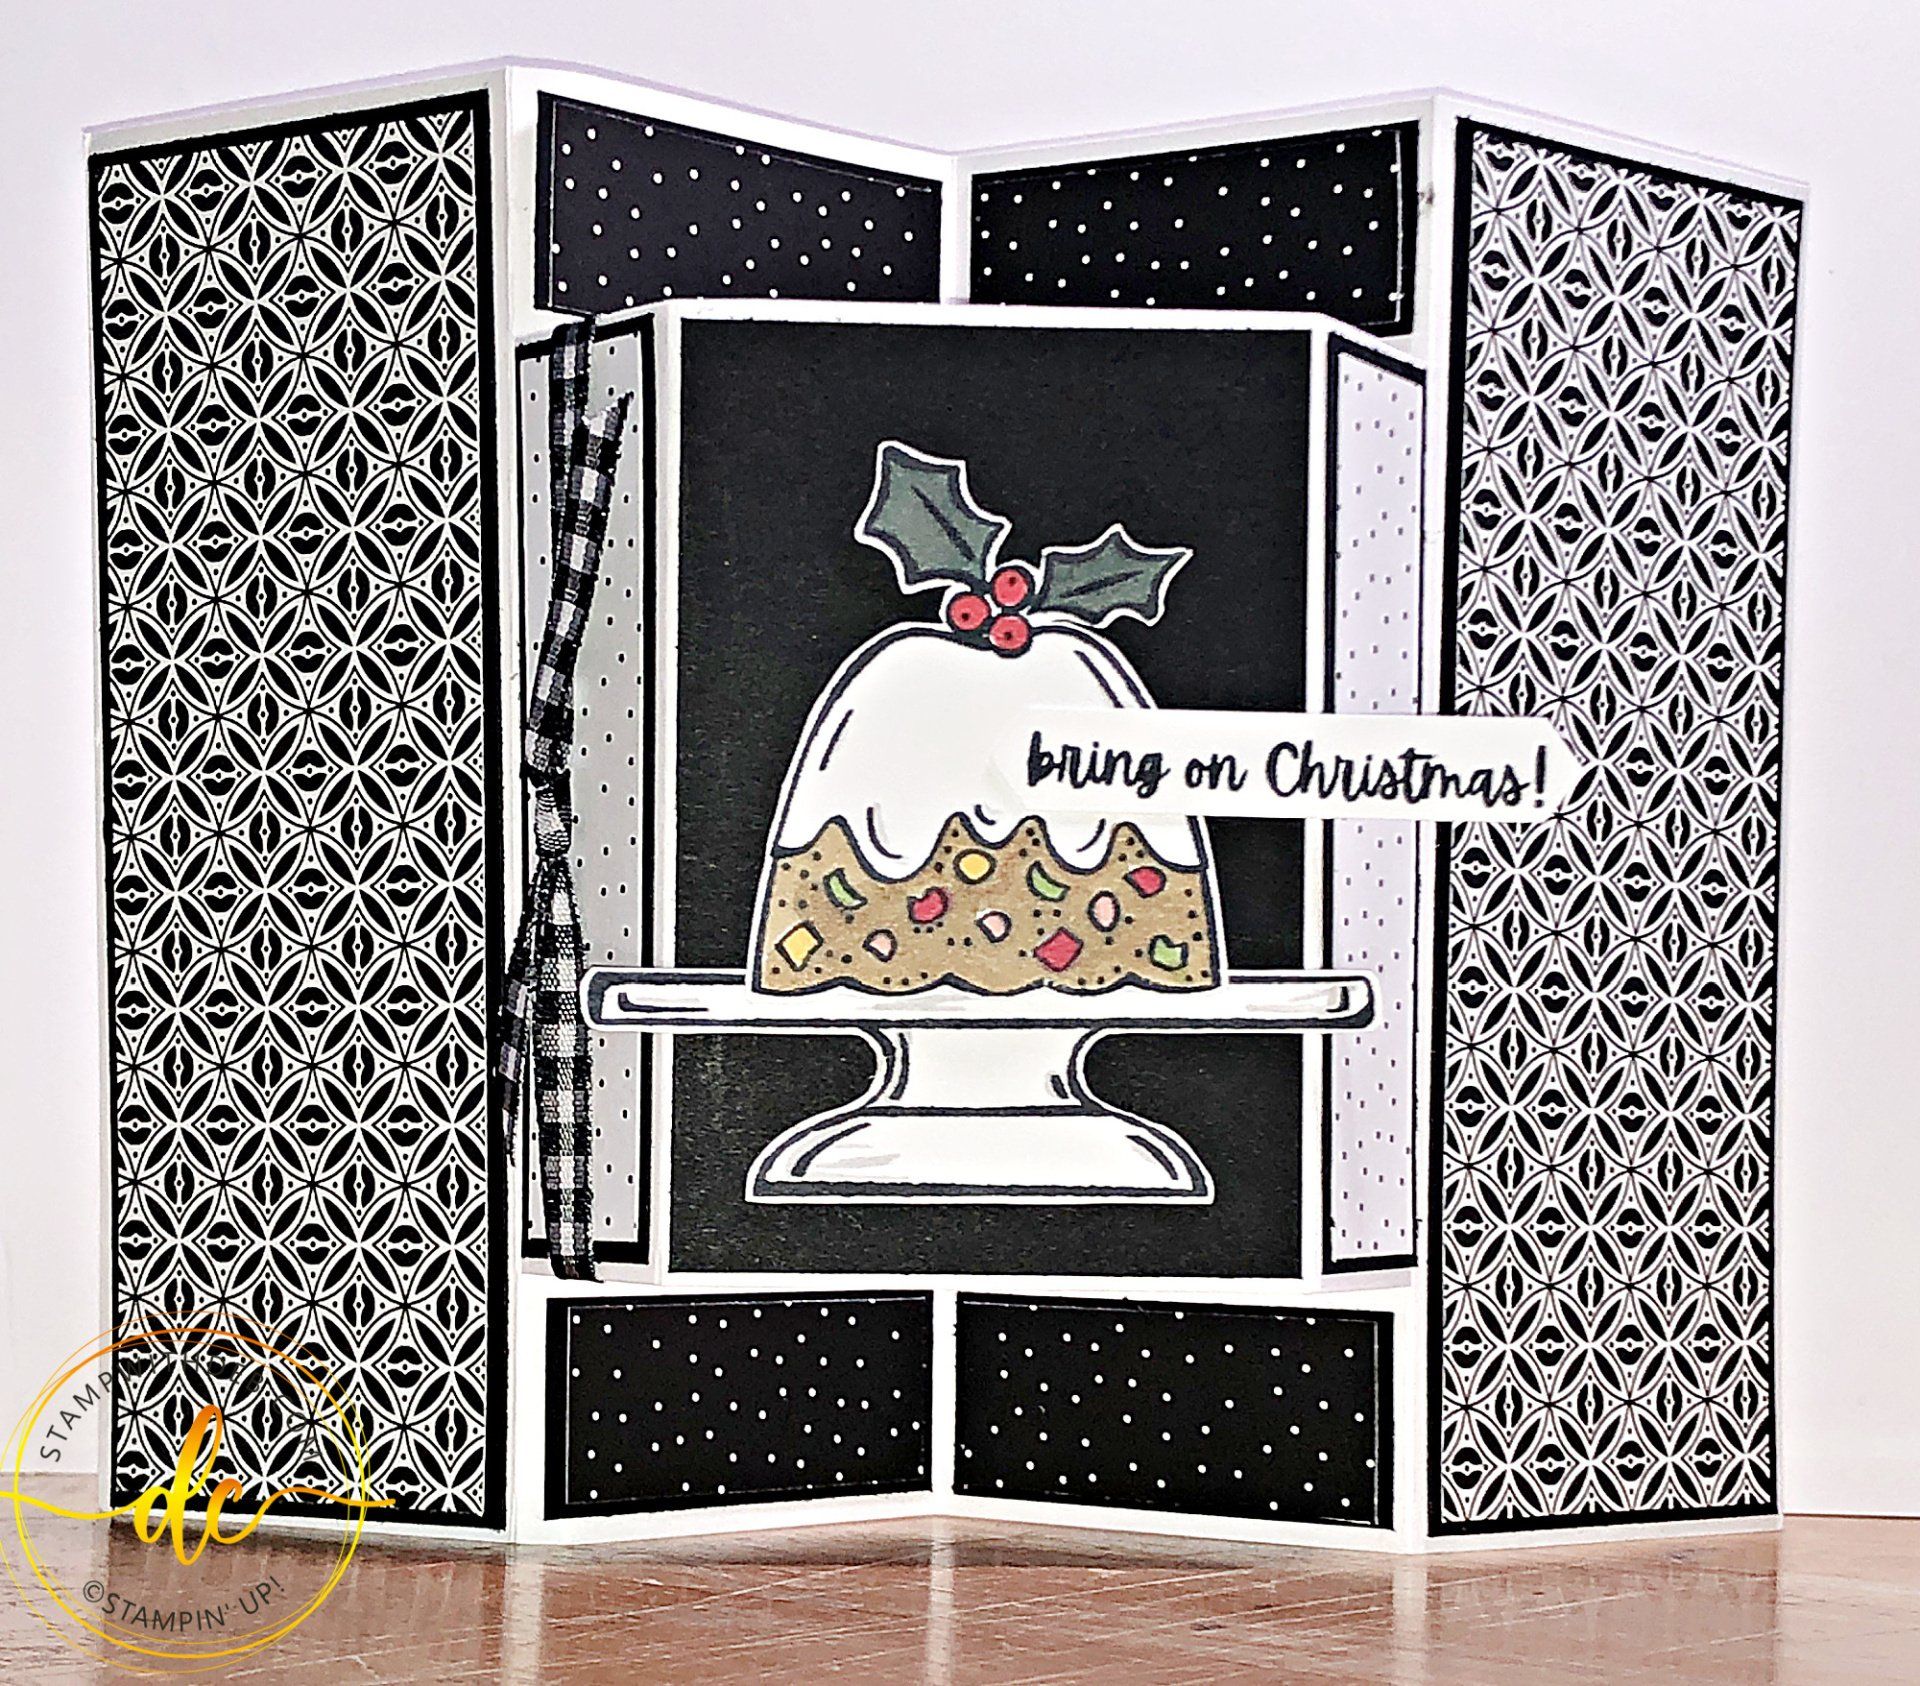
SWEETS & TREATS FUN FOLD CARD
I remember doing this card years, I mean a lot of years, ago and it seemed like it was such a hard layout. It is really easy as long as you have a Stampin' Up! Paper Trimmer with a nice sharp cutting blade.
For those who are weak at measuring, just go as close as you can. It is really easy to know where the 16th of an inch is on the Stampin' Up! Paper trimmer, just count the little lines, or divide. So if I am looking for 13/16, I know that there are 4, sixteenths in each quarter of an inch, so it is the little line just past 3/4. 13 divided by 4 is 3 (3/4) with one left over. Sounds really simple now. Check out my video below for help on the measuring.
I love this stamp set Sweets & Treats! It is perfect for the holidays and birthdays. It also coordinates nicely with Measure of Love #154997
Measurements:
Cut 5 1/2 x 8 1/2 Basic White,
- With 8 1/2 side at top score at 2 1/8 from each end,
- Rotate so the 5 1/2" side is at the top, line up at 1" and cut between the two score lines
- Flip over and do the same thing on the other edge (line up at 1" and cut between the two score lines)
- Turn so 8 1/2" side is at the top, line up at 3 3/16, score between the cut lines
- Flip over and do the same thing (line up at 3 3/16, score between the cut lines)
- With 8 1/2" side at top, score at 4 1/4 from the top edge to the cut line
- With the 8 1/2 side at top, score at 4 1/4 from the bottom edge to the cut line
See how easy that was! just follow the steps
Card stock layers:
Cut (2) 2 x 5 3/8 Basic Black
Cut (4) 7/8 x 2 Basic Black
Cut (2) 15/16 x 3 3/8 Basic Black (15/16 is the little line just before the 1" mark on the cutter)
Cut (1) 2 x 3 3/8 Basic Black
Designer Series Paper layers:
Cut (2) 1 7/8 x 5 1/4
Cut (4) 3/4 x 1 7/8
Cut (2) 13/16 x 3 1/4 (remember 13/16 is the little line just after 3/4" on the cutter)
Scrap of Basic White for the image. I used Smoky Slate, Real Red, Granny Apple Green, Daffodil Delight, Evening Evergreen, Calypso Coral and Soft Suede Stampin' Blends to color the images,
Stamp the greeting in Tuxedo Black and punched with the retired Classic Label Punch
Are you about to hit that $99 mark on your order (before shipping and tax)? If so, why not consider joining my team? As a member, you’ll enjoy $125 worth of products of your choice for only $99! Plus, you’ll snag a fantastic 20% discount on all your future purchases and a variety of exclusive perks from me and Stampin' Up! Dive into this exciting journey of paper crafting with us! For more information, check out my Join My Team page
We now have 3 catalogs each year, January - April, May - August, September - December. We no longer have an annual catalog. You will find all of the products in the catalogs online as well as Last Chance and Online Exclusive Products. If you want to check out the May - August Catalog click on that catalog below. If you want a paper copy, please contact me to get yours!
Check out:
Online Exclusives
May - August Catalog - Contact me to get yours!
Subscribe to my My YouTube paper crafting video channel
Follow me on Pinterest
Follow me on Facebook every week for Stampin' Tell Tuesday
Shop my Online Store