AN OLD EMBOSSING TECHNIQUE REVIVED

January 19, 2022

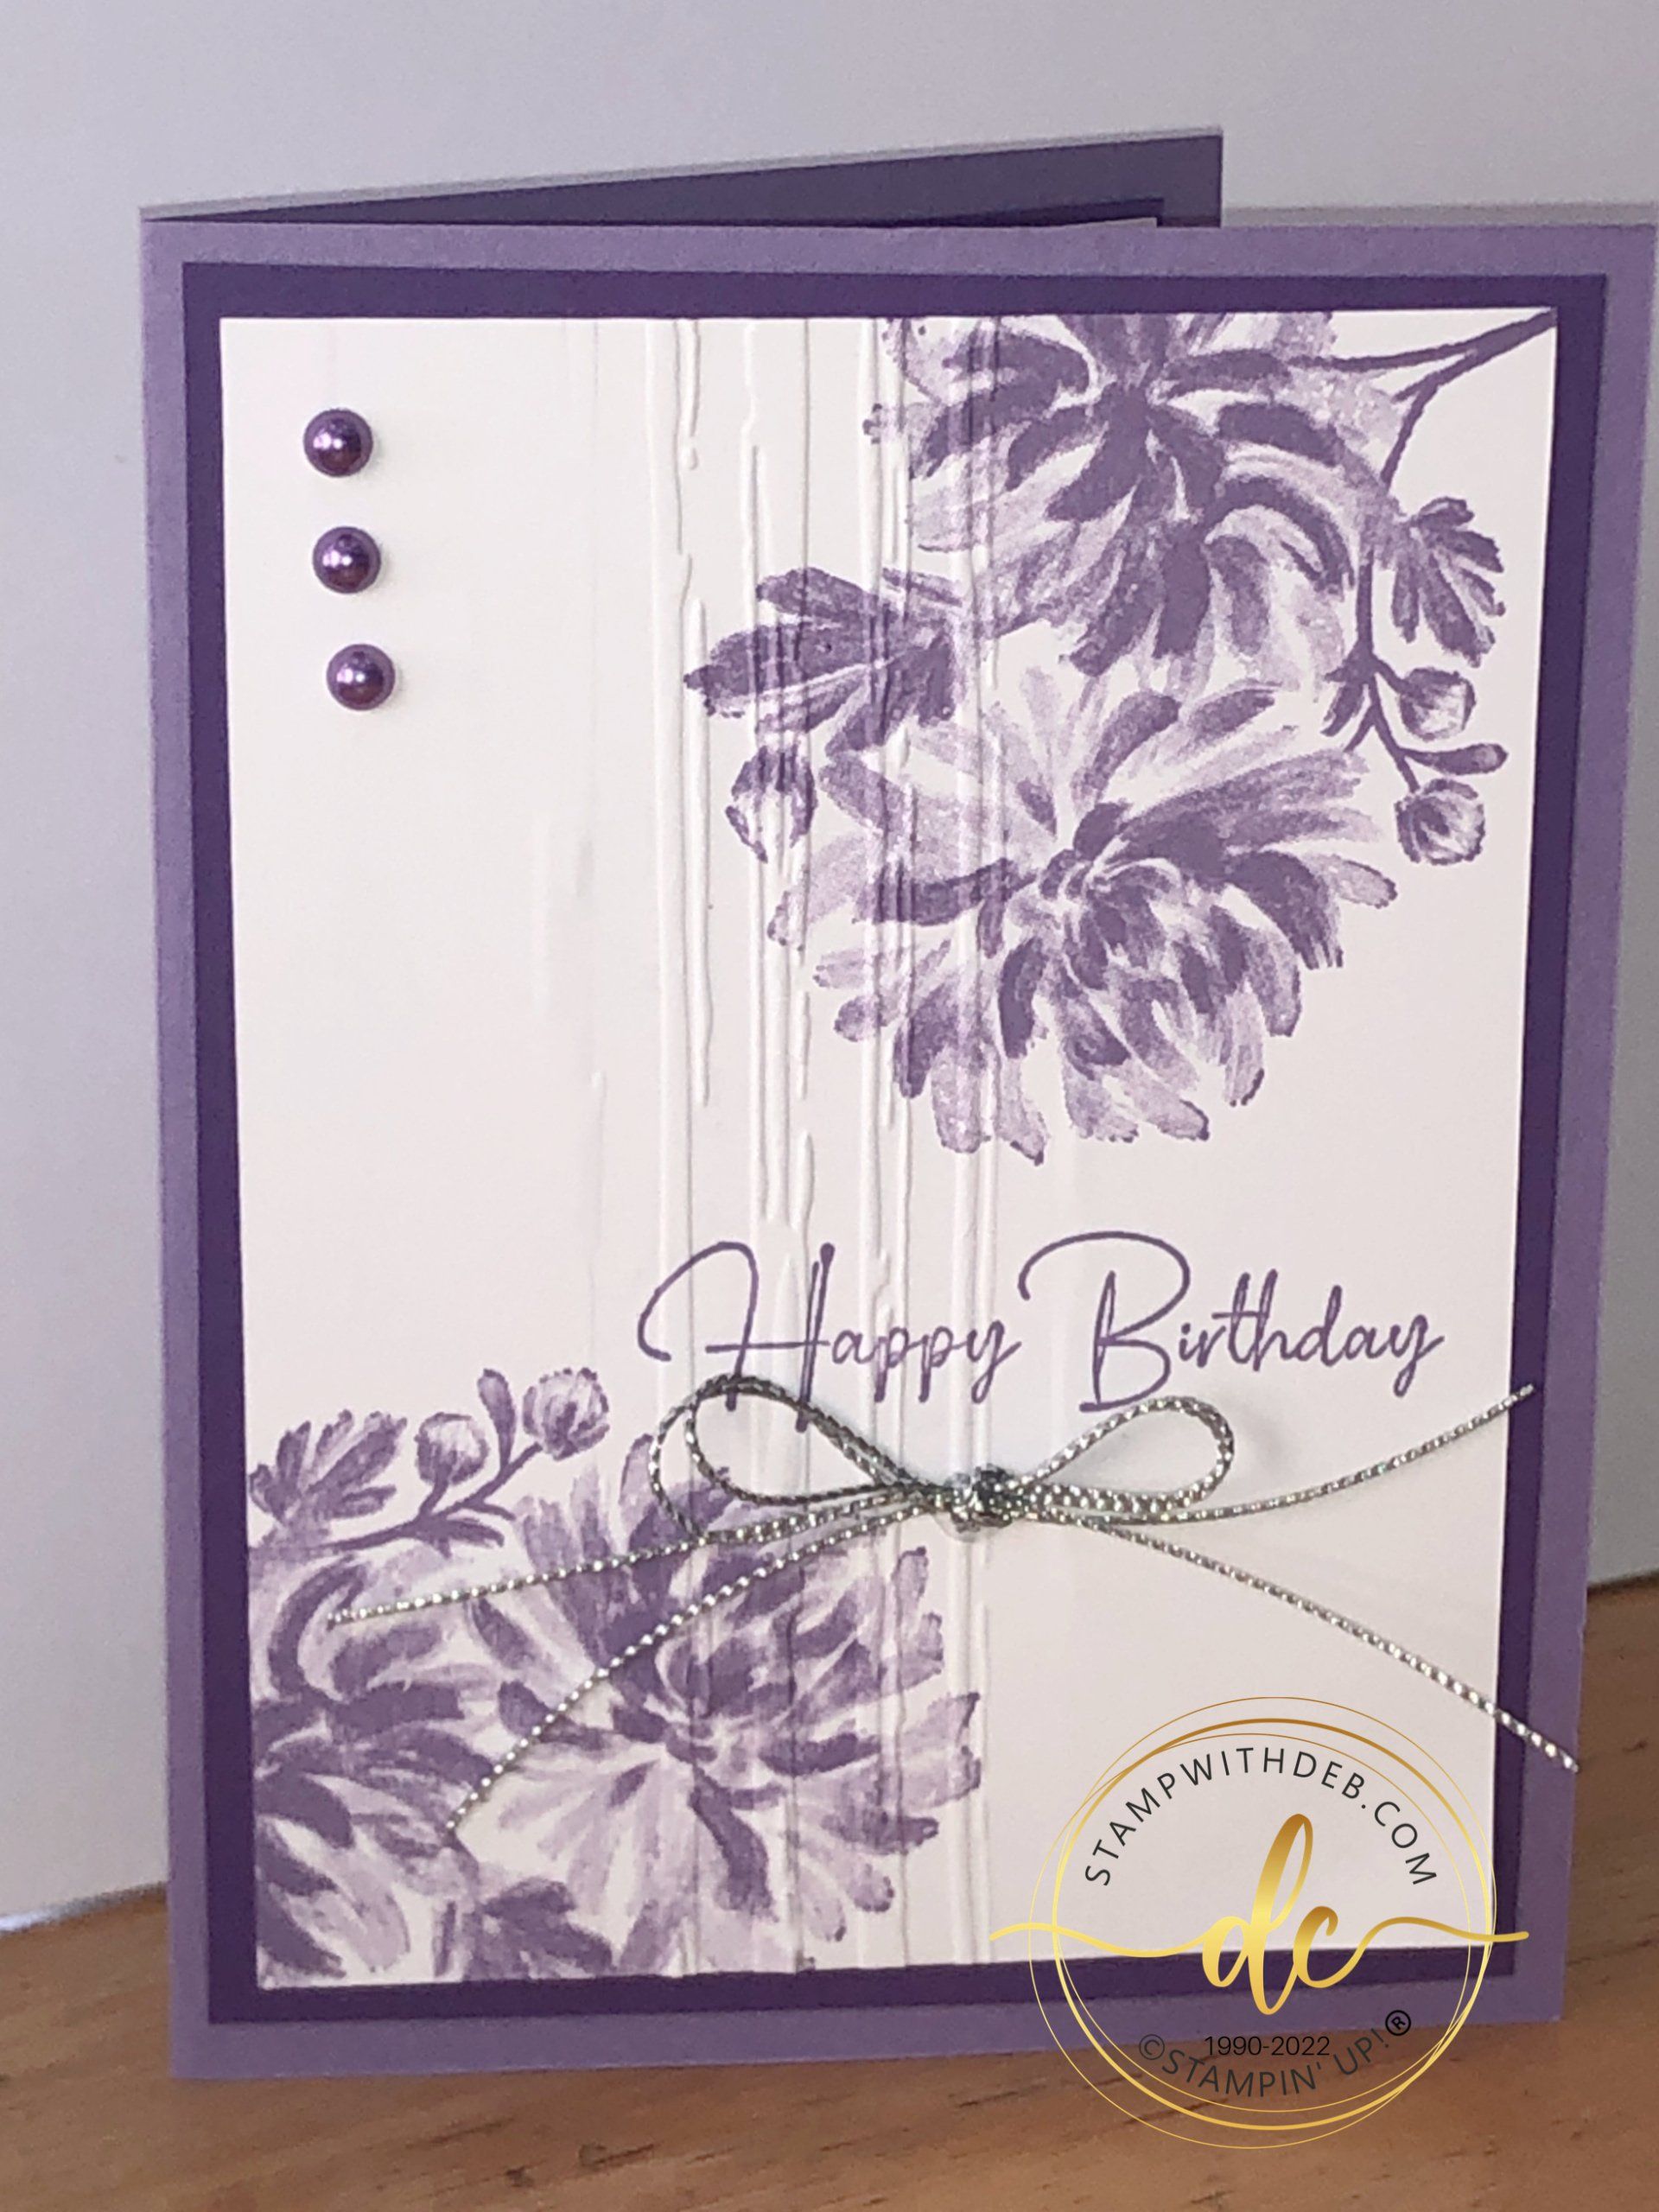
Do you remember long, long ago when we used to emboss and leave the circle in the center? We would punch out layers of the same circle then emboss with an embossing folder and hope the center wouldn't be embossed. Well this is the same technique only I wanted the embossing to be in the center of the page and not on the edges. I used the new Stripes & Splatters Embossing Folders.


A couple of weeks ago I did the same card but I used a different stamp set and I showed you how to score to achieve the lines down the center. Today I will show you how to used the embossing folder. I challenge you to try this technique and see what you can create!


Measurements:

Cut 5 1/2 x 8 1/2 Highland Heather, score at 4 1/4
Cut (2) 4 x 5 1/4 Gorgeous Grape
Cut (2) 3 7/8 x 5 1/8 Basic White


To create the shim you will need 5 1/2 x 8 Basic White, score at 1" keep in mind that you can change that to be more or less based on how wide you want the embossing. Also keep in mind that each embossing machine is different. It should go through your machine easily but it should have pressure or you won't emboss. Be careful and try it. DO NOT FORCE IT THROUGH THE MACHINE!!! You can remove one section at a time until you reach what is perfect for your machine.

Supplies

Is your order going to total over $99 (before shipping & tax? You may want to consider signing up for my team

where you will get $125 in products of your choice for $99! As a member of my team you will receive a 20% discount on all your purchases as well as many other perks from me and from Stampin' Up! for more information check out Join My Team!


Check out the  2024-25 ANNUAL CATALOG

May - April Annual Catalog releases May 6, 2025. Contact me to get yours!

Subscribe to my My YouTube paper crafting video channel
Follow me on
Pinterest

Follow me on Facebook every week for Stampin' Tell Tuesday
Shop my
Online Store

916-420-0562

Email Me

By Debbie Chronister April 29, 2025
My favorite part of my job is creating. It doesn't always come easy but this month's Paper Pumpkin kit contained beautiful Alcohol Ink papers. The papers were so beautiful and the kit included nine card bases which had the design on the front and back of the card. When cutting them apart you were able to create 18 card fronts. I started designing by cutting them apart and then went from there. Throughout the week I will post 3 cards each day for seven days that were all made with April 2025 Paper Pumpkin Inked Occasions
By Debbie Chronister April 28, 2025
This shows 3 alternatives to the April 2025 Paper Pumpkin Kit projects
By Debbie Chronister April 27, 2025
My favorite part of my job is creating. It doesn't always come easy but this month's Paper Pumpkin kit contained beautiful Alcohol Ink papers. The papers were so beautiful and the kit included Nine card bases which had the design on the front and back of the card. When cutting them apart you were able to create 18 card fronts. I started designing by cutting them apart and then went from there. Throughout the week I will post 3 cards each day for seven days that were all made with April 2025 Paper Pumpkin Inked Occasions
By Debbie Chronister April 16, 2025
This is the final card in a series from the Impressions Abloom. If you have not see the others check my blog. This is the first one I created using Timid Tiger but for my Facebook Live I wanted to use the new In Colors.
By Debbie Chronister April 15, 2025
All this week I will be posting cards created with products remaining from my recent event. This card was inspired by the card below that I created for that event. I had a focus on creating masculine cards and when I was done with the event I had a set of the undone cards remaining. I had received the New Impressions Abloom which is only available if you are a Demonstrator until May 1, 2025. After that date it will be available to anyone. I used the products that were in the packet to create this card. Of course I added a few extra things. I will give you all the instructions on the page including measurements and products used for both projects
By Debbie Chronister April 14, 2025
All this week I will be posting cards created with products remaining from my recent event. This card was inspired by the card below that I created for that event. I had a focus on creating masculine cards and when I was done with the event I had a set of the undone cards remaining. I had received the New Impressions Abloom which is only available if you are a Demonstrator until May 1, 2025. After that date it will be available to anyone. I used the products that were in the packet to create this card. Of course I added a few extra things. I will give you all the instructions on the page including measurements and products used for both projects
Show More