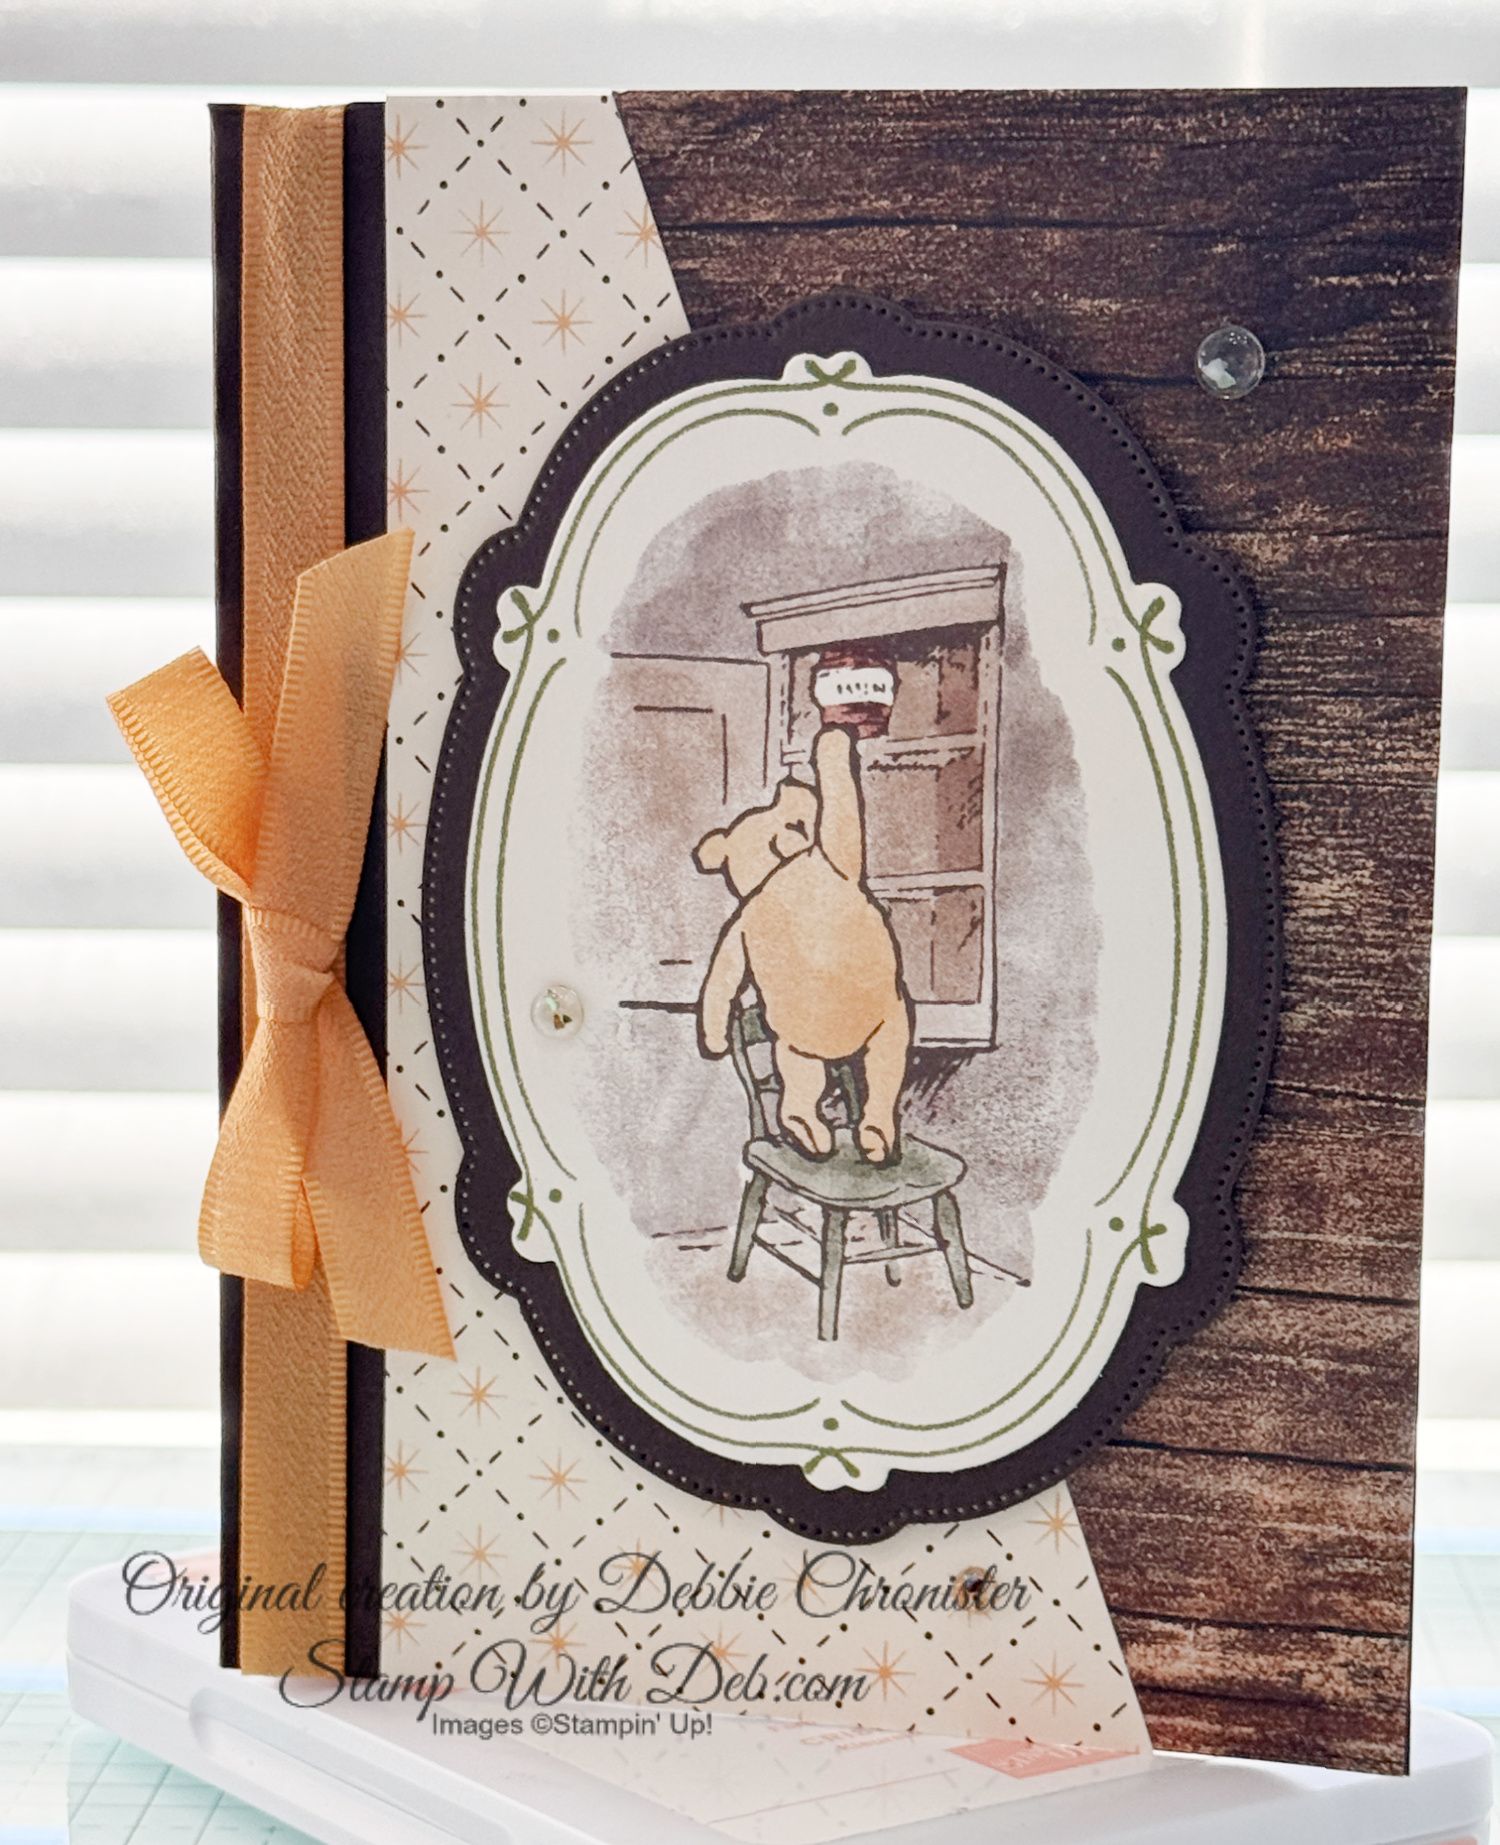

Charming Cafe
I am lucky to have a friend like you

When I look at this card it reminds me of how lucky I am to have so many wonderful friends. Stampin’ Up! has done that for me. I have made so many new friends through classes, clubs and other events that I would not have met if I wasn’t a Stampin’ Up! Demonstrator. I am so thankful for those wonderful friends.
This is made with the new Charming Cafe Bundle from the Occasions Catalog. If you don't have one yet please contact me and I will send you one!
Start with 8 ½ x 11 Blushing Bride. Place the 11” side at the top of the Stampin' Trimmer and the left edge of the paper at 5 ½” and score. Rotate so the 8 ½” side is at the top and score at 4 ¼”.

Lay the paper with the 11" side at the top and put an x on the top left corner.

That is the section you are going to cut out. Put your cardstock in the Stampin’ Trimmer with the 11" side at the top and position the left edge at 5 ½”, cut from the top to the 4 ¼ mark. Then turn the cardstock so the 8 1/2" side is at the top position the left edge of the paper at the 4 3/16” mark and cut to 5 ½”. This should cut that corner out. Note: You are cutting it 1/16” shorter than the normal 4 ¼ so that when this side folds in it won’t catch on the top that folds down .

Use the die from the Charming Cafe Bundle to cut out the front opening in the card. Be sure to position the flower edge on the top and bottom. You don't want to cut all the way through the card so refold the card so that the left edge it tucked under the back flap of the card and the front will go through first.

The next step is to cut the opening in the left flap. Use the card front to determine the position. It should be in the opening and you should not see any of the edge of the die when you look straight through. Use Washi Tape or a removable tape to hold the die in position. Fold the flaps so that there isn't anything under the flap that you are cutting.

Now everything is cut from the card base. It should look like this!

The rest is easy! Stamp the flowers and die cut . Stamp the chairs and table and die cut . I used light Crumb Cake, light Pink Pirouette, light Calypso Coral and light Old Olive Stampin' Blends.

Finish off a piece of Whisper White 4 1/4 x 5 1/2 and attach it to the back inside of the card. Cut two strips of DSP from Sweet Soiree Designer paper cut to 4 1/4 x 1 and adhere them to the right and left on the front of the card. Cut (2) 1/4 x 4 1/4 Whisper White to frame the Center area Tie a bow and adhere it with a glue dot to the top left Whisper White strip. Attach the colored flowers and the chairs and tables to the card base in the placed indicated. The most difficult part of this card was stamping the greeting. If you can do it through the hole in the front that would be the best. It is a close fit. If I did it over I might use a smaller greeting.

Thank you for joining me today for this tutorial. I think a video might be easier than all the photographing and text. So next time I will probably be back to doing videos. I just have to get a good setup for them and invest in some lighting. I just wanted to try this for a change and see how much work it is. Have fun doing this sweet card. I love the way it came out. Once you have done one it really is very easy. Below are all of the products I used to make this cute card! To shop for any of these or other products click on any of the pictures below or the "Shop" button.
Happy Stamping!!
Are you about to hit that $99 mark on your order (before shipping and tax)? If so, why not consider joining my team? As a member, you’ll enjoy $125 worth of products of your choice for only $99! Plus, you’ll snag a fantastic 20% discount on all your future purchases and a variety of exclusive perks from me and Stampin' Up! Dive into this exciting journey of paper crafting with us! For more information, check out my Join My Team page
We now have 3 catalogs each year, January - April, May - August, September - December. We no longer have an annual catalog. You will find all of the products in the catalogs online as well as Last Chance and Online Exclusive Products. If you want to check out the May - August Catalog click on that catalog below. If you want a paper copy, please contact me to get yours!
Check out:
Online Exclusives
May - August Catalog - Contact me to get yours!
Subscribe to my My YouTube paper crafting video channel
Follow me on Pinterest
Follow me on Facebook every week for Stampin' Tell Tuesday
Shop my Online Store