COLOR BLOCKING #3
TECHNIQUE #3 FOR COLOR BLOCKING
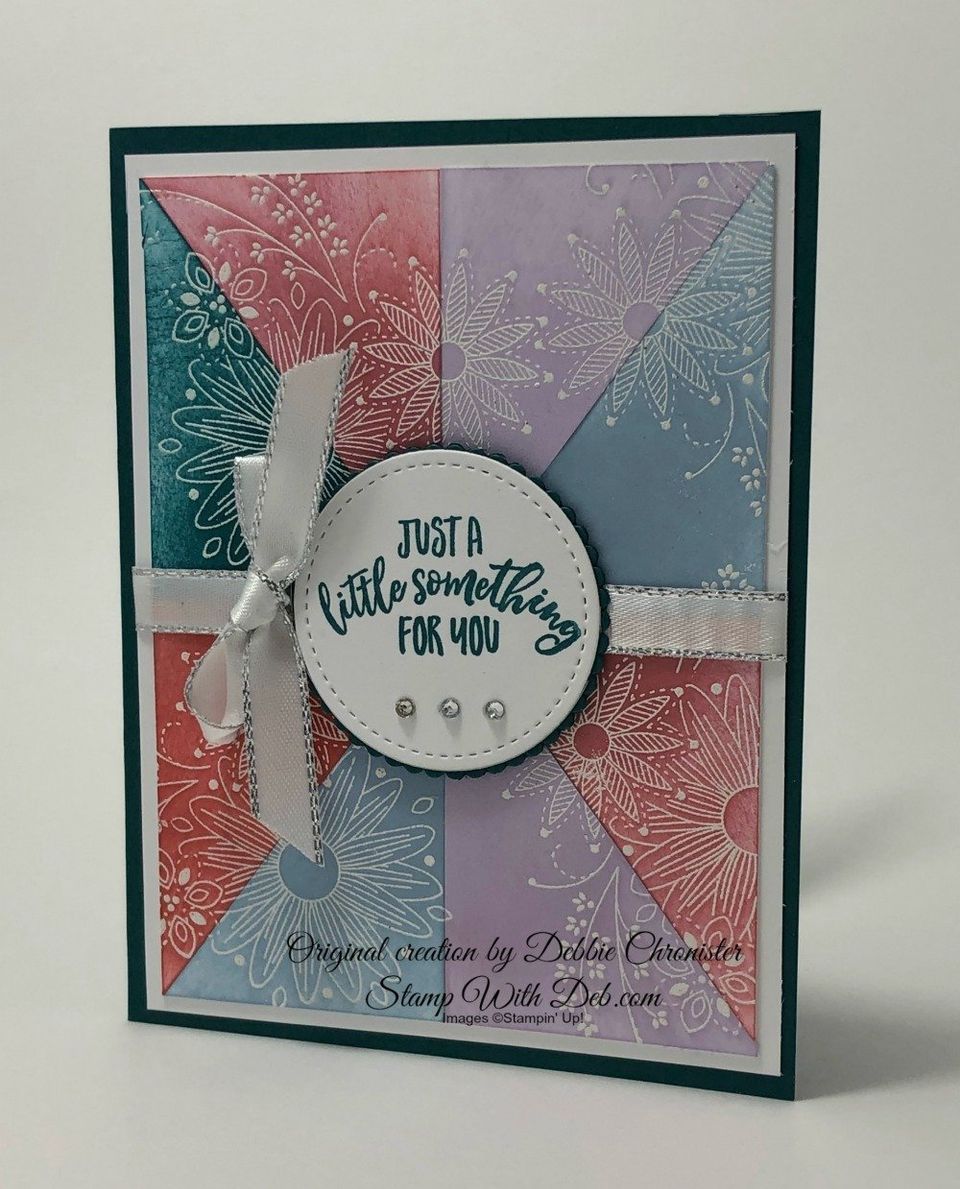
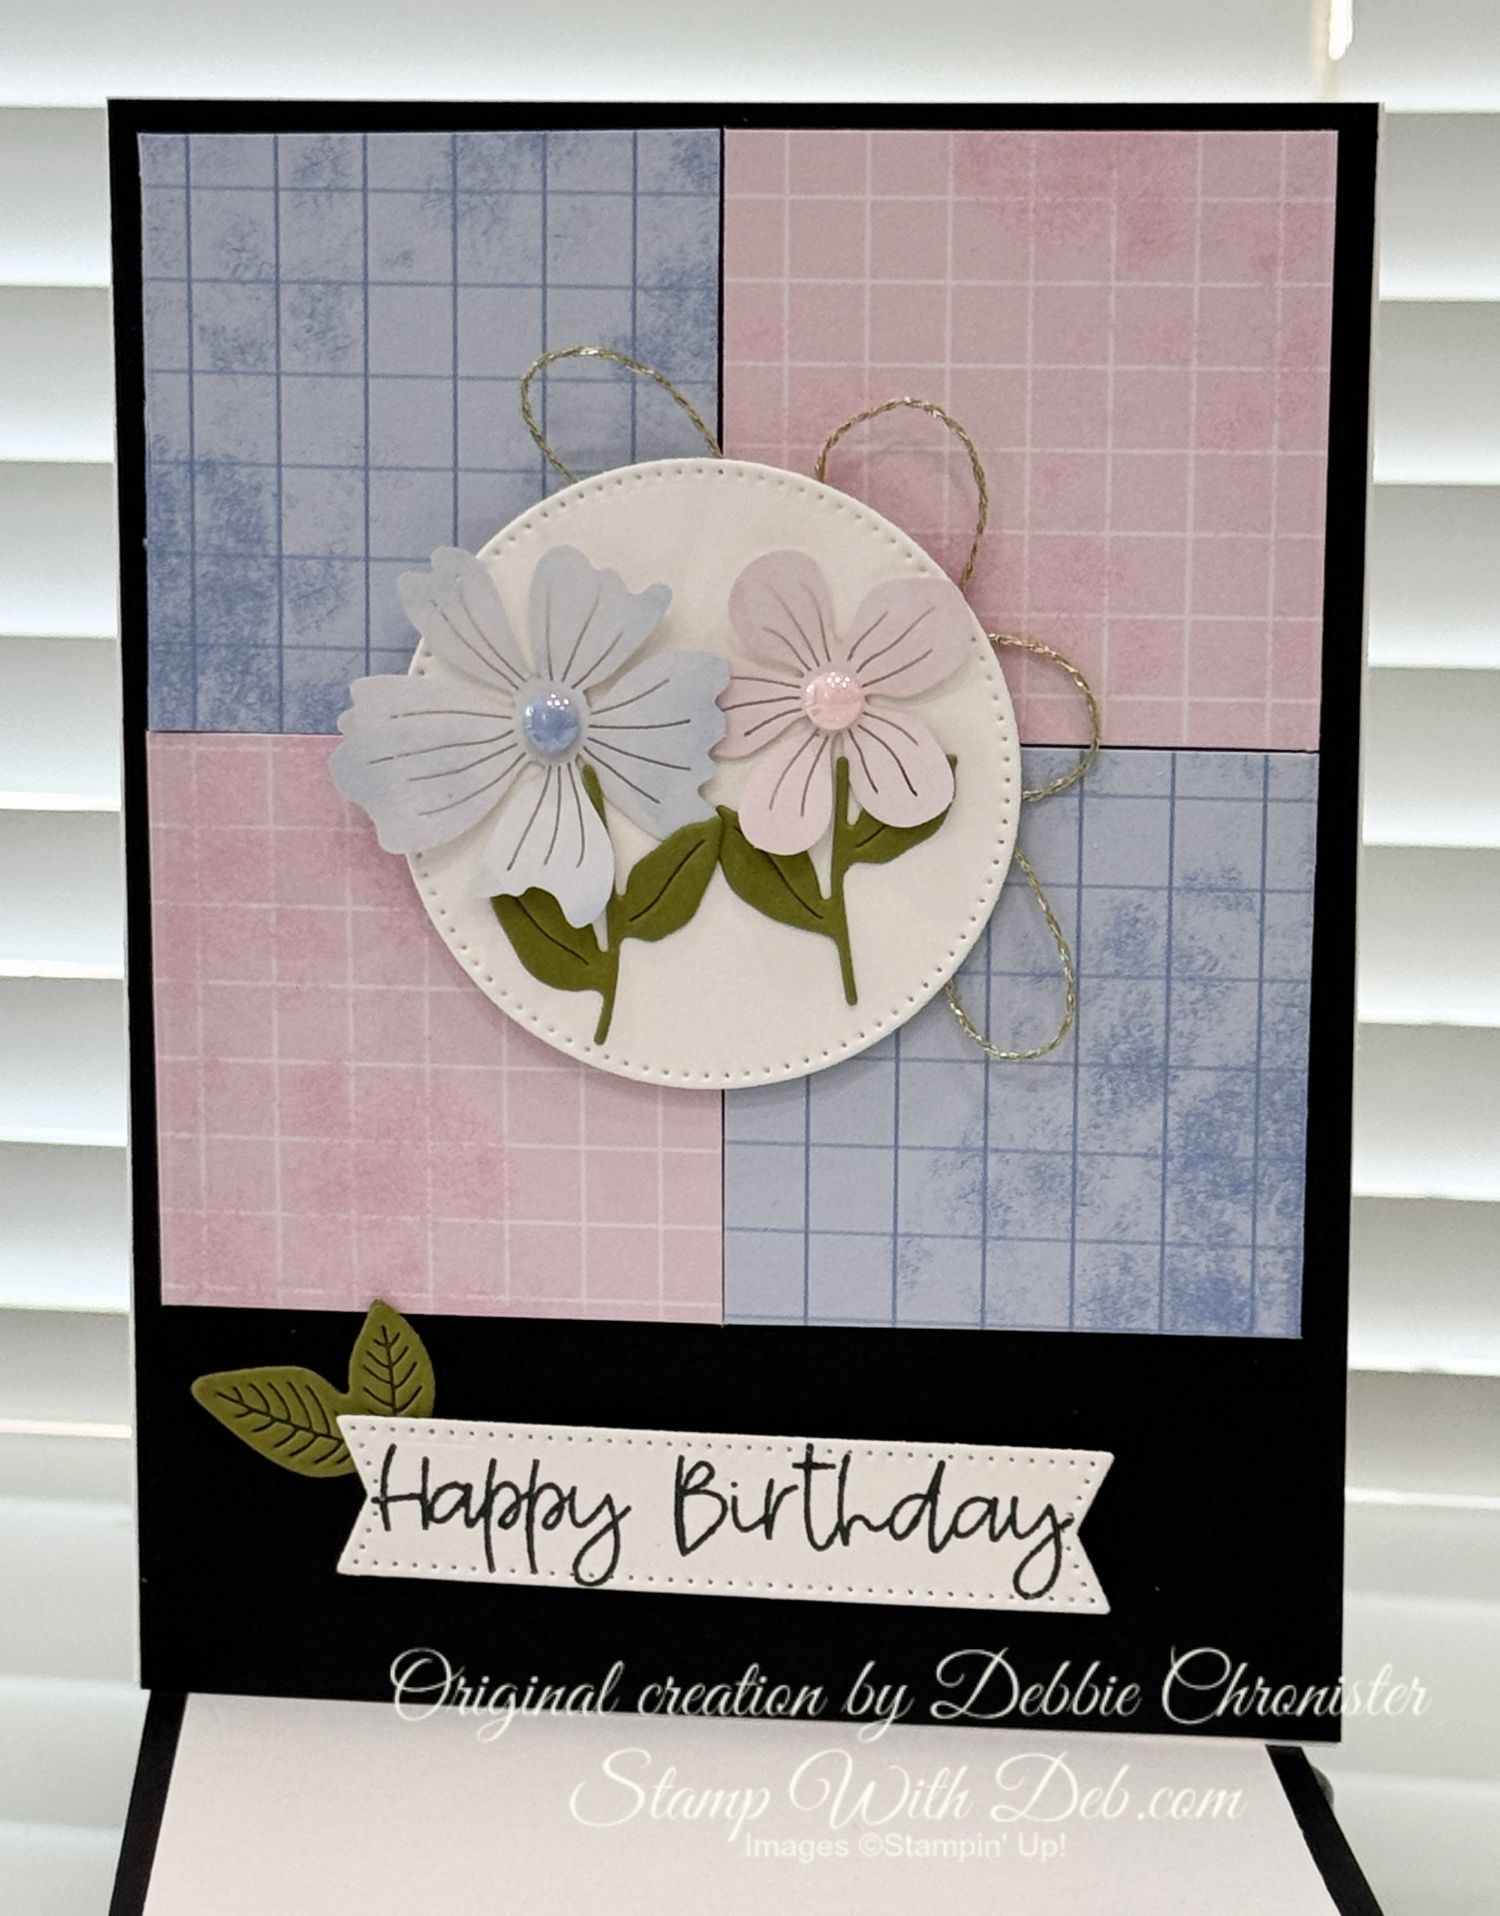
This technique is the most unique of the whole group. Instead of taping off the sections you will cut them apart. There are a few tricks. You will draw or stamp a small image (circle) on the back to be sure that you get them back together correctly. If you are doing them all in different colors and you don't care what goes next to what then this is not necessary. If you want a certain pattern then this will help you get them back together with all the flowers in tact. Just be sure to follow my instructions carefully.
STAMPS:
A Little Lace #149364
Delightful Day #149466
PAPERS:
Whisper White—5 1/4 x 4, (2) 5 x 3 3/4, scrap for greeting
Pretty Peacock—8 1/2 x 5 1/2, scrap for greeting layering
ACCESSORIES:
Whisper White Embossing Powder, Sponges, Heat Tool, Post It Note (small) Rhinestones, Metallic Edge Silver Ribbon, Paper Trimmer, Stitched Shapes Dies, Layering Circle Dies
INKS:
2019-20 In Colors—Purple Posy, Seaside Spray, Pretty Peacock, Terracotta Tile, Rococo Rose and VersaMark
INSTRUCTIONS:
- Stamp the image in various places on the 5 x 3 3/4 Whisper White with Versa Mark and emboss with Whisper White Embossing powder
- Turn the paper over and stamp or draw a circle in the center of the paper. It should be about 3/4 inch at least. This will be a guide.
- Cut it in half both horizontally and vertically. Lay this out so that you know how you stamped it
- This is where you will find the circle on the back helpful. Cut each quarter in half again this time diagonally -from the center to the outside corner of each rectangle
- Sponge each triangle with a different color
- Adhere the triangles to the other 5 x 3 3/4 Whisper White
- Cut 1 7/8” circle from Whisper White using the Stitched Shapes Dies & stamp the greeting in Pretty Peacock
- Cut the 2” Scallop Circle from Layering Circle Dies
- Attach the greeting with a dimensional
- Wrap the ribbon around the top two layers before attaching to the card base
- Add the bow and rhinestones
If you would like to order any of the products I used to create these projects or any other. Please click on the shop link or the photos below and it will take you to my website which is open 24/7.
DOWNLOAD TECHNIQUE # 3 COLOR BLOCKING
Thank you for supporting me as a small business owner.
Are you about to hit that $99 mark on your order (before shipping and tax)? If so, why not consider joining my team? As a member, you’ll enjoy $125 worth of products of your choice for only $99! Plus, you’ll snag a fantastic 20% discount on all your future purchases and a variety of exclusive perks from me and Stampin' Up! Dive into this exciting journey of paper crafting with us! For more information, check out my Join My Team page
We now have 3 catalogs each year, January - April, May - August, September - December. We no longer have an annual catalog. You will find all of the products in the catalogs online as well as Last Chance and Online Exclusive Products. If you want to check out the May - August Catalog click on that catalog below. If you want a paper copy, please contact me to get yours!
Check out:
Online Exclusives
May - August Catalog - Contact me to get yours!
Subscribe to my My YouTube paper crafting video channel
Follow me on Pinterest
Follow me on Facebook every week for Stampin' Tell Tuesday
Shop my Online Store