COLOR BLOCKING #4
THIS IS THE 4TH AND FINAL TECHNIQUE OF COLOR BLOCKING THAT I WILL BE SHOWING YOU. I AM SURE THERE ARE OTHERS BUT MOST OF THEM ARE BASED ON THE ONES I HAVE COVERED.
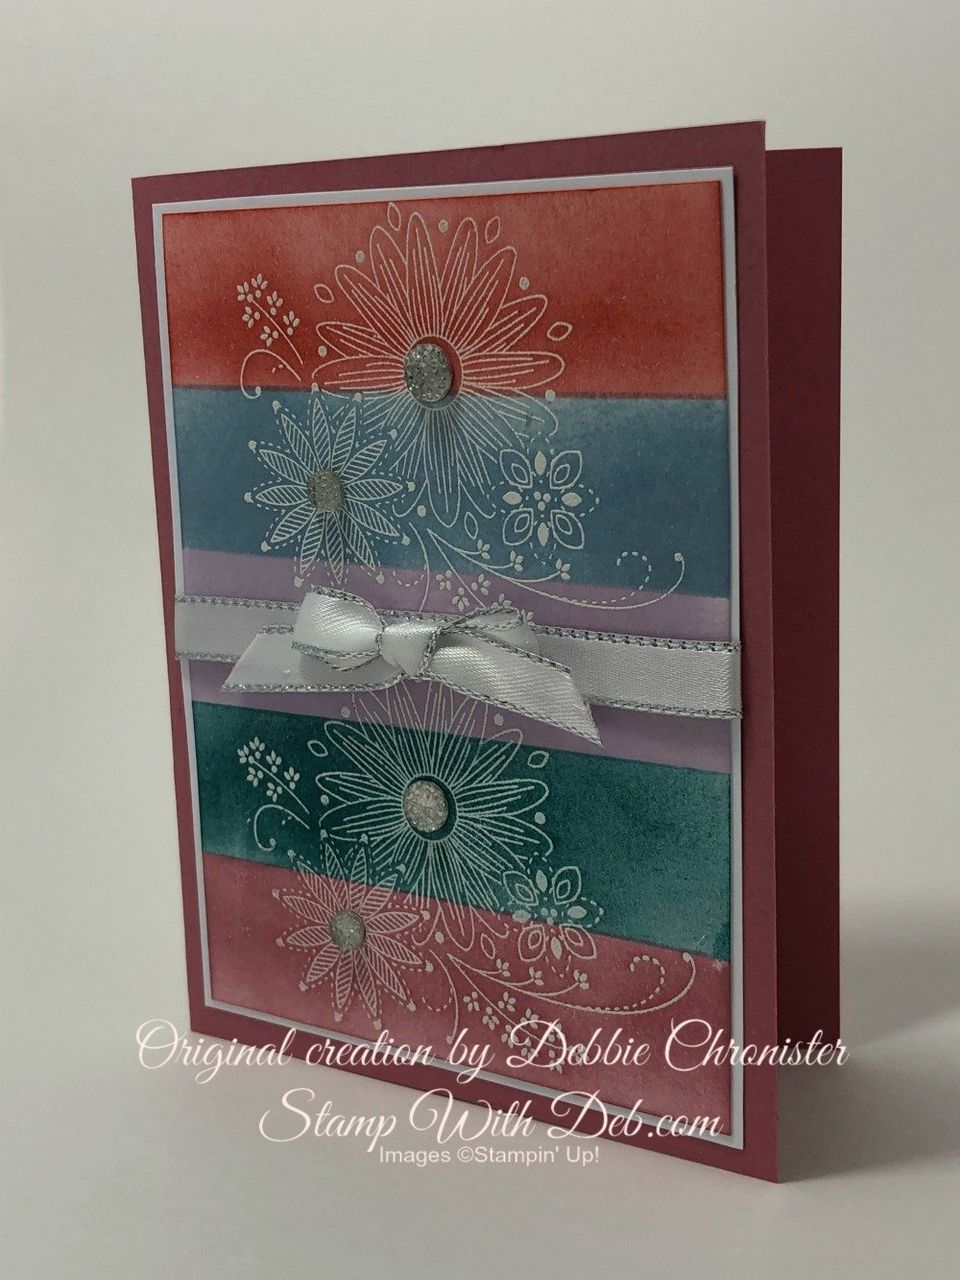
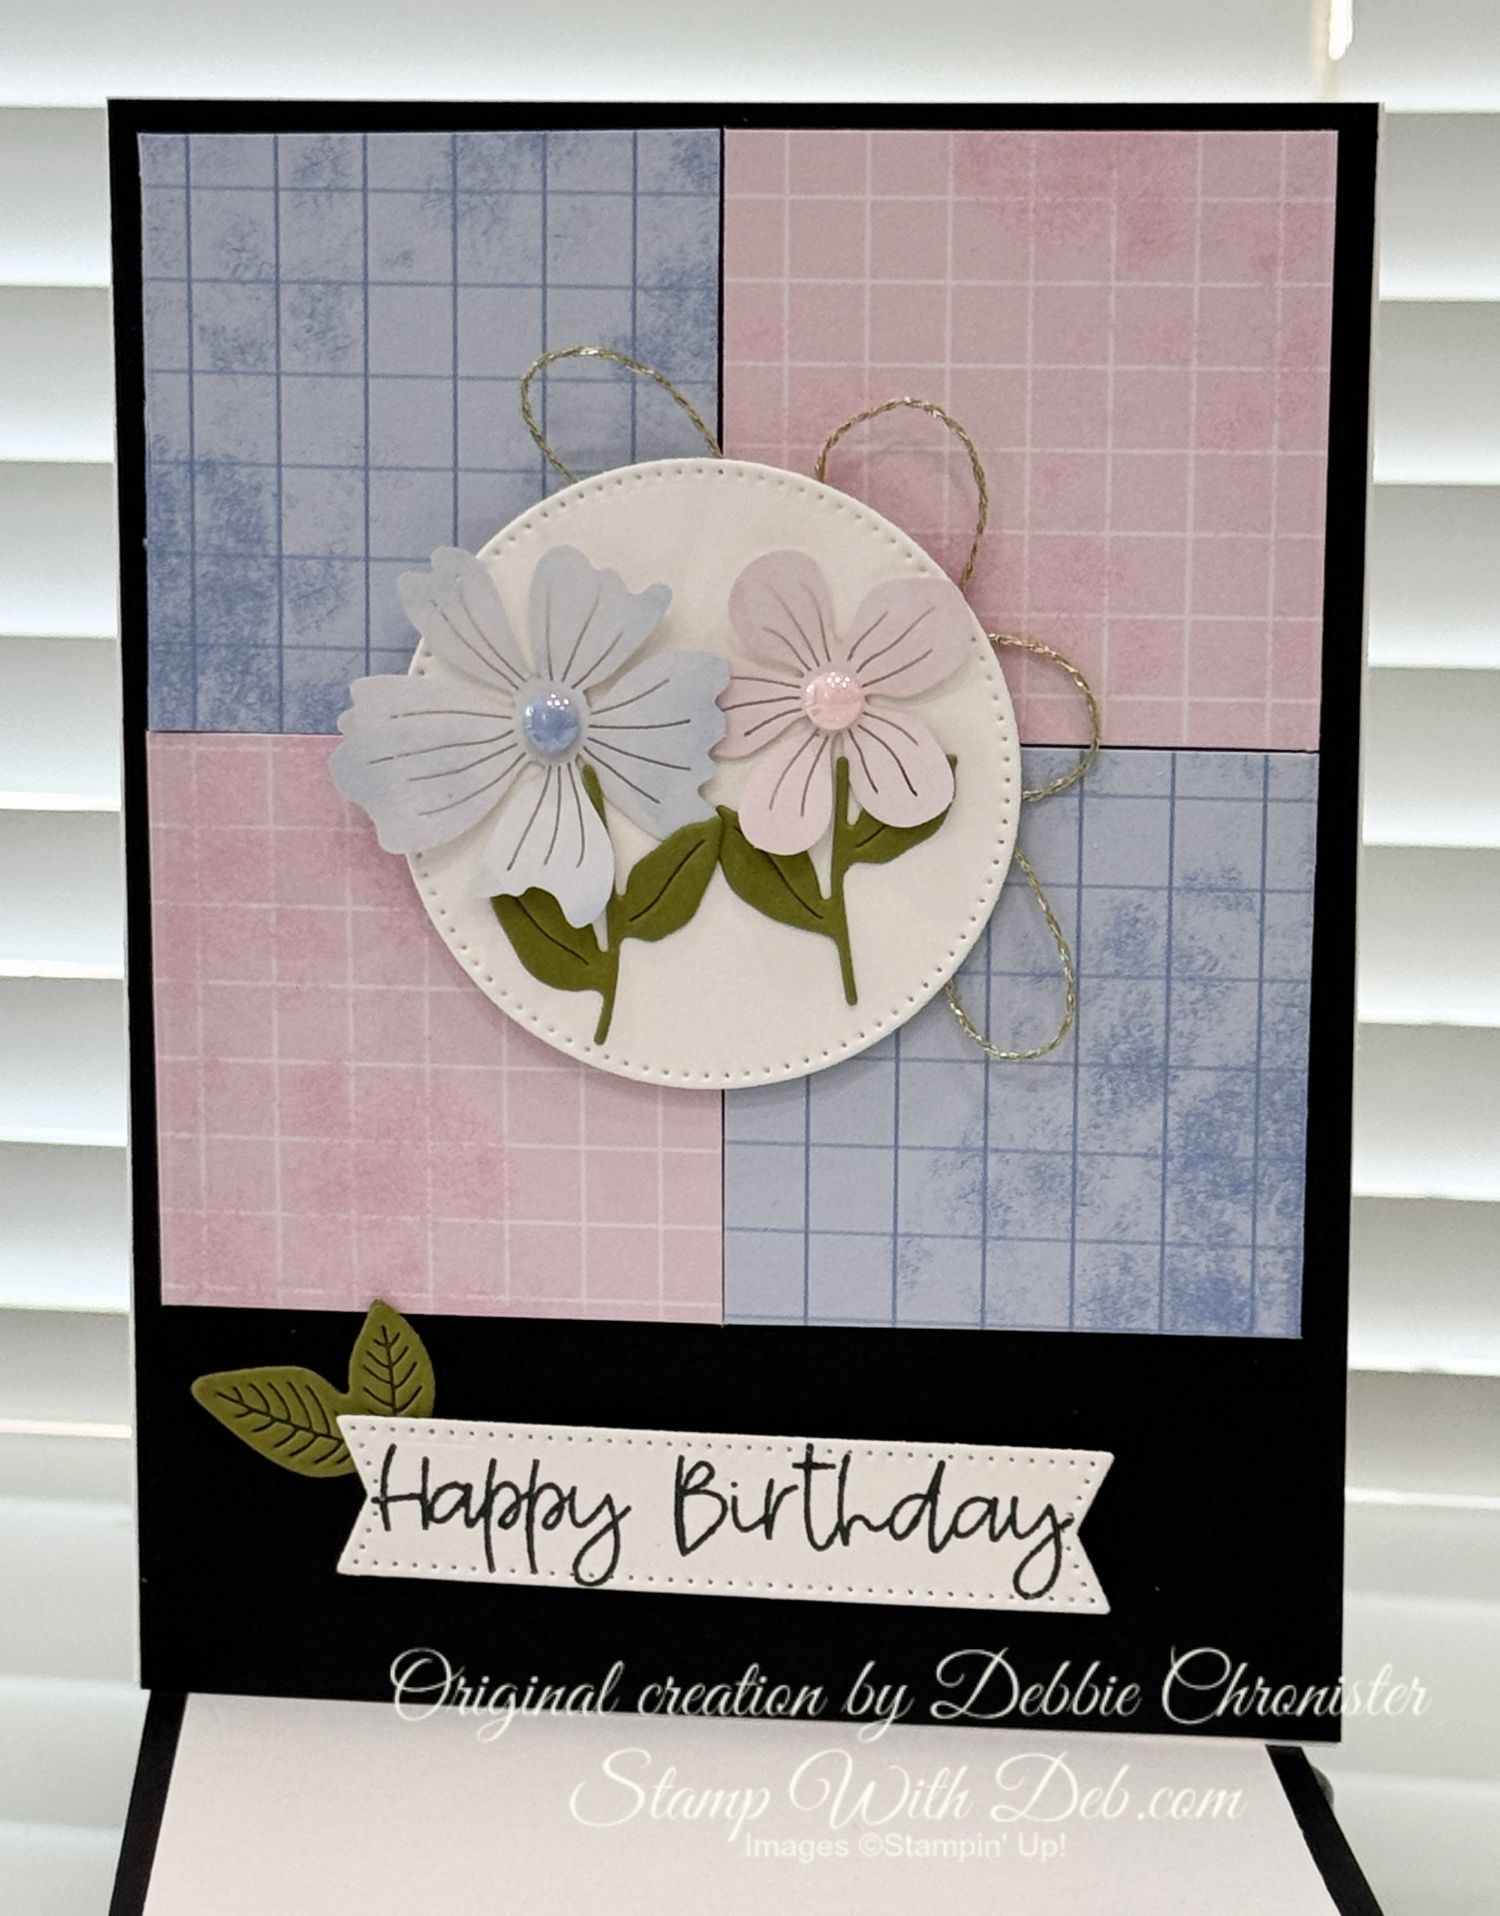
This techniques is much like the others. You are going to block off the areas that you don't want to have color. Be sure to leave a teeny tiny edge of the color, you are covering, showing when you put your tape on or you will end up with a white line between, unless that is the look you are going for. Sponge with a different color in each section. This technique is so versatile and could be done with any group of colors.
STAMPS:
A Little Lace #149364
PAPERS:
Whisper White—5 1/4 x 4, 5 x 3 3/4
Rococo Rose—8 1/2 x 5 1/2
ACCESSORIES:
Whisper White Embossing Powder, Sponges, Heat Tool, Post It Note or Masking Tape, Faceted Gems, Metallic Edge Silver Ribbon
INKS:
2019-20 In Colors—Purple Posy, Seaside Spray, Pretty Peacock, Terracotta Tile, Rococo Rose and VersaMark
INSTRUCTIONS:
- Stamp the image at the top and bottom of 5 x 3 3/4 Whisper White with Versa Mark and heat emboss with Whisper White Embossing powder
- Use the Stampin’ Up! grid sheet and count off 4 squares which is 1”. Using either Post it Note or Masking Tape off a straight horizontal line one inch below the top. Sponge that area with color 1. Move the tape to cover the area you just sponged and place tape 1” below that and sponge the open space. Continue with this process until you have sponged the entire piece of Whisper White. Changing colors each time you move the tape.
- Wrap the ribbon around the top two layers before attaching to the card base.
- Add the bow and Faceted Gems
DOWNLOAD TECHNIQUE # 4 COLOR BLOCKING
Thank you for supporting me as a small business owner.
Are you about to hit that $99 mark on your order (before shipping and tax)? If so, why not consider joining my team? As a member, you’ll enjoy $125 worth of products of your choice for only $99! Plus, you’ll snag a fantastic 20% discount on all your future purchases and a variety of exclusive perks from me and Stampin' Up! Dive into this exciting journey of paper crafting with us! For more information, check out my Join My Team page
We now have 3 catalogs each year, January - April, May - August, September - December. We no longer have an annual catalog. You will find all of the products in the catalogs online as well as Last Chance and Online Exclusive Products. If you want to check out the May - August Catalog click on that catalog below. If you want a paper copy, please contact me to get yours!
Check out:
Online Exclusives
May - August Catalog - Contact me to get yours!
Subscribe to my My YouTube paper crafting video channel
Follow me on Pinterest
Follow me on Facebook every week for Stampin' Tell Tuesday
Shop my Online Store