Fall Swap

August 11, 2017

Every month I participate in a swap with fellow demonstrators that my upline organizes it. The other day as I spoke to her I was so excited to start working on my swap for this month, anticipating the arrival of my new products from the Holiday Catalog. I had put my order in a couple of days before and expected it would be Tuesday morning at the latest. I was very puzzled when 10:30 came around and my order hadn’t arrived. I went back to my computer and pulled up the order . . . the order I forgot to place. It was still sitting in the spool waiting for me to click the final button. So that changed my plans for my swap card. I went to work with the idea I had and changed the stamps I would be using. I decided that Basket of Wishes and Beautiful Bouquet were about the only fall set I had left unless I wanted to do leaves. This is what I came up with.

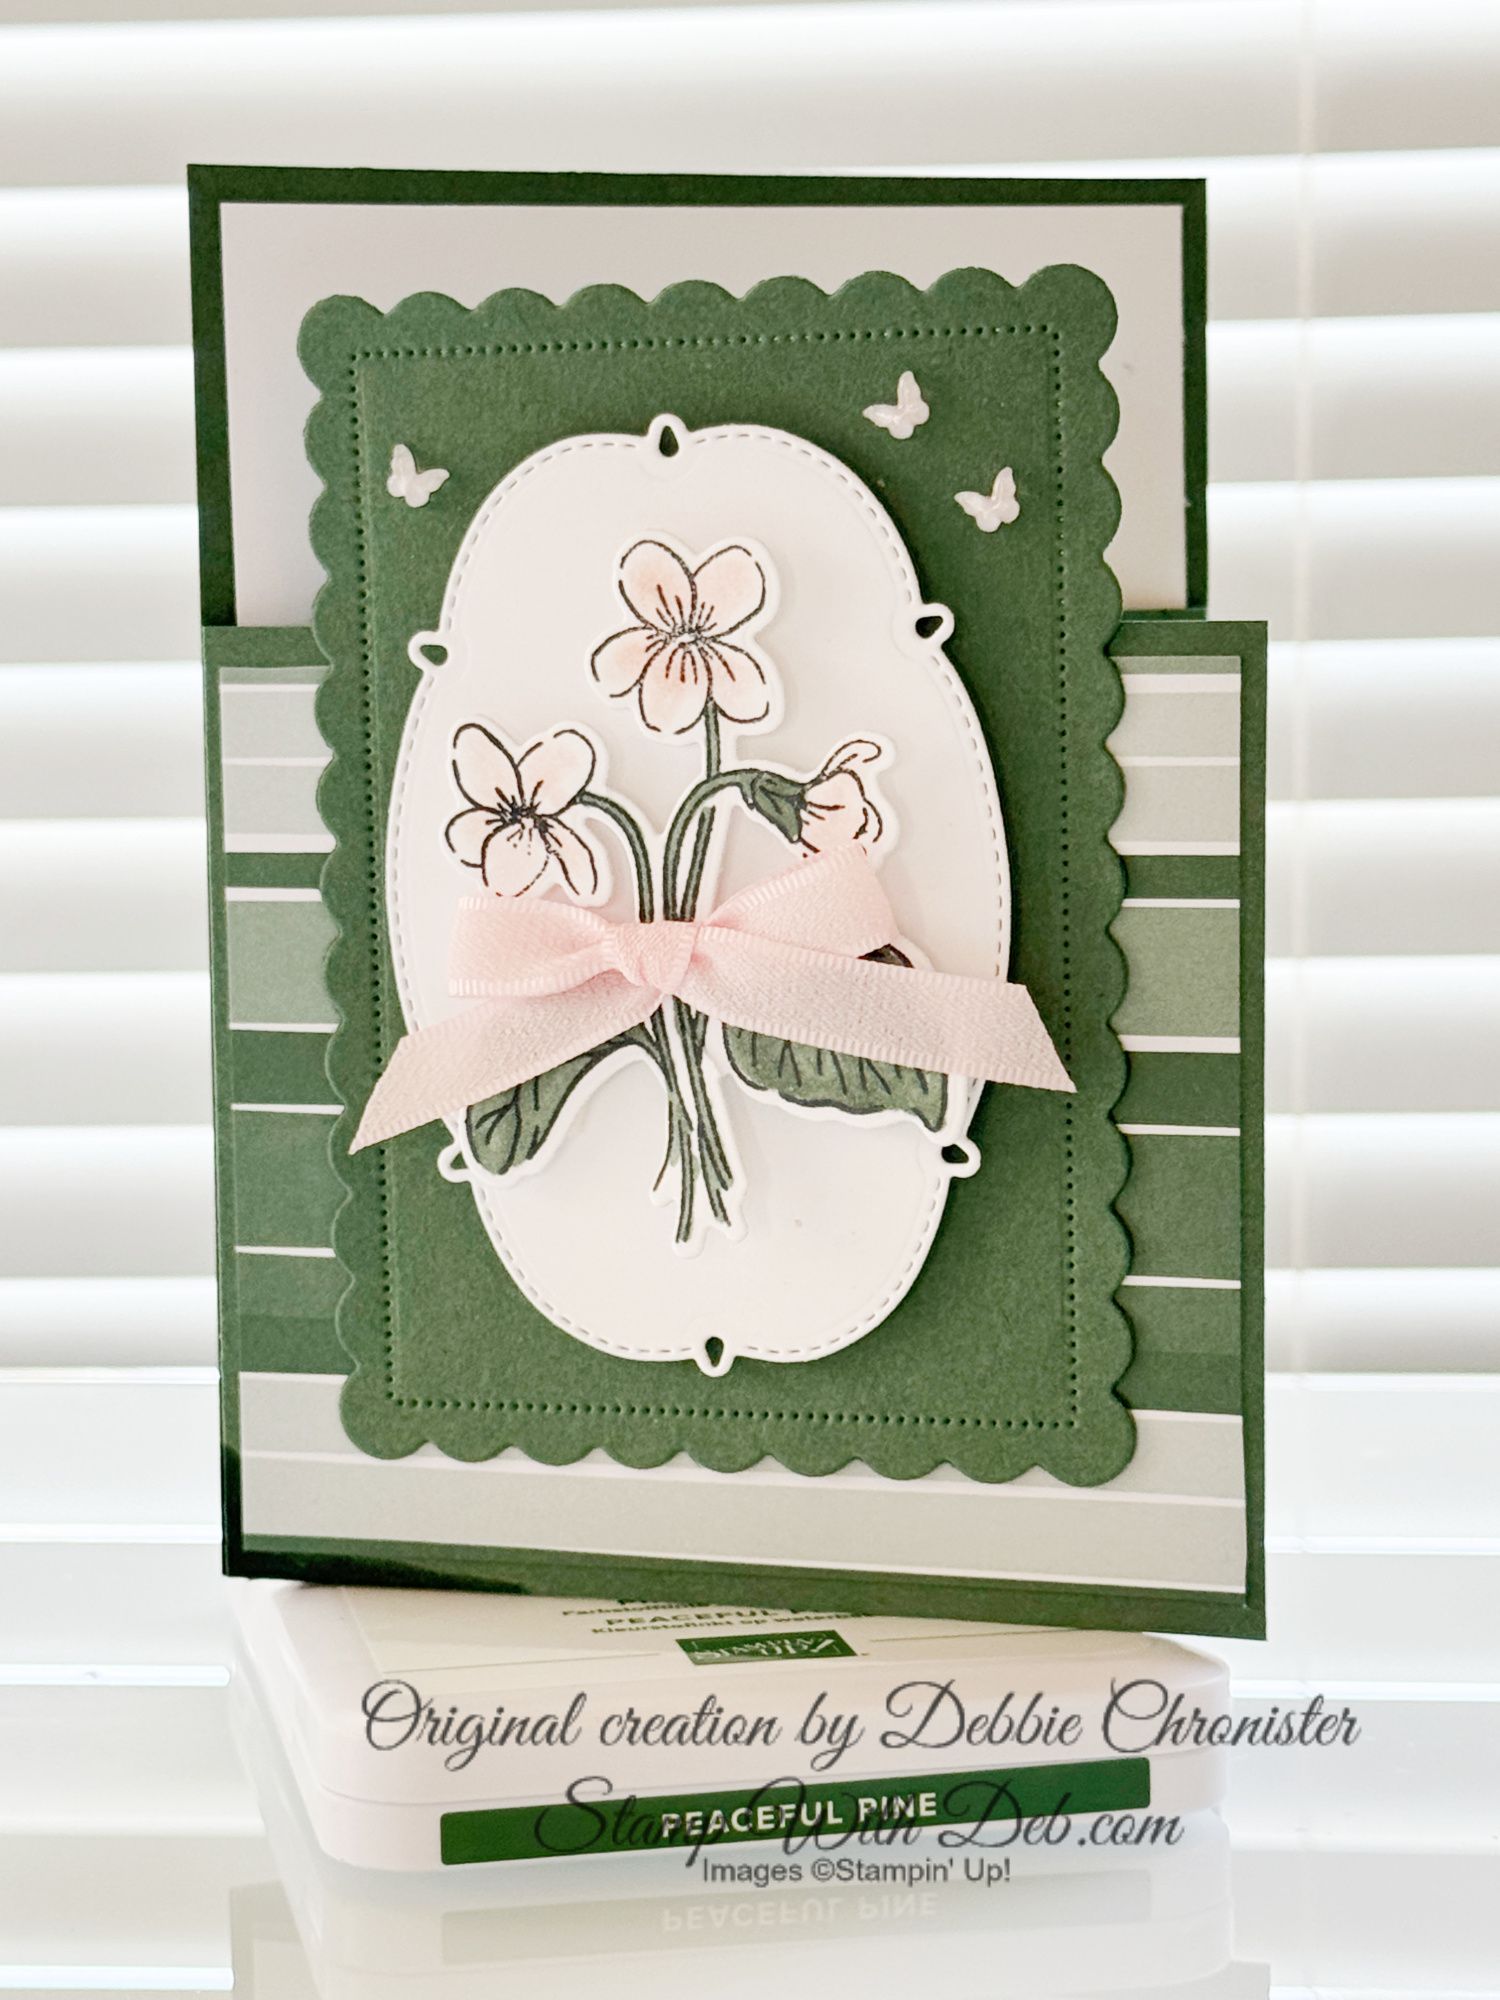
This is the first one I made with the Layering Circle dies and punches.

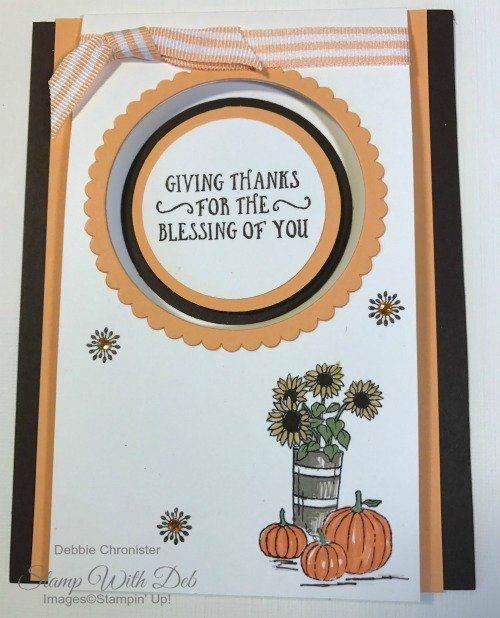
I wasn’t really happy with it so I played around some more and I created another card. My final card was a combination of the two. It is the same as the first except that the ribbon is tied on the side like the oval one. I liked some things about each of the cards but I wasn’t really thrilled with either one of them. They are ok in my book. I am glad they are not supposed to be WOW cards like they are in October. I hope you enjoy these they are easy to make. The second one was made with the Layering Circles dies.

  • Adhere the 5 1/2 x 4 1/4 Peekaboo Peach to the Early Espresso
  • Stamp the image in the lower right corner of the 11 x 3 3/4 Very Vanilla with the Basic Black Archival pad. Score the Very Vanilla at 5 1/2
  • Cut a circle or oval from the Very Vanilla using the Layering Circle Dies (or oval dies). Keep the scrap and stamp it with the greeting in Early Espresso or the image in Basic Black Archival. I used the center scraps to create the circles and ovals needed for the card
  • Cut the scallop circle from the 5 1/2 x 4 Peekaboo Peach (Keep the scrap) for the inside circle or oval
  • I stamped 3 little flower images randomly on the front of the card and placed a rhinestone which I had colored with a sharpie in the center.
  • Attach the Vanilla to the Peekaboo Peach
  • Adhere the circles (ovals) through the front circle (oval) on the Vanilla. When you open the Vanilla it will show the circles (ovals) inside.
  • I colored the image with Peekaboo Peach, Pear Pizzaz, Crumb Cake, So Saffron and Early Espresso.These are easy cards but they take time to color the images.Below is all the product that I used to create these cards. You can shop 24-7 by clicking on the shop link or by clicking on any of the images below. If I can be of any help please contact me.

Are you about to hit that $99 mark on your order (before shipping and tax)? If so, why not consider joining my team? As a member, you’ll enjoy $125 worth of products of your choice for only $99! Plus, you’ll snag a fantastic 20% discount on all your future purchases and a variety of exclusive perks from me and Stampin' Up! Dive into this exciting journey of paper crafting with us! For more information, check out my Join My Team page


Check out the  2024-25 ANNUAL CATALOG

May - April Annual Catalog releases May 6, 2025. Contact me to get yours!

Subscribe to my My YouTube paper crafting video channel
Follow me on 
Pinterest

Follow me on Facebook every week for Stampin' Tell Tuesday
Shop my 
Online Store


916-420-0562

Email Me

By Debbie Chronister May 6, 2026
I created this card using one of the more challenging patterns from the Valley In Bloom Designer Series Paper, and I love how it pushed me to think a little more creatively with my design. The detailed background really makes a statement, so I paired it with a simple, elegant greeting from the Scalloped Blooms stamp set to keep the focus balanced. To add a bit of texture and shine, I included Dew Drops embellishments, which catch the light beautifully. The finishing touch is a Mossy Meadow and gold bow, bringing in a rich, coordinated look that ties everything together perfectly while adding just the right amount of sophistication.
By Debbie Chronister April 22, 2026
This beautiful fun fold card was created using the Waterside Retreat April 2026 Paper Pumpkin kit from Stampin’ Up!, featuring the soft, calming tones of Gray Granite for an elegant and serene look. The unique fold adds an extra touch of interest, allowing the peaceful waterside imagery to shine from every angle while creating a delightful surprise when opened. The layered elements and coordinating designs from the kit make it easy to craft a card that feels both sophisticated and heartfelt, perfect for a variety of occasions. Be sure to check out the Free Project Sheet for step-by-step instructions so you can recreate this lovely design with ease!
By Debbie Chronister April 18, 2026
If you missed out on this acorable, all-occasion cards with the adorable Cute As A Bug Designer Series Paper in a project that’s as relaxing as it is rewarding. This kit makes it easy—everything is pre-cut and ready to go, except for the charming images from the Designer Series Paper that you’ll get to fussy cut yourself. Simply turn on a favorite movie, grab your scissors, and enjoy cutting out the delightful designs that will bring each card to life. Don't like fussy cutting? You will be able to purchase the coordinating dies. Ten of the images can be cut with the coordinating dies. This is an online class. You will receive PDF Instructions and videos to guide you through putting the cards together. The registration for this online class is closed. You can purchase the Tutorial by clicking the button below. This will give you all the measurements and product lists you need to complete these adorable cards.
By Debbie Chronister April 15, 2026
This cheerful greeting card comes to life with the playful patterns of the Cute As A Bug Designer Series Paper paired beautifully with rich Blackberry Bliss cardstock. Adorable bug images are carefully hand-cut from the paper, adding a whimsical, handmade touch that makes each card feel extra special. A sweet greeting tag ties the design together, while charming ladybug embellishments bring dimension and a pop of personality. Finished with a soft accent of Blackberry Bliss striped ribbon, this card is a delightful combination of fun and elegance—perfect for brightening someone’s day for any occasion.
By Debbie Chronister April 8, 2026
I had so much fun creating this playful fun fold card using the Sweet Bugs Bundle from Stampin’ Up! The interactive design adds an extra element of surprise, making it just as exciting to open as it is to display. I paired it with a greeting from the Lovely Arrangements set, which complements the whimsical bug images perfectly. One of my favorite features of this bundle is how the coordinating dies effortlessly cut out the images from the Designer Series Paper, making it easy to create a polished, layered look with minimal fuss. This card is a great example of how simple tools can come together to create something truly special! Be sure to download the Free Project Sheet below for the correct measurements.
By Debbie Chronister April 3, 2026
Join the vibrant 2026-28 In Color Club with me, and get ready to unleash your creativity! Over the next five months, one color each month, you’ll receive an exciting selection of products, including: 10 sheets of cardstock Two 12 x 12 sheets of Designer Series Paper A new Magnetic Stampin' Pad A two pack of Stampin' Blends Two yards of gorgeous ribbon The fabulous New Shimmer Pen (this is not in photo due to availability at the time of this post) Plus, your first order includes delightful In Color Dots! Each kit comes with supplies, instructions, and videos for crafting your first four cards in each color. This is an amazing deal at $54.95 (include shipping & tax) each month and will give you all the NEW In Colors to experience and decide which one is your favorite. This way you can build up your new In Colors at a fraction of the cost. Don't miss out—registration closes on May 1, 2026, with your first kit shipping on May 15! Let’s create something beautiful together!
Show More