Vacationing in Colorado
After a forced vacation, no air conditioning a couple of weeks ago, I am vacationing in Colorado. My daughter and her husband live here and it has been 2 years since I was here. It is such beautiful country and their lifestyle though busy, is relaxing for me. I love being in her beautiful home and just love being with my daughter and incredible son-in-law. She is my web designer and she does a great job at listening to me and knowing just want I want for my blog. If you are looking for a blog or web page she will get you started on your blogging process. Just click this link Get Out There Media and it will take you to her information.
I
have a card for you today so lets move on to that!
Stamps and dies: Birthday Delivery Bundle and Big on Birthdays
Cut a piece of Basic Black 11 x 4 1/4 score @ 4 1/4, 5 1/4, 9 1/2, 10 1/2 rotate and score @ 2 1/4.
Cut out small corner and cut up to the middle on the shortest side on each score line. Cut Whisper White one at 1 7/8 x 4 1/8 and 2 at 1 7/8 x 7/8 and attach it to the box flaps so when you fold the flaps down it will show. Cut the Pic-A-Patterns DSP 4 x 1 3/4 and two at 1 3/4 x 3/4 and attach to the Whisper White.
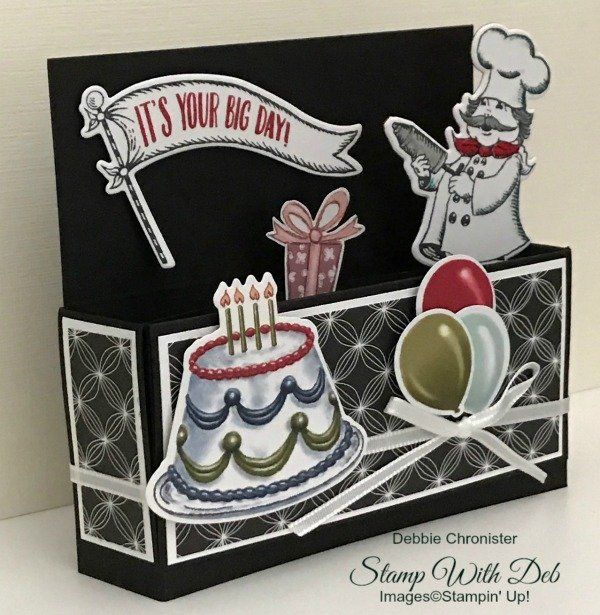
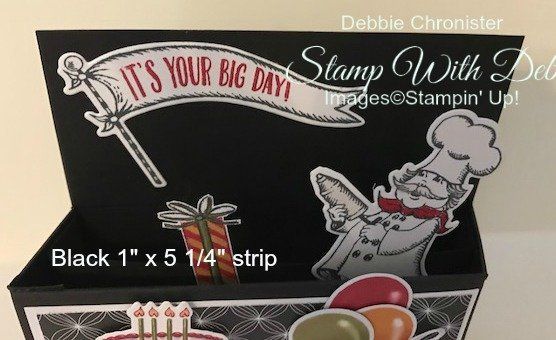
Cut another piece of basic black 1 x 5 3/4 score @ 1/2 and 4 11/16 adhere to the inside of the box. Put glue on the tabs on the end and put in the inside so that it sticks out in the center of the box when it is closed, this is for mounting the baker. Tape the box on the side to close it. Fold down the box flaps and tie the ribbon around.
Color the baker’s scarf with Real Red and hair with Smokey Slate. Attach the cake, present and flag.
Are you about to hit that $99 mark on your order (before shipping and tax)? If so, why not consider joining my team? As a member, you’ll enjoy $125 worth of products of your choice for only $99! Plus, you’ll snag a fantastic 20% discount on all your future purchases and a variety of exclusive perks from me and Stampin' Up! Dive into this exciting journey of paper crafting with us! For more information, check out my Join My Team page
We now have 3 catalogs each year, January - April, May - August, September - December. We no longer have an annual catalog. You will find all of the products in the catalogs online as well as Last Chance and Online Exclusive Products. If you want to check out the May - August Catalog click on that catalog below. If you want a paper copy, please contact me to get yours!
Check out:
Online Exclusives
May - August Catalog - Contact me to get yours!
Subscribe to my My YouTube paper crafting video channel
Follow me on Pinterest
Follow me on Facebook every week for Stampin' Tell Tuesday
Shop my Online Store
